

What each mode reacts to
HPA (Horizontal Pod Autoscaler) watches the CPU and memory usage of your pods through the Kubernetes metrics-server. When average usage goes above a threshold, it adds pods. When usage stays below the threshold, it removes them. KEDA (Kubernetes Event-Driven Autoscaling) watches a source outside your pods: the number of messages in an SQS queue, the length of a Redis list, consumer lag on a Kafka topic, a Prometheus query, a cron schedule. It computes how many instances that backlog needs and scales to that number. Under the hood, KEDA still drives a Kubernetes HPA, but it feeds it external metrics instead of CPU. The difference matters most for background workers. A worker waiting on I/O (an external API, a database, a slow upstream) can sit at 10% CPU while 20,000 messages pile up in its queue. HPA sees an idle pod and does nothing. KEDA sees 20,000 messages and scales out.Side-by-side
Choose HPA when
- The service handles HTTP or gRPC requests and its CPU goes up with traffic: REST APIs, web frontends, server-side rendering.
- You want autoscaling that works on any cluster with no extra setup.
- The service must always keep instances running to answer requests.
Choose KEDA when
- The service consumes a queue or a stream (SQS, RabbitMQ, Kafka, Kinesis, Redis lists) and the backlog tells you whether it keeps up.
- The workload is sporadic and you want it to cost nothing while idle. KEDA is the only mode that accepts 0 minimum instances.
- You already expose a business metric in Prometheus (pending jobs, active sessions) that predicts load better than CPU.
- Load follows a known schedule and you want to scale up before it arrives, with the cron scaler.
Choose no autoscaling when
The service is a development environment, a proof of concept, or a test. For production, run at least 2 instances, or 3 if your app needs several instances to handle normal traffic, so a node maintenance or a pod crash does not take it down.A typical setup
A common architecture uses both modes in the same environment:api(receives requests, pushes jobs to SQS): HPA, 2 to 10 instances, CPU threshold 60%.worker(consumes the SQS queue): KEDA, 0 to 20 instances, scaleraws-sqs-queuewithqueueLength: "5".
Configure HPA
1
Open the application resources
In the Qovery Console, open your application and go to Settings → Resources. Scroll to Instances & Autoscaling.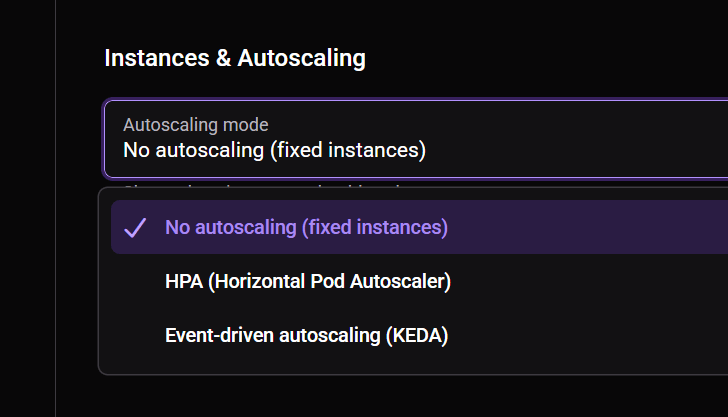
2
Select HPA
In Autoscaling mode, select HPA (Horizontal Pod Autoscaler). Pick CPU only or CPU + Memory.
3
Set instances and thresholds
Set the minimum and maximum number of instances. The CPU threshold defaults to 60%. If you selected CPU + Memory, set the memory threshold too.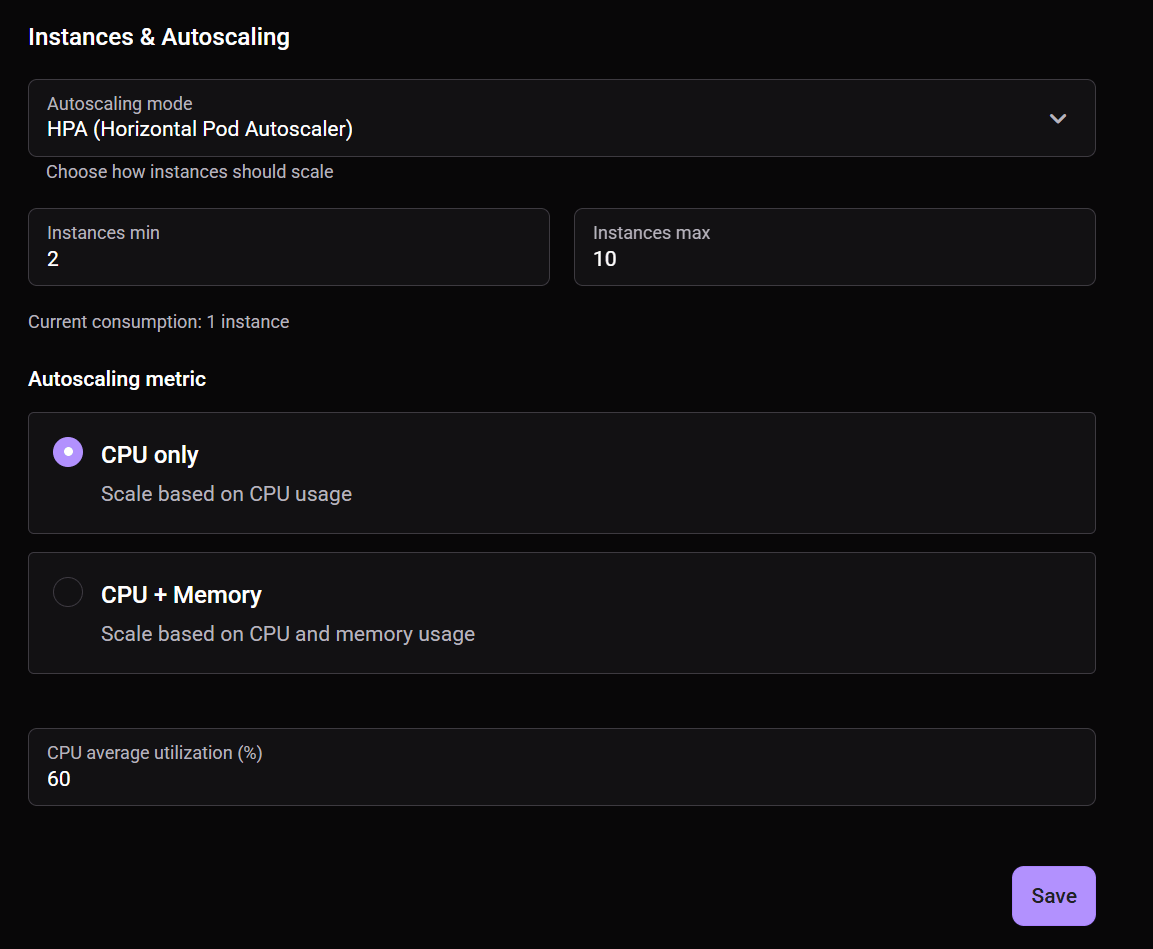
hpa.cpu.average_utilization_percent and hpa.memory.average_utilization_percent.4
Save and redeploy
Save, then redeploy the application to apply the new autoscaling policy.
Configure KEDA
1
Enable KEDA on the cluster
Open your cluster settings, go to the Add-ons tab and enable KEDA. Redeploy the cluster: the add-on is only installed after the cluster deployment.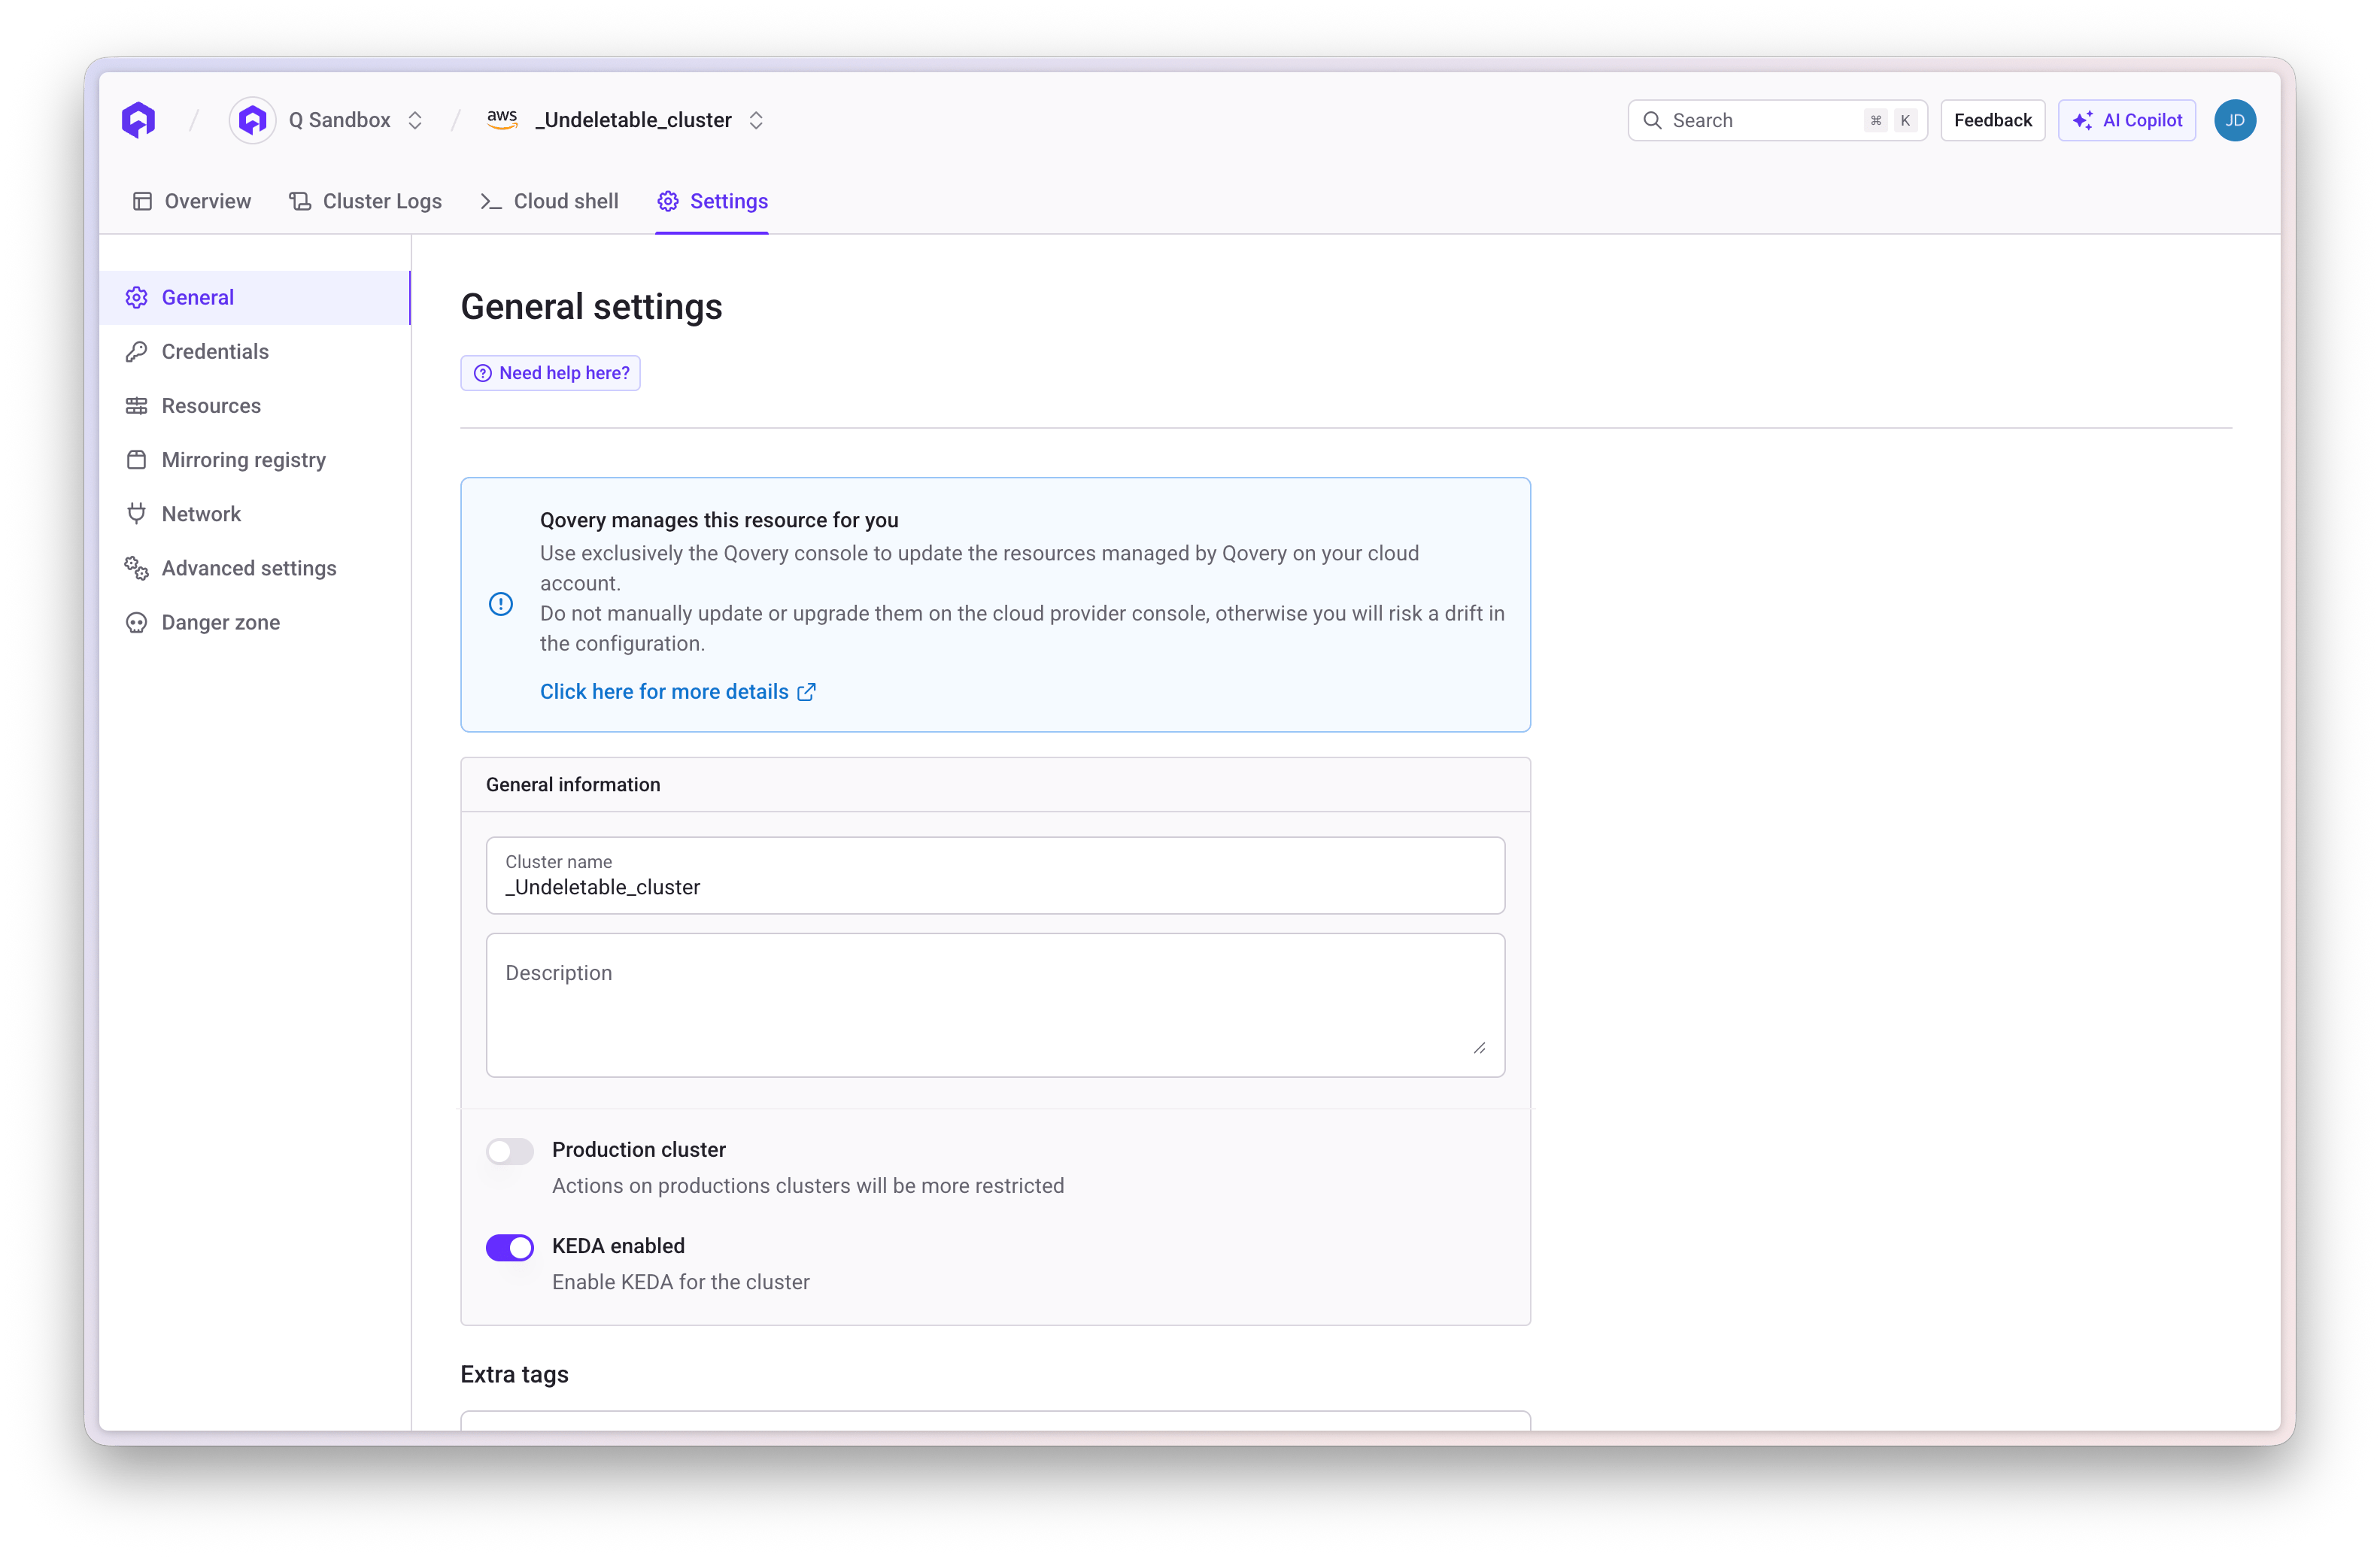
2
Select KEDA on the application
Open your application, go to Settings → Resources → Instances & Autoscaling and select Event-driven autoscaling (KEDA) in Autoscaling mode.If the saved configuration of the application uses HPA, the Console shows a KEDA migration restriction message and disables the KEDA settings. Follow Migrate from HPA to KEDA first.
3
Set instances, polling interval and cooldown
- Minimum instances: 0 to scale to zero, or 1 or more to keep warm instances.
- Maximum instances: the upper limit. Keep it low for your first test.
- Polling interval: how often KEDA reads the event source while the application runs 0 instances. Default 30 seconds.
- Cooldown period: how long KEDA waits after the last event before scaling back to 0. Default 300 seconds.
pollingInterval and cooldownPeriod in the KEDA reference.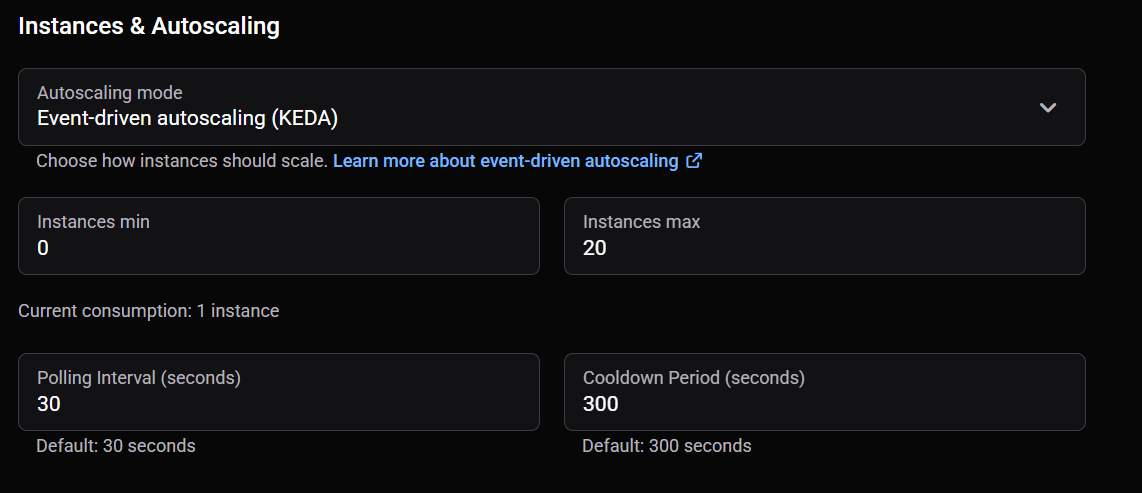
4
Add a scaler
Click Add scaler, enter the scaler type and paste its configuration YAML. Parameters go under 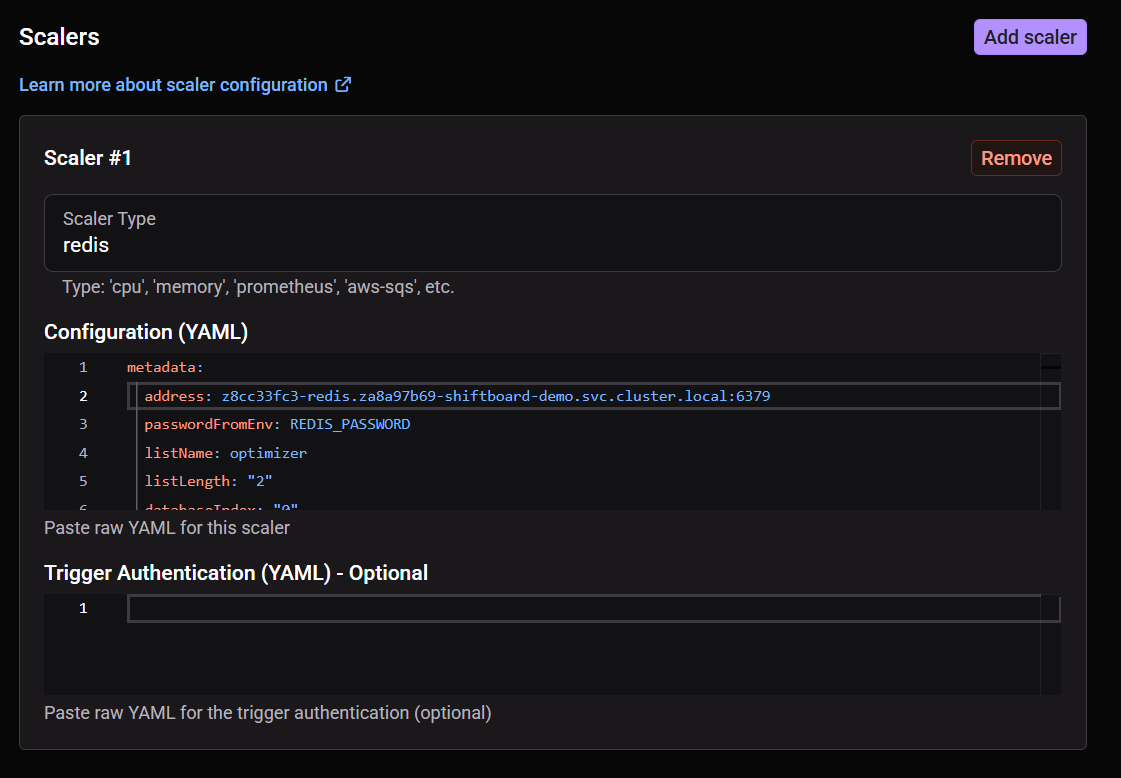
metadata. Example for a Redis list, with one instance per 2 waiting items:passwordFromEnv reads the REDIS_PASSWORD environment variable from your application container. Use the full in-cluster address, as explained in Pitfalls.Each scaler type has its own parameters. See the KEDA scalers reference.5
Add authentication if the source needs it
Paste the credentials setup in Trigger Authentication (YAML) - Optional. Two options:
-
podIdentity, for cloud IAM. On AWS,identityOwner: workloadmakes KEDA reuse your application’s IAM role: -
secretTargetRef, to read a Qovery environment variable or secret withqovery.env.VARIABLE_NAME:
6
Save and redeploy
Save, then redeploy the application.
Multiple scalers
You can add several scalers to one application. KEDA computes a target number of instances for each scaler and applies the highest one. For example, with a queue of 15 messages at 1 message per instance and another of 50 messages at 10 messages per instance, KEDA runs 15 instances.Migrate from HPA to KEDA
HPA and KEDA’sScaledObject both control the replica count of the same Deployment. If both exist at the same time, they fight over it. Qovery blocks the direct switch, so go through No autoscaling:
1
Switch to fixed instances
Set Autoscaling mode to No autoscaling (fixed instances) and save.
2
Redeploy
The deployment removes the HPA from the cluster.
3
Switch to KEDA
Set Autoscaling mode to Event-driven autoscaling (KEDA) and configure your scalers.
4
Redeploy again
The deployment creates the KEDA
ScaledObject.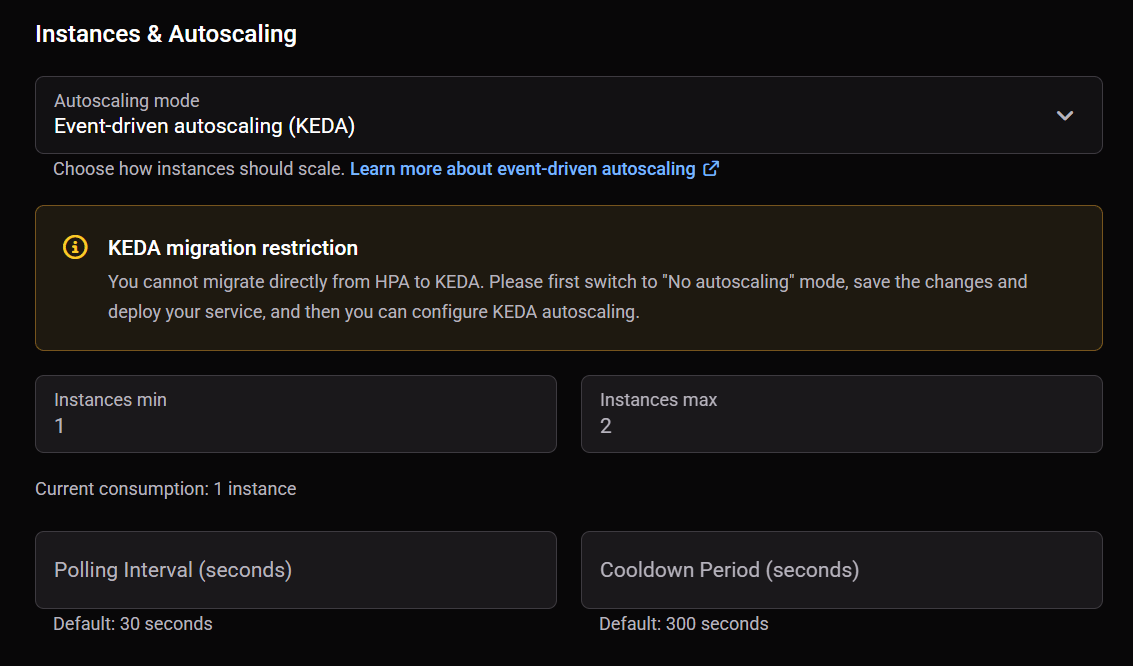
Pitfalls
- Scale-to-zero on a service that receives requests. With 0 minimum instances, nothing answers until KEDA polls the source and starts a pod. Use 0 for queue consumers and batch workers, not for APIs.
- Short hostnames in scaler YAML. The KEDA operator runs in the
kube-systemnamespace, not in your application’s namespace. A short service name likeredis-queue:6379does not resolve from there. Use the full in-cluster name:<service>.<namespace>.svc.cluster.local:6379. When the address does not resolve, KEDA does not scale and the application shows no error. - Scaler parameters outside
metadata. Put scaler parameters under themetadata:key. With parameters at the root of the YAML, the Console shows the scaler configuration as empty. - Memory-only HPA. Not supported. If memory is your only signal, use CPU + Memory, or a KEDA scaler on a metric that tracks the real load.
Check that scaling works
- Start with a low maximum (3 or 5 instances) and a low target, such as
listLength: "1"for Redis orqueueLength: "1"for SQS. - Push a batch of messages to the queue, or generate traffic for HPA.
- Watch the instance count on the application overview in the Console.
- If nothing moves, read the application logs and the KEDA operator logs (
keda-operatorinkube-system). Authentication and address errors show up there.
listLength: "2", 0 to 20 instances). About 120 jobs land in the queue at once, and KEDA adds workers until it reaches the 20-instance maximum, while the queue drains.
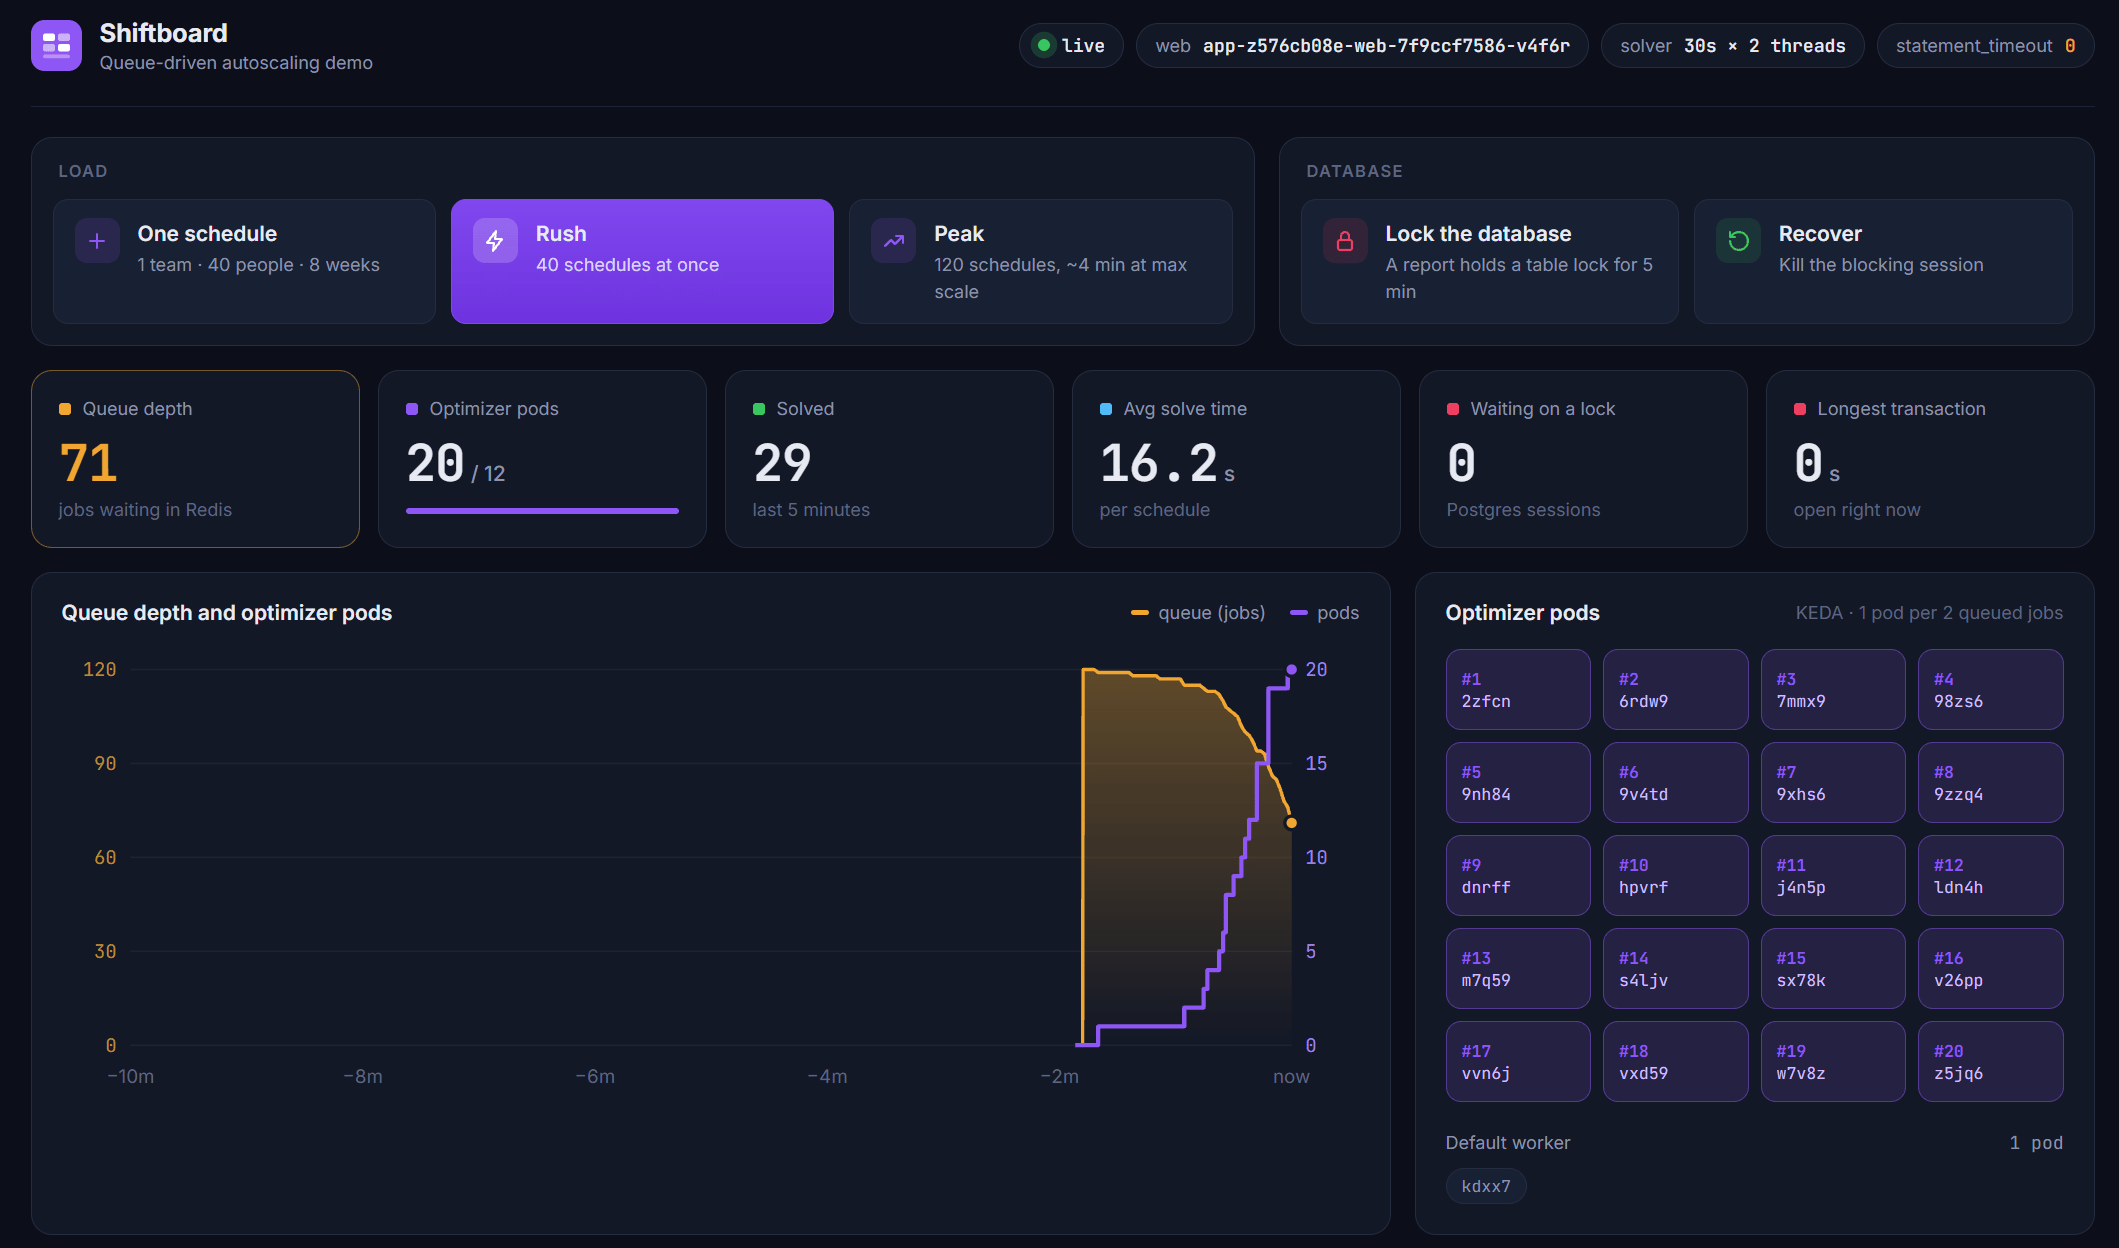
Demo application dashboard: Redis queue depth and worker pods during a load test