

Overview
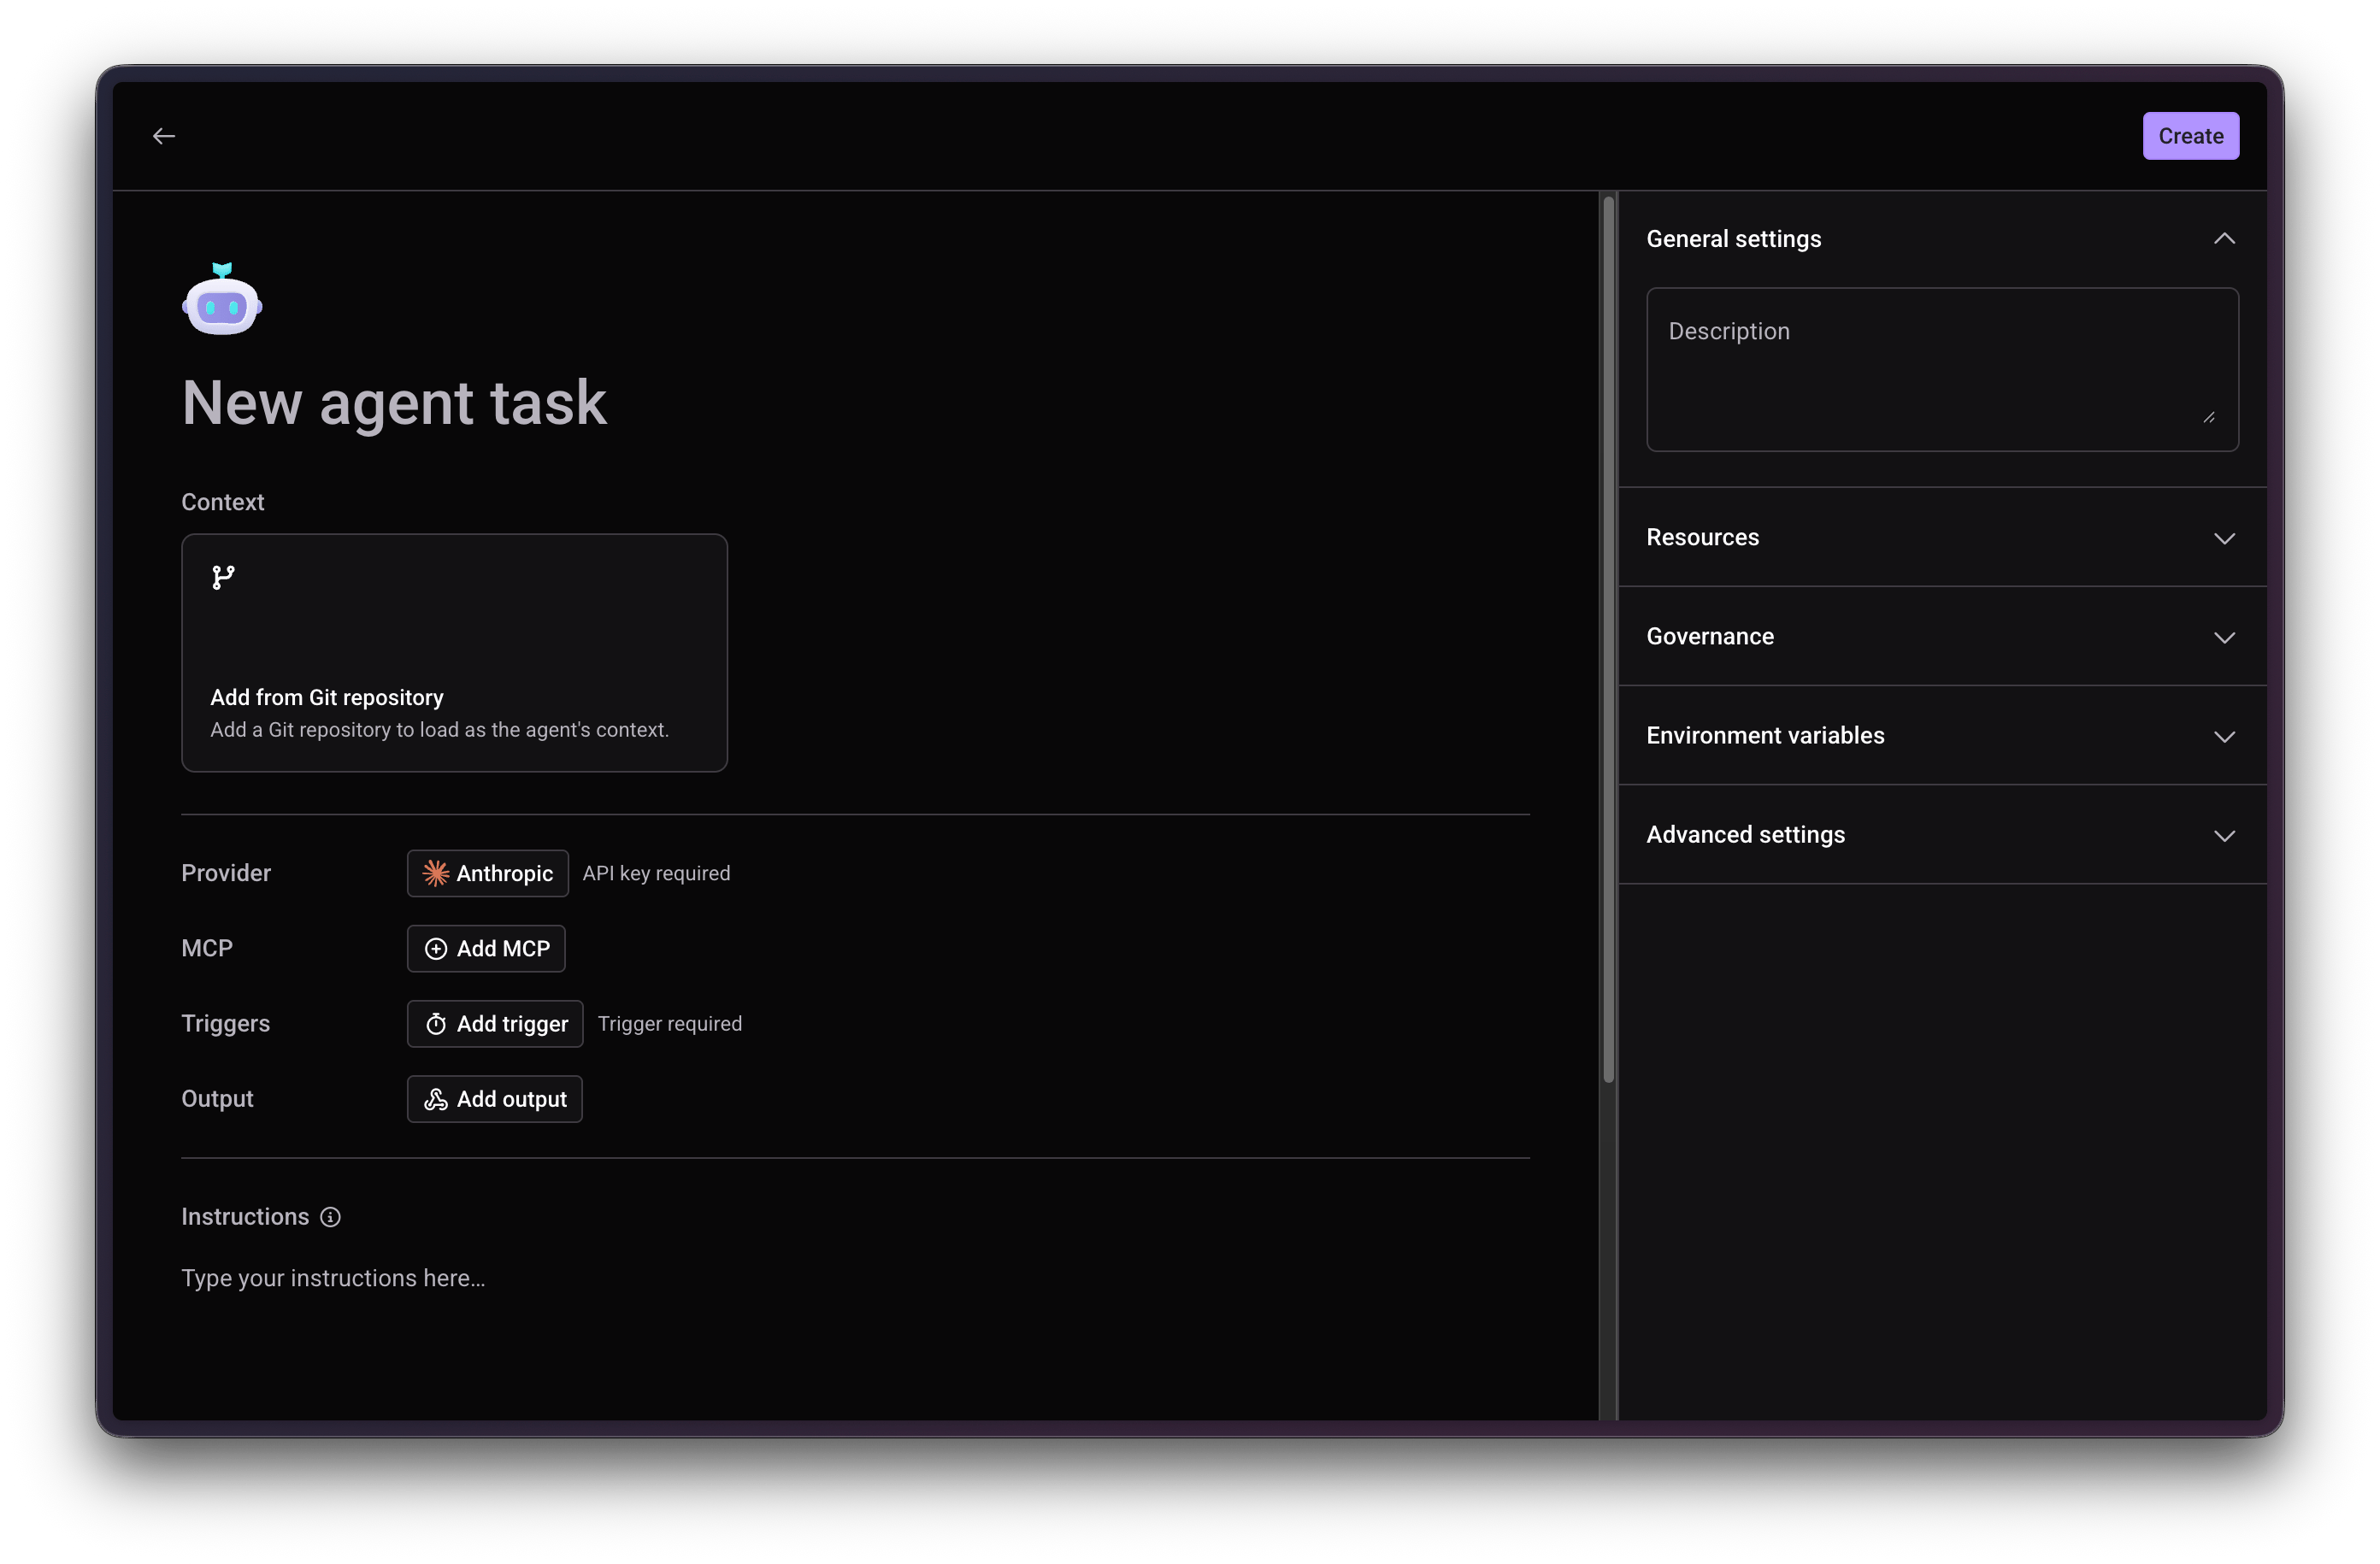
Agent Tasks are one-time or scheduled jobs delegated to AI agents, running on your Qovery-managed infrastructure like any other service. Each agent runs with its own resources, environment variables, and a domain allowlist controlling exactly what it can reach.Creating an Agent
1
Create New Service
In your environment, click New Service > Create new service. Under Agent use cases, pick a ready-made template (see Tutorials below) or Start from scratch.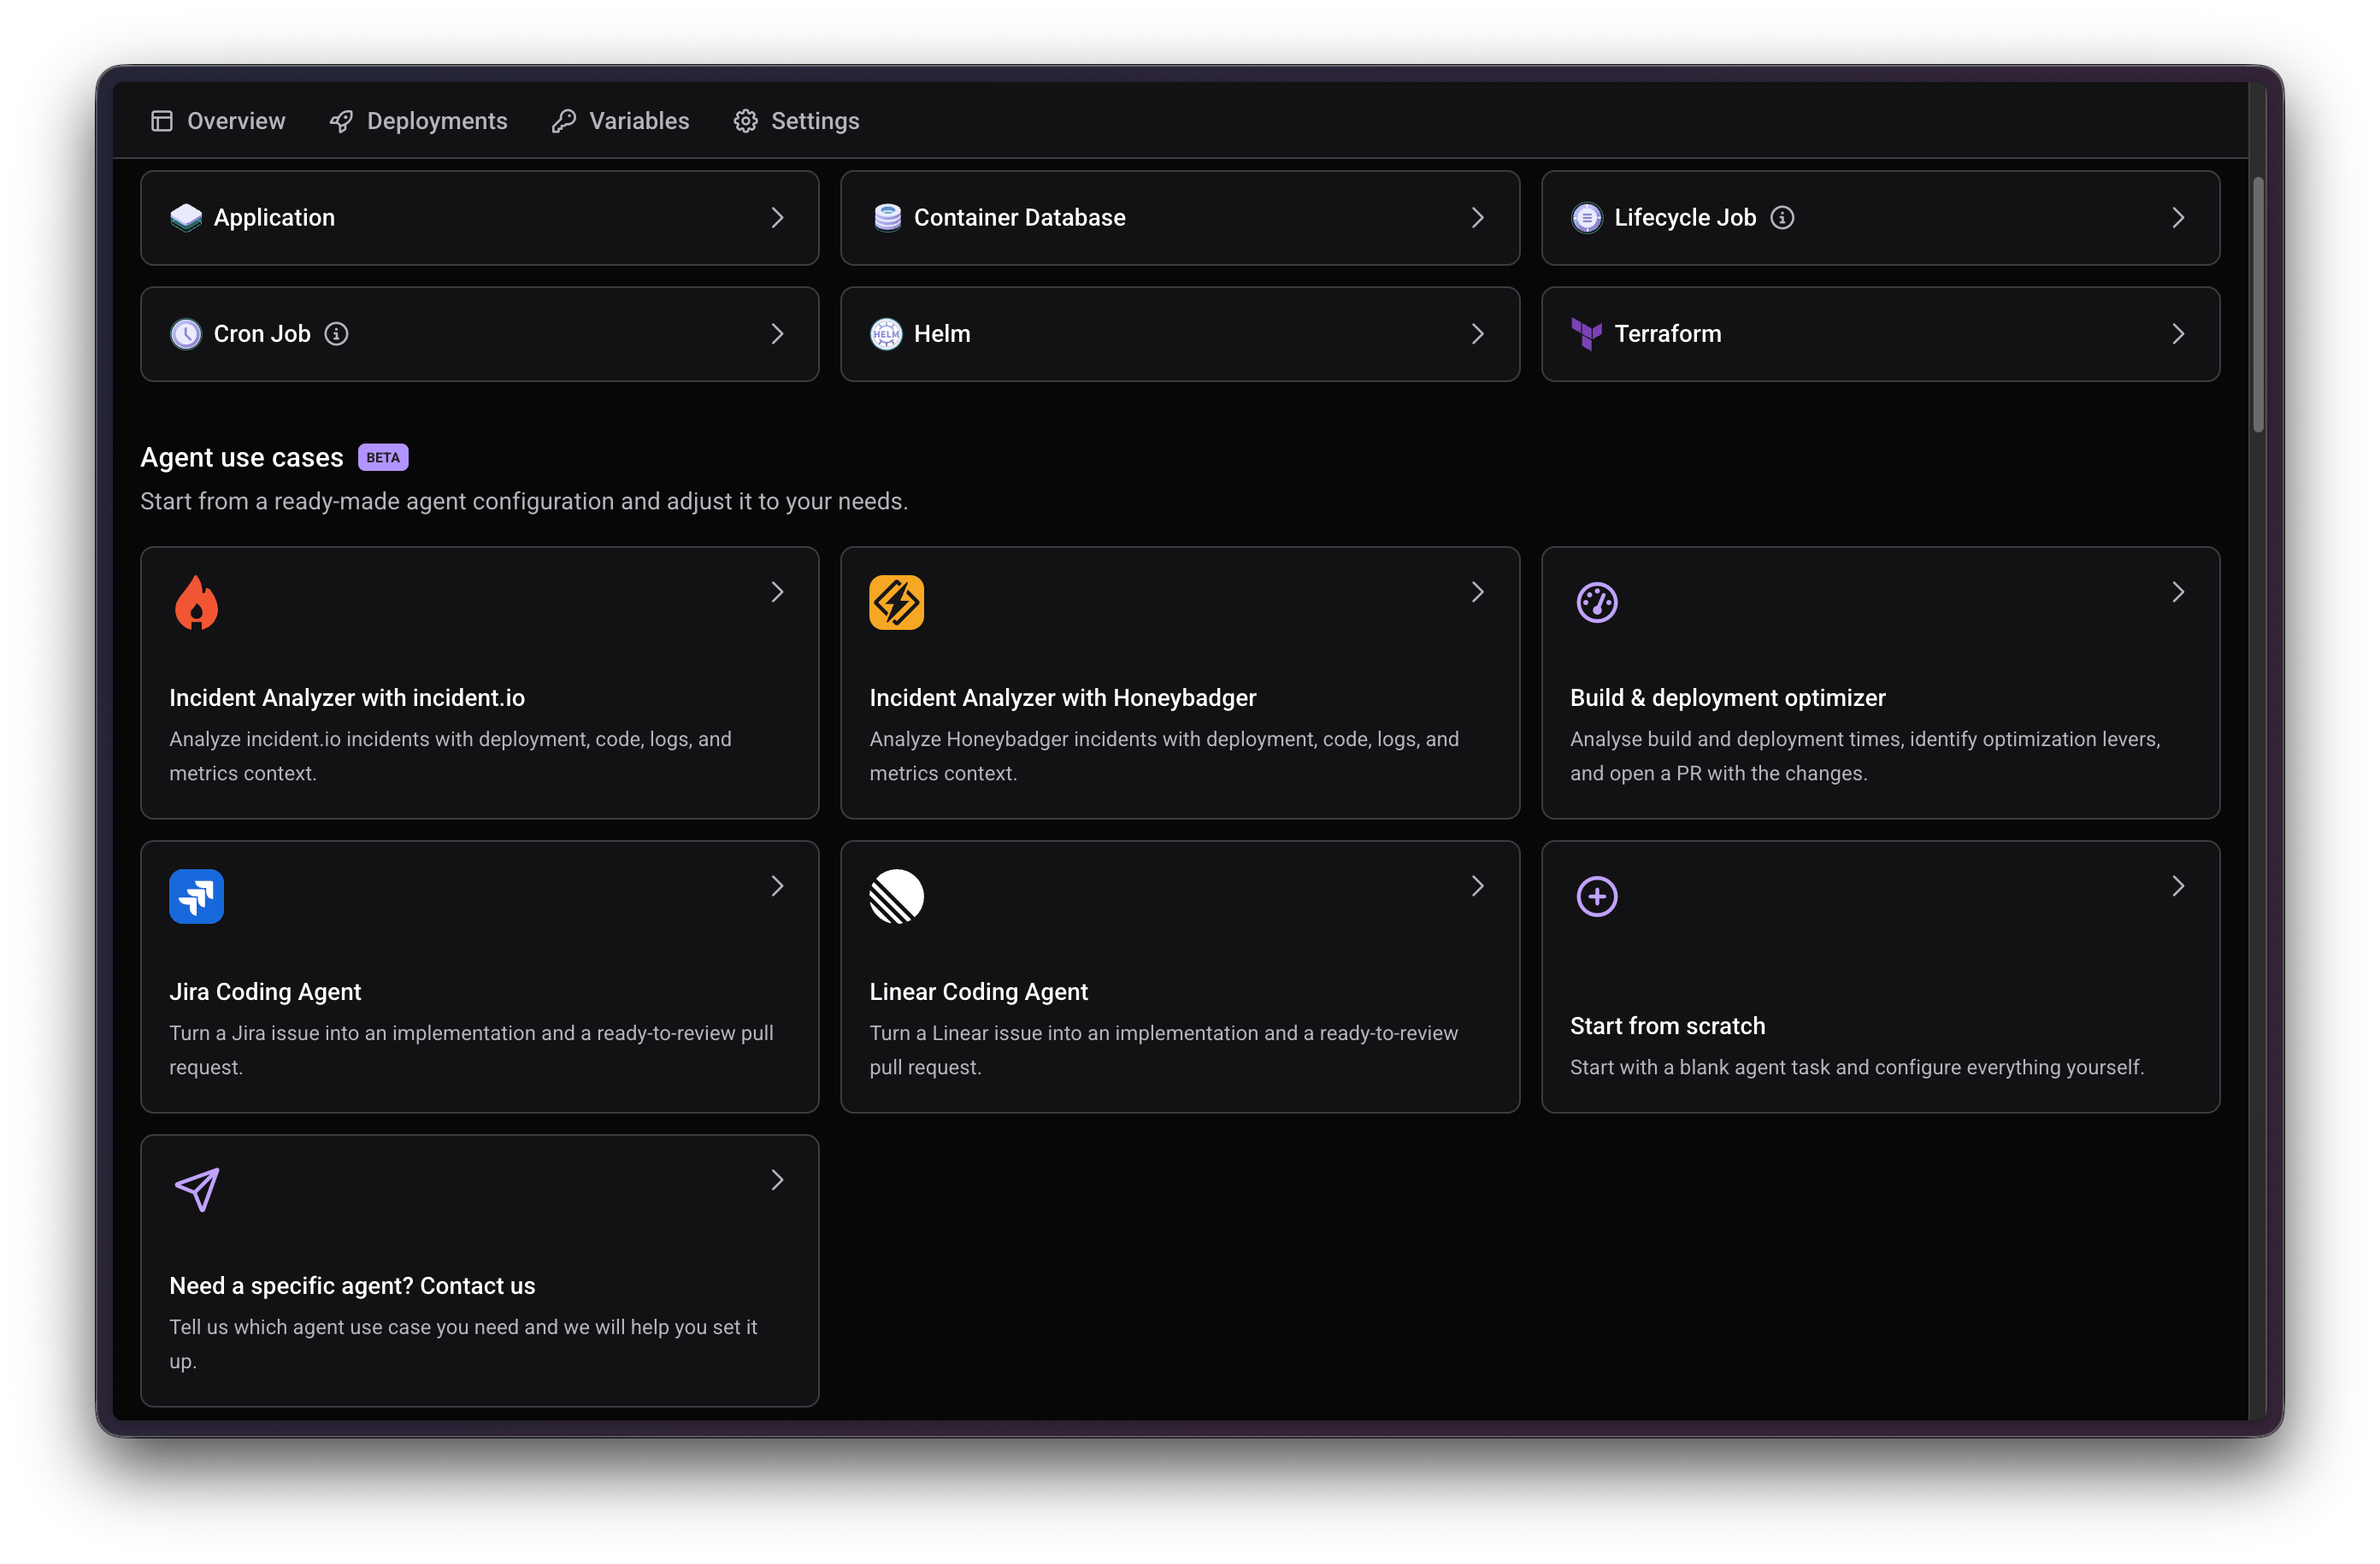
2
Add Context (Optional)
Connect a Git repository, a Qovery service, or both, for the agent to load as context.
3
Choose a Provider
Enter your Anthropic API key, the only provider supported today.
4
Add MCP Servers (Optional)
If you added a Qovery service as Context in the previous step, Qovery’s own MCP server is created and selected automatically: organization-scoped, read-only, backed by a Viewer API token. No URL, header, or token to configure. This is also preconfigured for the Incident Analyzer (incident.io and Honeybadger) and Build & deployment optimizer templates.For anything else, connect any remote HTTPS MCP server with its own name, URL, and headers. MCP servers added here are available to every agent task in the organization and can also be managed from Organization Settings > AI settings > Agents.To add Qovery’s own MCP server manually, for example with write access instead of the automatic read-only setup, use an API Policy Token (a regular API token works too):
- Server URL:
https://mcp.qovery.com/mcp - HTTP header name:
Authorization - HTTP header secret value:
Token <your API token or Policy API token>(Tokenwith a capitalT, then a space, then the token value)
5
Write Instructions
Describe the agent’s role and the steps it should follow in plain text. Reference credentials by the environment variable names you configure below, for example
INCIDENT_IO_API_KEY.6
Choose an Execution Mode
Run the agent in place, or in a clone of the environment. See Execution Mode below.
7
Add a Trigger
Required to run the agent automatically. See Triggers below.
8
Add an Output (Optional)
Send the agent’s result somewhere when it’s done. See Outputs below.
Execution Mode
Choose where the agent runs when it’s triggered:- In Place: runs directly in the current environment.
- Clone Environment: duplicates the entire environment first, then runs the agent in that isolated clone.
Limits
- Execution timeout: each run is capped at 1 hour.
- Cloned environment TTL: environments created by Clone Environment mode are deleted 3 days after creation.
- Iterations per run: up to 50 agent iterations per run by default. Override this with the
MAX_TURNSenvironment variable. - Clone rate limit: up to 60 clones per hour, per organization, to prevent runaway environment creation.
Triggers and Outputs
Add a trigger to run the agent automatically, and optionally an output to send its result somewhere when it’s done. You can also trigger any agent task on demand: click the Trigger (play) button on its overview page, or from the environment’s services list.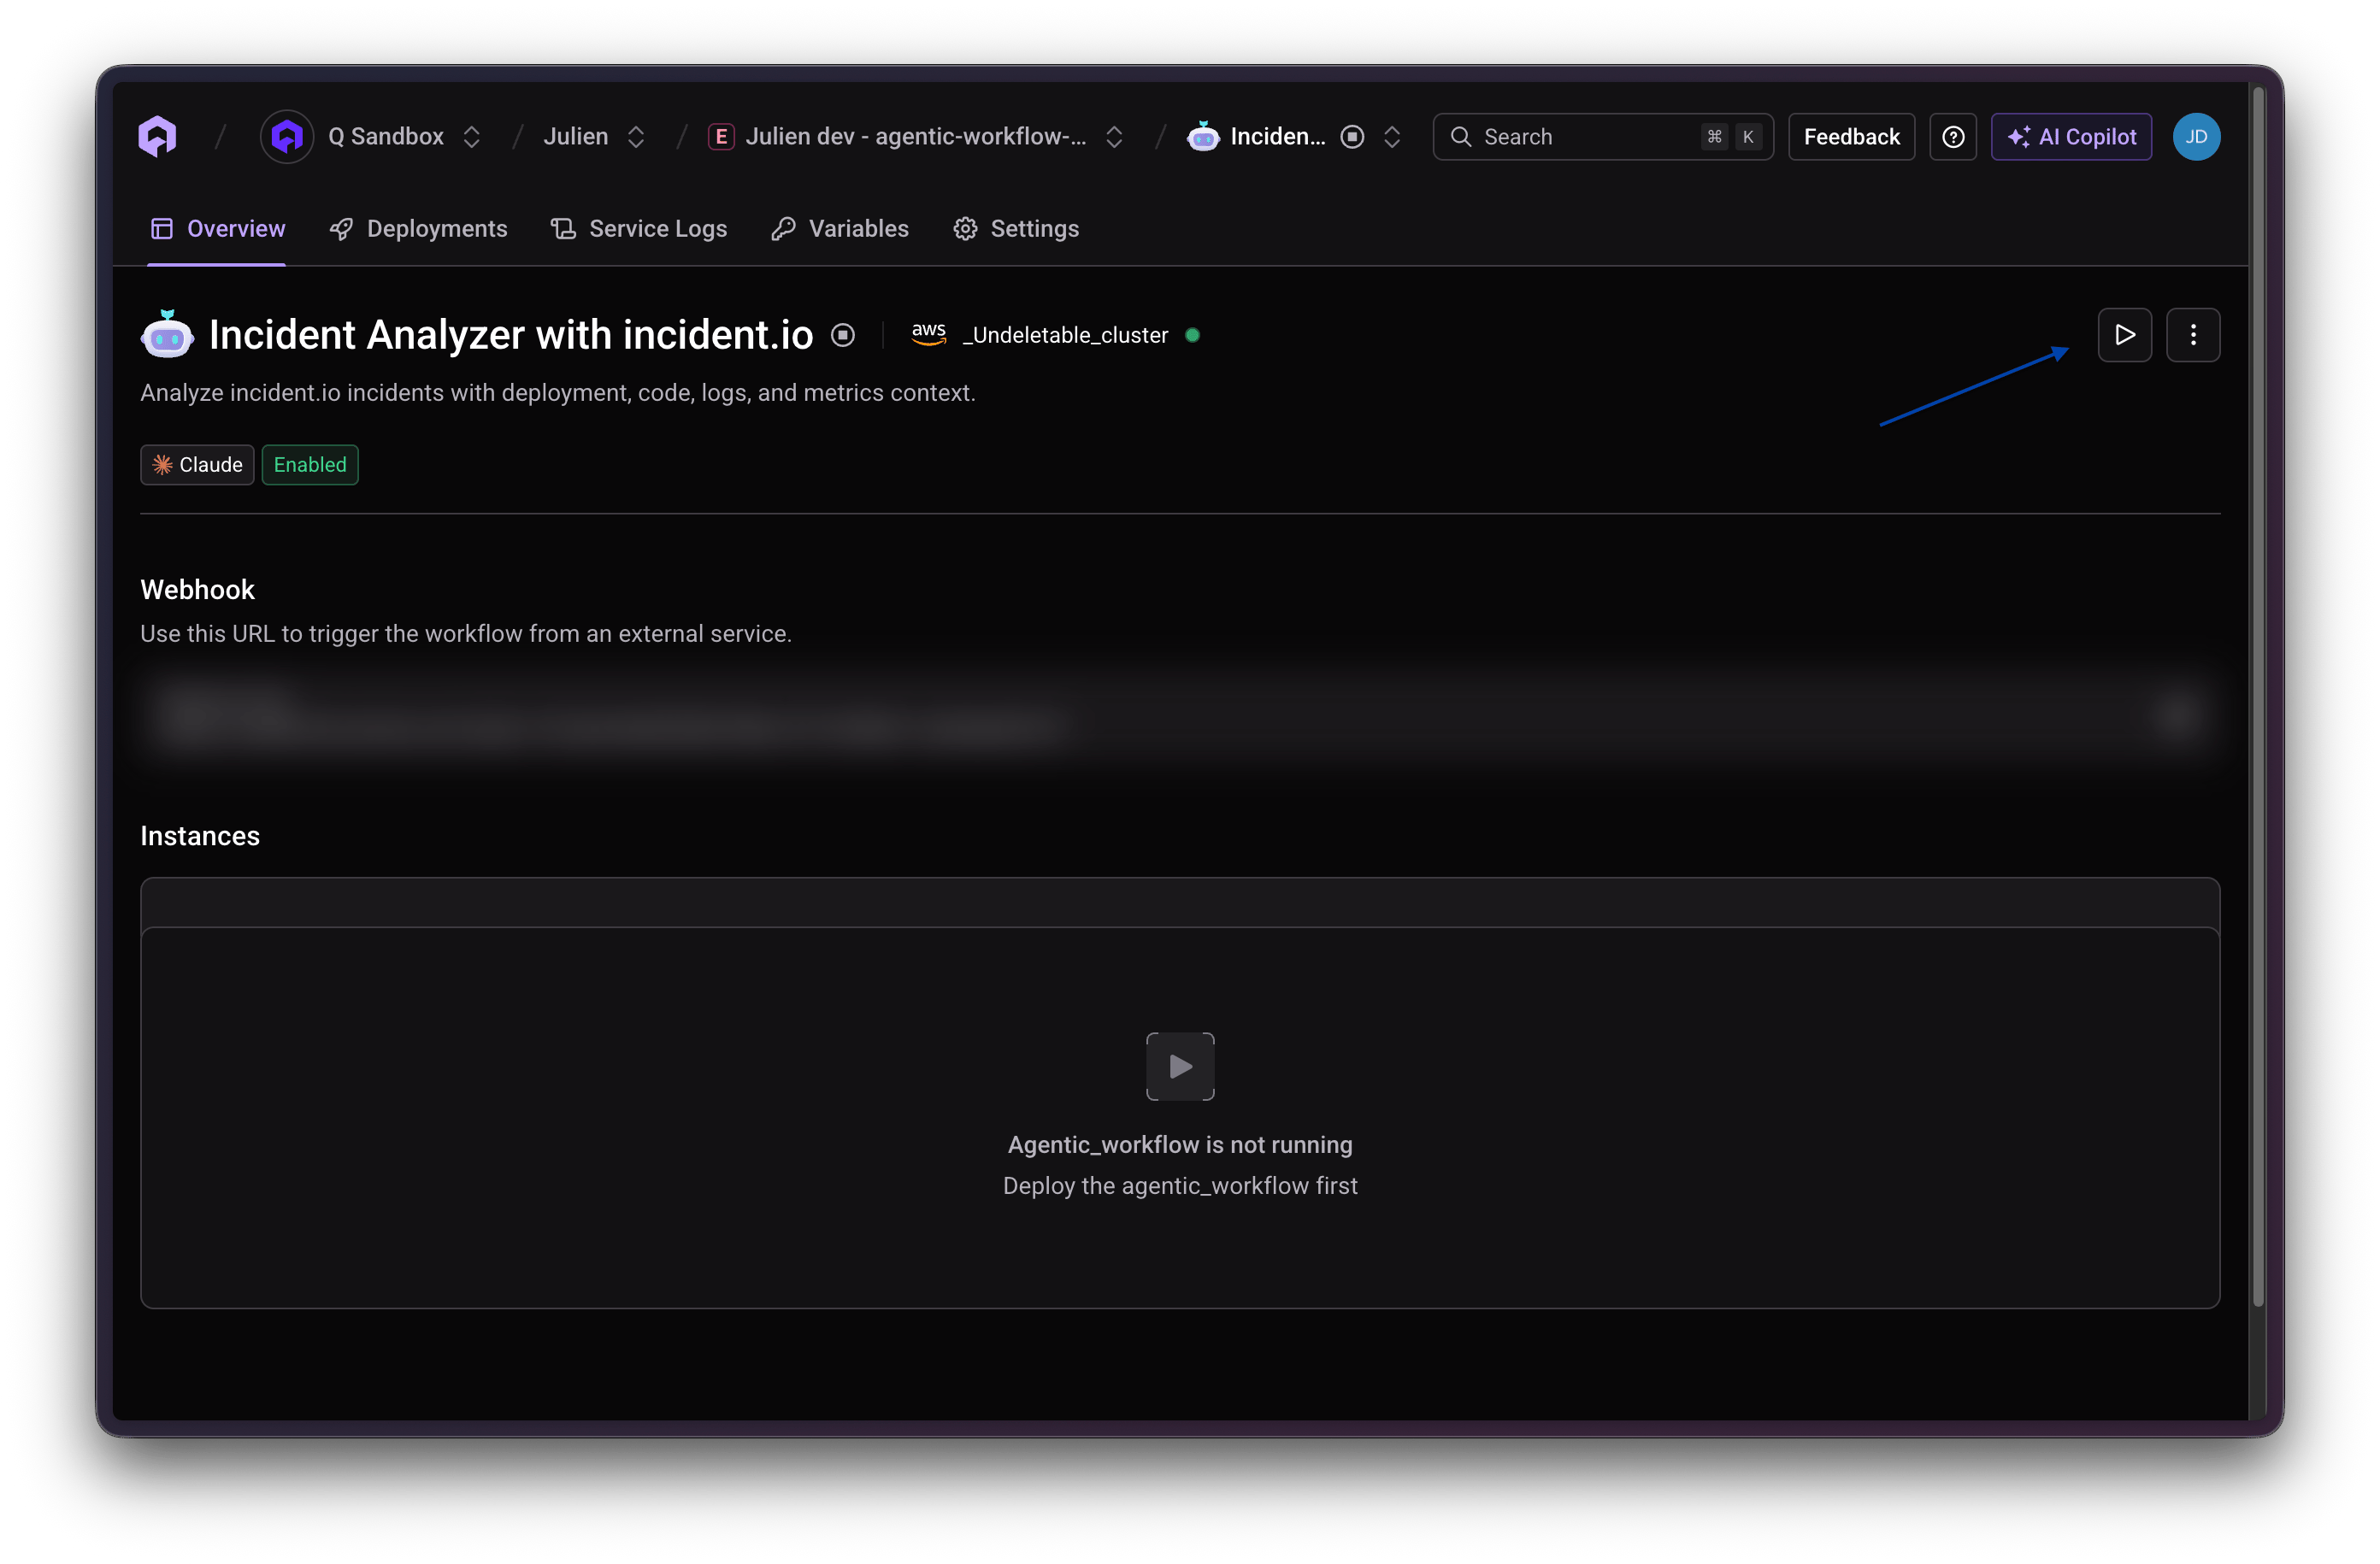
Triggers
- On a schedule: a cron expression and timezone, for example
0 8 * * 1-5for 8:00 AM, Monday through Friday. - From a webhook: Qovery generates a unique URL for the agent task, visible later in the environment’s Agent Tasks list (for example
https://webhook.qovery.com/api/v1/hook/...). Anything that can send a POST request to that URL starts the agent.
Outputs
Send the automation’s result to a webhook: a destination URL, custom headers, and a prompt describing how to shape the result before sending it. For example, to post the result to a Slack channel:1
Create a Slack Incoming Webhook
In Slack, add the Incoming Webhooks app to the channel and copy the generated URL (
https://hooks.slack.com/services/...).2
Add the output in Qovery
In Add output, paste that URL into Webhook URL. No custom headers are needed, Slack’s incoming webhooks accept a plain JSON POST.
3
Write the prompt
In Prompt, describe the message you want, for example: “Summarize the result as a short Slack message with the root cause and the recommended next step.”
Some agents use a different, more direct pattern instead: storing a chat webhook URL as a secret (for example
SLACK_WEBHOOK_URL), adding its hostname to the domain allowlist, and instructing the agent to post to it directly as one of its own steps. Use this pattern when the agent itself, not just the automation’s final output, should decide when and what to post.Configuration
General Settings
General Settings
A description of what the agent does.
Resources
Resources
CPU (mCPU), memory (MB), and storage (GB) allocated to the agent, same as any other Qovery service.
Governance
Governance
A domain allowlist controls which external hosts the agent task can reach: comma-separated hostnames, or
* for all domains.Environment Variables
Environment Variables
Plain variables or encrypted secrets the agent’s instructions can reference by name. Secret values can’t be viewed again once set.
Advanced Settings
Advanced Settings
A Dockerfile fragment lets you install additional CLIs or binaries in the agent’s runtime before it starts.
After You Create It
Agent Tasks appear in your environment overview under Agent Tasks, jobs delegated to AI agents, run once or on a schedule. Each one lists its status, last operation, underlying model, and a dedicated webhook URL you can call to trigger it from outside Qovery. That same webhook URL is also shown on the agent task’s own overview page.Tutorials

Incident Analyzer with incident.io
Ready-made agent that correlates a firing incident.io incident with recent changes, logs, and metrics

Incident Analyzer with Honeybadger
Ready-made agent that correlates a firing Honeybadger incident with recent changes, logs, and metrics
Build & deployment optimizer
Ready-made agent that proposes faster, cheaper build and deployment configurations

Jira Coding Agent
Ready-made agent that picks up a Jira issue and proposes the corresponding code change

Linear Coding Agent
Ready-made agent that picks up a Linear issue and proposes the corresponding code change
Agent Tasks Overview
Use cases and ready-made agent templates