

Overview
Correlate a firing incident.io incident with recent changes, logs and metrics, then report and open a PR. When an incident fires, the agent investigates it and hands a clear summary back to the human on-call, it never merges a fix on its own.How It Works
When an incident fires, the agent:- Reads the incident details (id, title, severity, affected services) from the trigger, fetching any missing details from incident.io.
- Correlates the incident with recent change context: the latest deployments, config changes, and merged PRs for the affected services around the incident start time.
- Pulls the relevant signals: application logs, metrics, and any runbooks for the affected services.
- Determines the most likely root cause and the blast radius, and is explicit about its confidence and what it could not verify.
- Reports its findings to the on-call human in chat: a short summary, the suspected root cause, and a recommended next step.
- If the fix is small and well-understood, opens a PR with the proposed change and links it in the message. It never merges, the human always stays the gate.
Setting It Up
1
Create the agent task
From the Agent use cases section when creating a new service, pick Incident Analyzer with incident.io (see Creating an Agent), or start from scratch and paste in the instructions above.
2
Connect the repository
Add the Git repository of the service(s) this agent should investigate as its Context, so it can read recent commits and merged PRs around the incident. You can also add the Qovery service(s) themselves as Context, in addition to or instead of their repository.
3
Qovery MCP server (automatic)
Since you added the service(s) as Context, Qovery’s own MCP server is created and selected automatically: organization-scoped, read-only, backed by a Viewer API token. That’s enough for the agent to get deployment history, logs, and metrics for the affected services, this agent only reads and reports, it never applies a fix directly.
4
Choose a Provider
Enter your Anthropic API key, the only provider supported today.
5
Add credentials and domain allowlist
Add your incident.io API key as a secret, referenced by name in the instructions above (
INCIDENT_IO_API_KEY). In incident.io, go to Settings > API keys to create one. Add its hostname to the domain allowlist, for example api.incident.io.6
Add a trigger
Select From a webhook, the default for this template, and copy the generated webhook URL from the agent task’s overview page, you’ll need it next.
7
Point incident.io at the webhook
In incident.io, go to Settings > Workflows and create one. Set the trigger to An incident is created or changed, optionally scoped further (for example 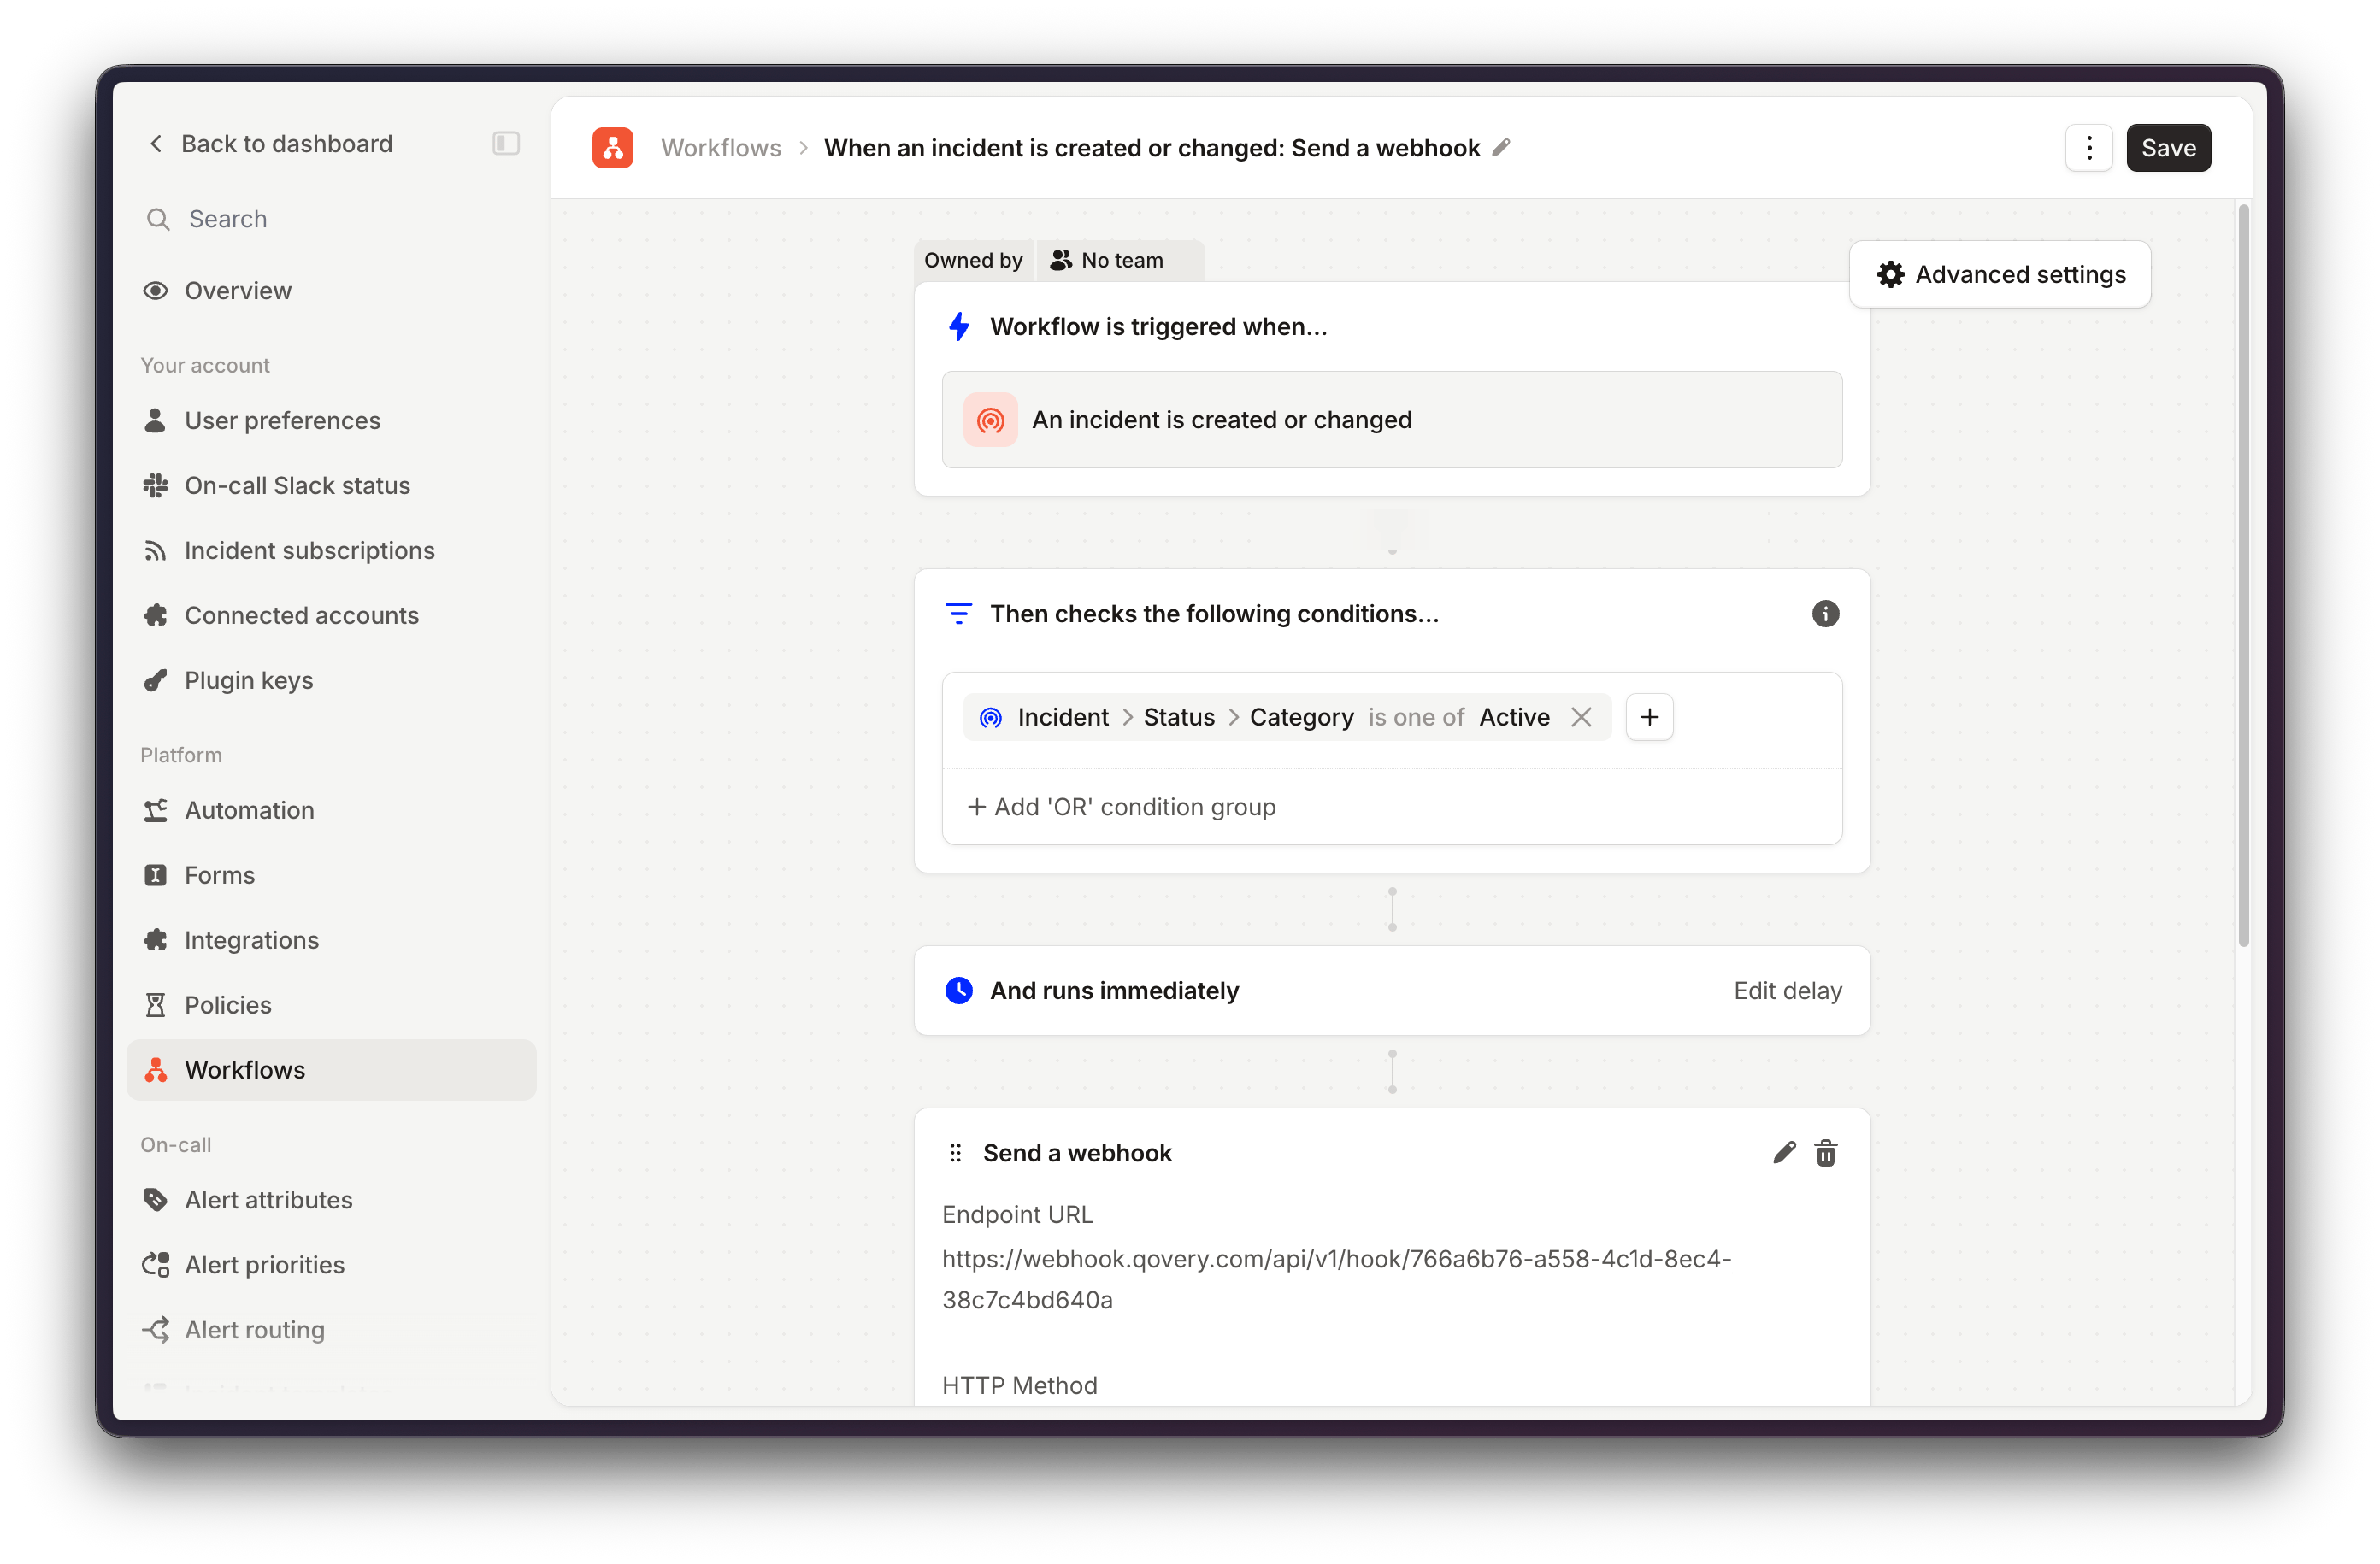
Incident > Status > Category is one of Active), then add a Send a webhook step with the URL from the previous step as the Endpoint URL. Pass the incident data in the request body, that’s what gives the agent context on the incident (id, title, severity, affected services) it reads in step 1 of How It Works.8
Add an output (optional)
Same as any other agent task, see Outputs.
9
Use Clone Environment as the execution mode
Incidents can fire frequently, so use Clone Environment rather than In Place: an overlapping trigger would otherwise replace the currently running investigation. See Execution Mode.
10
Trigger a first run and check the results
Test the agent by clicking Trigger on its overview page, or by sending a POST request with a sample incident payload to its webhook URL. Check the run under the agent task’s Deployments tab. If you added a Slack output in the optional step above, confirm the summary reached the channel tied to that webhook URL.