

Hi there, and welcome to the Changelog 20! After a small summer break, we are back with more product releases, and even though our efforts are mainly focused on the console V3, I have a few exciting new things to show you! 🚀
Advanced Settings - IP Whitelist (CLI only)
Let’s start strong with a feature that is both new in the V3 console and the V2 via the API: IP whitelisting!
What our user wants, they get, as this was a user request from the forum that got quite popular.
You can now limit access to the application to certain IP addresses.
How to use it in the V2?
1. Check out our API documentation.
⚠️ Keep your API token secured - never share it with anyone.
Whitelist IP addresses
To whitelist only some IPs like:
- 1.1.1.1
- 42.42.42.42
- 11.11.11.11
You can run the following CURL command:
curl -X PUT -H 'Authorization: Token <your API token>' -H 'Content-type: application/json' \\ -d '{"network.ingress.whitelist_source_range": "1.1.1.1,42.42.42.42,11.11.11.11"}' "<https://api.qovery.com/application/:appId/advancedSettings>"
Then redeploy your application to apply the change.
The default value is: 0.0.0.0/0, which means all the IPs are whitelisted.
Your Application ID (appId) is the last ID in your console.qovery.com URL. E.g. for https://console.qovery.com/platform/organization/141c07c8-0dd9-4623-983b-3fdd61867777/projects/4ac1185f-4b7c-4f12-95b6-0690f796bbbb/environments/1109c4d2-ffbb-49d6-9826-f5a7ca3a8888/applications/3cc850c6-cc4f-46bc-ad05-c90f7b597333/summary the Organization ID is 3cc850c6-cc4f-46bc-ad05-c90f7b597333
Container Deployments (API only)
We are super excited to announce the public beta launch of our container feature! Most of you have been waiting long to deploy container applications from your private and public container registries. Since we launched Qovery, we were only supporting application deployment from your git repository - now, you can also deploy it from your container registry.
Why Use Container Instead of Application?
If you already use a CI system and have pushed your container images into your container registry, you might want to use those images and avoid rebuilding them. This is where deploying a container is useful.
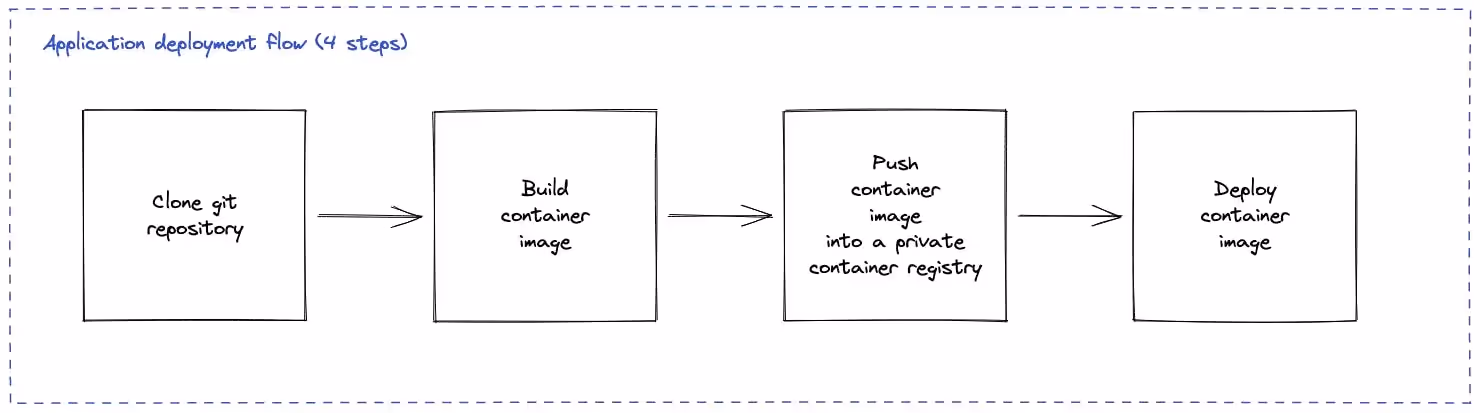
Deploying an application is 4 steps - Qovery clones your Git Repository, builds your container image, pushes it into a private container registry, and deploys it.
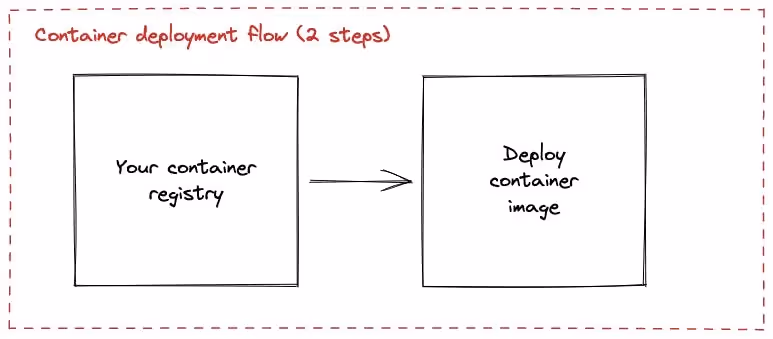
Deploying a container is 2 steps - Qovery takes your container image from your container registry and deploys it.
If you want to know how to do it, here are some further explanations and a tutorial that can help.
Cluster Advanced Settings
Last month was all about settings, so we also started adding some advanced settings in the cluster.
To further fine-tune your Qovery infrastructure, you can set advanced settings through the Qovery API endpoint.
Logs
loki.log_retention_in_week now allows you to specify an amount in weeks for how long your applications' logs are kept.
Image registry
registry.image_retention_time will enable you to specify an amount in seconds, after which images in the default registry are deleted.
Cloud Provider
load_balancer.size (Scaleway Only) Allows you to specify the load balancer size in front of your cluster.
If you want more information about it, don’t hesitate to look at our documentation.
Preview Environments New Message on PR
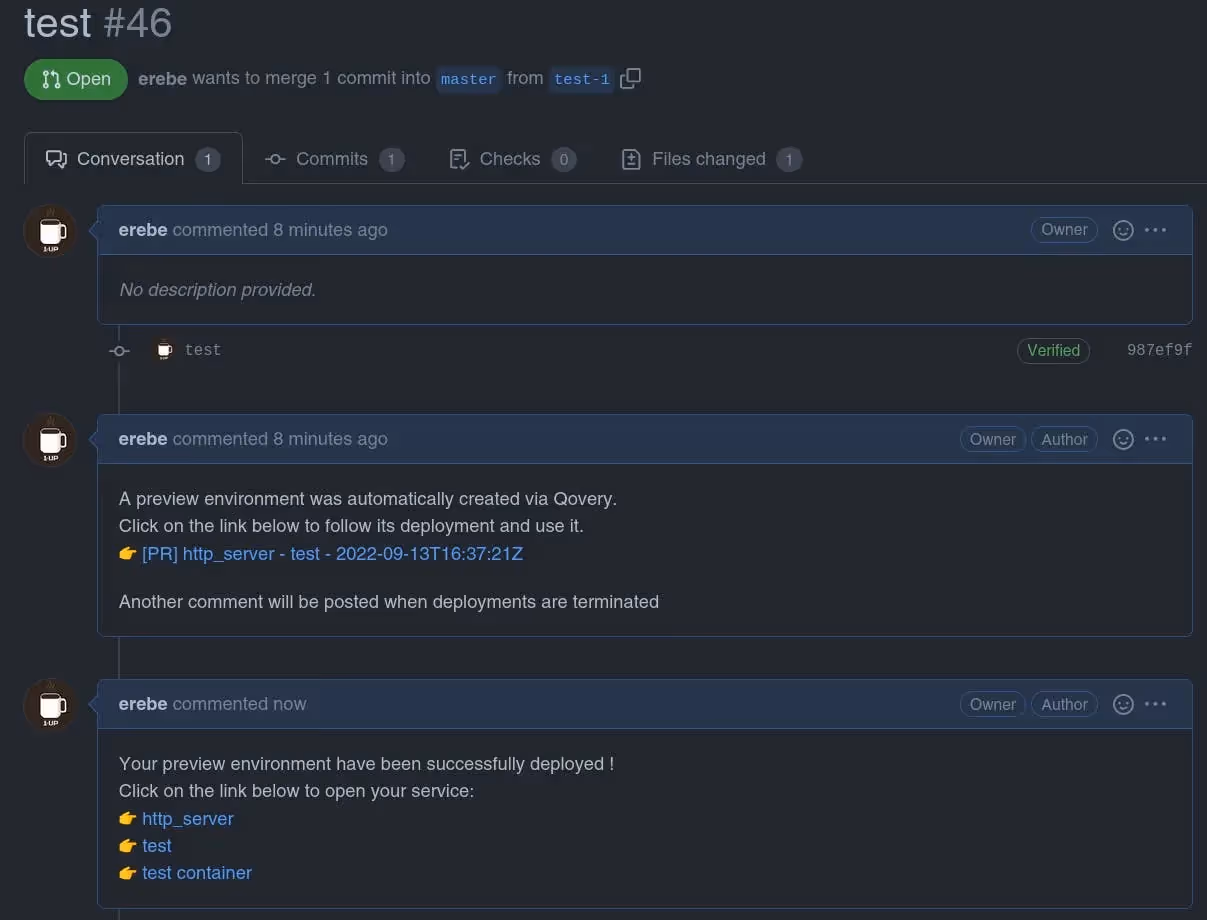
Victim of its success, our Preview Environment is getting even better; after some great feedback from some of our customers, we have added a new message on the PR when the deployment is finished with the URLs of the applications.
Curious to see what it looks like? Here is a screenshot:
Smaller Improvements and Fixes
- Improve UX to prevent a user from performing unexpected actions on a cluster