How does Kubernetes Work? Everything you should know
So you’ve heard of Kubernetes, and you’ve decided it’s time to dive into this cloud native architecture thateveryone’s talking about. Or maybe you’ve worked with it a little, but you’d like to level up.

Romaric Philogène
December 11, 2021 · 9 min read
Romaric Philogène
CEO and co-founder of Qovery. Romaric has 10+ years of experience in R&D. From the Ad-Tech to the financial industry, he has deep expertise in highly-reliable and performant systems.
See all articlesIf you're just starting out, be prepared to spend about a month working to understand and deploy your first production-ready pod application. But where to begin?
No worries. This guide will share key information about Kubernetes, detailing its native terminology and illustrating how it can enhance your cloud-native containerized applications. Hopefully, by the end of this article, you'll have a firm understanding of the essential concepts, which will allow you to more easily connect the dots that more intensive Kubernetes tutorials provide.
#So What Is It?
Kubernetes is a platform for automating the deployment, scaling, and management of containerized applications, with its robust control plane playing a pivotal role in maintaining the desired state and efficiency of these operations. It groups containers that make up an application into logical units for easy management and easy deployment on the cloud.

It's responsible for:
- Managing the cluster of machines and the states on which the containers are running.
- Managing the groups of containers that make up an application, also known as pods.
- Scheduling the containers on the cluster with a Kubernetes scheduler (which we'll cover later).
#Why Do I Need to Understand It?
Kubernetes allows you to make your application more resilient, enabling static and dynamic scaling. What makes Kubernetes powerful over, say, Docker Compose, is that Kubernetes works as a cluster in multiple nodes, whereas Docker Compose works in a single node.
With Kubernetes, you can make scaling automatic. What if suddenly you have too many requests, and all three available pods can't serve the requests? What if you have no traffic in the early phase of your project, and cluster resources are sitting idle?
Kubernetes can resize the number of replications automatically based on CPU/memory utilization. If it's higher than a certain threshold percentage, Kubernetes can create a new pod to balance the traffic.
#Core Functionalities of Kubernetes
Kubernetes's core functionalities, being an open source system, include a variety of features, so you'll want to get used to terminology such as:
- Clusters
- Control panel
- Deploying an application
- Access control
- ConfigMap and secret management
- Scheduler
- minikube
- Service
- Persistent volume
That's kind of a lot to take in, but we'll take a closer look at each of these functionalities.
#Clusters
A Kubernetes cluster is a set of nodes/VMs with the same computing and memory resources running Kubernetes software. These nodes are also called a node pool.
If you add more nodes to the node pool (ie, horizontal scaling), Kubernetes will redistribute all pods to the new node. Kubernetes tracks various metrics to stay informed as to whether nodes are available—we'll get into that in the Scheduler section later.
All nodes in a Kubernetes cluster have to have the same specification of CPU and memory. It's also recommended that you separate them across regions if you decide to have more than two nodes. In Google Cloud terms, you split nodes on different zonal, regional, or global locations. So if a catastrophic accident occurs in one zonal area, your application still lives on in the other zonal area(s).
Fortunately, cloud infrastructures like AWS, Google Cloud, and DigitalOcean already manage the Kubernetes clusters for you by default. The master node where kubectl resides (and components such as kube-APIserver, etcd, kube-scheduler, kube-cloud-manager, and kube-controller-manager) is being managed by the cloud provider. You only need to provision the number of nodes and physical specs.
Google also took things a step further by introducing GKE Autopilot. With Autopilot, you don't have to manage node pools and kubectl commands; you simply need to specify pods configuration.
#Control Panel
Kubernetes's control panel, in short kubectl, is a command-line interface for managing Kubernetes clusters. Let's go over a few examples:
- With the kubectl get command, you can get a sense of states in your Kubernetes cluster. This includes observing all available nodes, pods, deployments, services, and configuration/secret files.
- With the kubectl apply command, you can deploy your application or redeploy if there is a new update in the configuration file.
- In real-time running applications, you can view logs generated by pods and containers with kubectl logs. You can also use the kubectl exec command to SSH into these containers.
- When you upgrade an application to a newer version, you use the kubectl rollout command to specify how to upgrade/downgrade. By default, it upgrades some of the idle pods, load balances traffic to pods that have the newer version, and finally, upgrades the remaining pods.
These are some of the basic kubectl commands in Kubernetes, but there are many others if you'd like to learn more.
#Deploying an Application
To deploy an application, you first need a configuration file in YAML format, like docker-compose.yml. In the YAML file, you specify the name of your application, the desired state of your application, which container images to use, and the CPU/memory resources needed to build your application. You then deploy your application using the kubectl apply command discussed earlier.
When deploying applications, you also need to specify which disk volume you want to attach, what services are needed to expose your application, and which role is available to use the application. We'll go over that next.
#Access Control
Kubernetes, an open-source system, also provides its own role-based access control, known as Kubernetes RBAC. With RBAC, you can control two things:
- Access for namespaces in cluster resources
- Access with role bindings within a namespace.
Creating a namespace in cluster resources can be very useful when cross-departments need cluster resources or multi-staging environments such as dev, staging, QA, and production.
With roles and role bindings, you can restrict which users have read-only, write-only, or both types of access in a specific namespace.
#ConfigMaps and Secret Management
Kubernetes ConfigMaps and secrets store persistent configuration data or sensitive data.
A ConfigMap helps developers avoid unnecessary duplication of application-specific configuration files across different namespaces/environments running the same application. Secrets are essentially ConfigMaps, but with base64 encoded for sensitive data.
#Scheduler
A Kubernetes scheduler is a component that decides where to place your container. It's responsible for determining where to deploy a pod in order to meet certain service level objectives (SLO). It takes into account various metrics such as resource usage and resource availability. In some cases, the scheduler must make the decision based on what resources are available at a given time.
The scheduler is one of the reasons why Kubernetes is so powerful. When scaling, it decides where to put your pod application given available node resources. When one node is missing or unavailable, it schedules all new pods in the missing node to other available nodes, maintaining the same number of replications required.
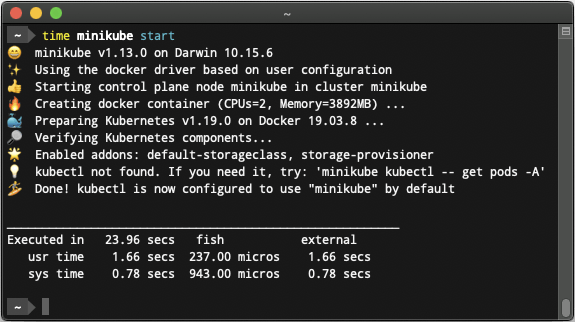
#minikube
minikube is a tool to run Kubernetes on your laptop. It runs in a VM and works as a local cluster, but can be scaled to any size.
minikube gives you the opportunity to try out Kubernetes without deploying to the cloud or managing infrastructure. It's designed so you can test by adding more nodes and then scale up for production-grade capacity.
In the real world, you can test locally whether your pod application is actually working. The DevOps infrastructure specifically working with actual Kubernetes clusters can absorb your pod configuration. They then can specify production configuration for replication, scaling, and access control, and determine how to expose your pod application to the internet accordingly.
#Service
Kubernetes services determine how to expose your application with network service. There are three kinds of services available.
First, by default, each pod is open with Kubernetes internal cluster IP. Each pod has its own IP, and other pods can access this pod using IP. Since this is an internal cluster network, it can only be accessed within the cluster.
The second option is NodePort. Kubernetes has the same port across any pod available, meaning that you can't assign a different pod using the same port. Kubernetes also has its own automatic internal load balancer. You don't have to specify all three nodes to load balance traffic for a specific pod. All traffic from any node IP will route to NodePort service, then redistribute again to the actual application pods.
The third option is using an external load balancer, which is usually supplied by cloud providers like Google and Amazon. Earlier, you used the IP of the node. This time, only the IP of the external load balancer is exposed to the internet.
#Persistent Volume
Kubernetes pods, by default, have ephemeral storage. When the pod is destroyed or replaced with the new pod, it loses all of the data. A persistent volume allows your application to have durable storage independent of the lifecycle of the application pods.
With cloud providers managed by Kubernetes, you don't have to create disk volume. Instead, you only have to claim it with a specified volume configuration, and the volume will be provided when a pod is built.
#Understanding Kubernetes Networking
One of the key aspects of Kubernetes that often puzzles newcomers is how it manages networking. Understanding this is crucial for deploying applications effectively. Here’s a brief overview:
1. Pod Networking: In Kubernetes, each pod is assigned a unique IP address. This design eliminates the need for explicit port mapping and allows containers within the same pod to communicate using localhost. However, this also means that pods must be able to connect to any other pod across a network without NAT, which leads to the need for a network solution that can handle this requirement.
2. Service Networking: While pods have unique IP addresses, these addresses are not stable. Therefore, Kubernetes uses Services to provide a stable endpoint for accessing pods. Services match a set of pods using labels and selectors and provide an IP address and DNS name to connect to them. There are different types of services like ClusterIP (internal), NodePort, and LoadBalancer (external), each serving different use cases.
3. Network Policies: Kubernetes also supports network policies that allow you to control the traffic between pods. You can define rules that specify which pods can communicate with each other and which ports can be used for this communication. This is crucial for building secure applications and is often used in tandem with other security measures.
4. Ingress Controllers: For managing external access to the services in a cluster, Kubernetes offers Ingress. An Ingress is a collection of rules that allow inbound connections to reach the cluster services. It can be configured to give services externally reachable URLs, load balance traffic, terminate SSL, and offer name-based virtual hosting.
5. CNI (Container Network Interface): Kubernetes relies on third-party plugins (CNI plugins) for networking. These plugins range from simple bridges to more complex solutions, offering advanced networking features like network segmentation, load balancing, and encryption.
#Conclusion
In this article, you learned the essential functionalities of Kubernetes and its components. However, you may be wondering, "What's next?" For example, how do you integrate CI/CD to your Kubernetes? How do you create a continuous deployment from updating your repo, rebuilding the image, and letting Kubernetes know to redeploy your application without restarting all of the available pods?
This is where Qovery comes in. With Qovery, the work of seamlessly deploying your application to AWS is simplified, leveraging Kubernetes' advanced cloud-native architecture to ensure efficiency and scalability. Push your code, and let Qovery handle the rest.
#Conclusion
In this article, you learned the essential functionalities of Kubernetes and its components. However, you may be wondering, "What's next?" For example, how do you integrate CI/CD into your Kubernetes? How do you create a continuous deployment from updating your repo, rebuilding the image, and letting Kubernetes know to redeploy your application without restarting all of the available pods?
This is where Qovery comes in. Qovery makes it easy for you to seamlessly deploy an application in your repo to AWS - by empowering Kubernetes behind the scenes. Push your code, and let Qovery handle the rest.
Your Favorite DevOps Automation Platform
Qovery is a DevOps Automation Platform Helping 200+ Organizations To Ship Faster and Eliminate DevOps Hiring Needs,
Try it out now!
Your Favorite DevOps Automation Platform
Qovery is a DevOps Automation Platform Helping 200+ Organizations To Ship Faster and Eliminate DevOps Hiring Needs,
Try it out now!