> ## Documentation Index
> Fetch the complete documentation index at: https://www.qovery.com/docs/llms.txt
> Use this file to discover all available pages before exploring further.
# Install Qovery on Scaleway
> Complete guide to installing Qovery on Scaleway with Kapsule Kubernetes
Install Qovery on your Scaleway account and deploy a fully managed Kubernetes cluster (Kapsule) in less than 20 minutes.
## Overview
Qovery simplifies Scaleway Kapsule management by:
* Automating Kapsule cluster creation and configuration
* Managing networking, load balancers, and DNS
* Providing built-in monitoring and logging
* Handling rolling updates and scaling
* Securing your infrastructure with best practices
Qovery creates and manages your Kapsule cluster automatically
All data stays in Europe - Paris, Amsterdam, or Warsaw
Free control plane + competitive instance pricing
European cloud provider with built-in GDPR compliance
## Prerequisites
Before you begin, ensure you have:
**Scaleway Account**: Active Scaleway account with billing enabled
**Scaleway Project**: A project created (or use default project)
**Qovery Account**: Free account at [console.qovery.com](https://console.qovery.com/signup)
**IAM Access**: Ability to create applications and API keys
### Why Choose Scaleway?
* All data centers located in Europe (Paris, Amsterdam, Warsaw)
* GDPR compliant by design
* No data transfer outside EU
* Sovereignty for sensitive workloads
* Free Kubernetes control plane (mutualized option)
* Transparent, predictable pricing
* No egress fees within regions
* Easy-to-use console and APIs
* Fast provisioning times
* Good performance-to-price ratio
* European-based support team
## Step 1: Create Scaleway Credentials
Qovery needs API credentials to manage resources in your Scaleway account. We use a secure API key approach with granular permissions.
### Generate API Key
1. Log into [Scaleway Console](https://console.scaleway.com)
2. Click your profile/organization name in the top-right
3. Select **Identity and Access Management (IAM)**
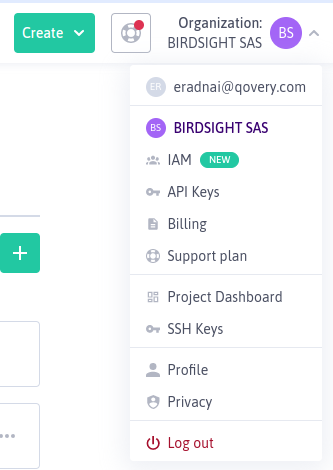 1. Navigate to **Applications** tab
2. Click **+ Create application**
3. Name it: `qovery-manager` or similar
4. Description: "Qovery cluster management"
5. Click **Create application**
Applications help organize API keys by purpose. You can reuse this application for multiple clusters.
1. Click on your newly created application
2. Go to **API keys** tab
3. Click **+ Generate API key**
4. Description: "Qovery cluster access"
5. Select **Object Storage preferred Project** (your main project)
6. Click **Generate API key**
**Save these credentials immediately!** The secret key is only shown once and cannot be retrieved later.
You'll see:
* **Access key ID**: `SCWxxxxxxxxxxxxxxxxx`
* **Secret access key**: `xxxxxxxx-xxxx-xxxx-xxxx-xxxxxxxxxxxx`
Copy both to a secure location.
1. Go to **Policies** tab in IAM
2. Click **+ Create policy**
3. Name it: `qovery-permissions`
4. Click **Add rule** for each of these permission sets:
**Required Permissions:**
* ✅ **Containers** - Full access (for Kapsule management)
* ✅ **Network Services** - Full access (for VPC, Load Balancers)
* ✅ **Compute** - Full access (for instances)
* ✅ **Storage** - Full access (for persistent volumes)
* ✅ **VPC** - Full access (for networking)
5. Under **Principal**, attach this policy to your application
6. Click **Create policy**
These permissions allow Qovery to fully manage your Kubernetes infrastructure, including creating instances, configuring networking, and managing storage. For a detailed breakdown of every permission and why it's needed, see the [Scaleway IAM Permissions Reference](/docs/getting-started/security-and-compliance/scaleway-iam-permissions).
You'll need these identifiers:
**Organization ID:**
1. Go to **Organization Settings**
2. Copy the **Organization ID** (format: `xxxxxxxx-xxxx-xxxx-xxxx-xxxxxxxxxxxx`)
**Project ID:**
1. Go to your **Project Dashboard**
2. Click **Project settings**
3. Copy the **Project ID** (format: `xxxxxxxx-xxxx-xxxx-xxxx-xxxxxxxxxxxx`)
Keep these IDs handy - you'll need them when configuring Qovery.
### Add Credentials to Qovery
1. Go to [Qovery Console](https://console.qovery.com)
2. Go to your organization overview and click on the **Clusters** tab
3. Click **Create Cluster**
4. Select **Scaleway** as the cloud provider
Provide the information you gathered:
* **Access Key ID**: Your Scaleway access key
* **Secret Access Key**: Your Scaleway secret key
* **Organization ID**: Your Scaleway organization ID
* **Project ID**: Your Scaleway project ID
1. Navigate to **Applications** tab
2. Click **+ Create application**
3. Name it: `qovery-manager` or similar
4. Description: "Qovery cluster management"
5. Click **Create application**
Applications help organize API keys by purpose. You can reuse this application for multiple clusters.
1. Click on your newly created application
2. Go to **API keys** tab
3. Click **+ Generate API key**
4. Description: "Qovery cluster access"
5. Select **Object Storage preferred Project** (your main project)
6. Click **Generate API key**
**Save these credentials immediately!** The secret key is only shown once and cannot be retrieved later.
You'll see:
* **Access key ID**: `SCWxxxxxxxxxxxxxxxxx`
* **Secret access key**: `xxxxxxxx-xxxx-xxxx-xxxx-xxxxxxxxxxxx`
Copy both to a secure location.
1. Go to **Policies** tab in IAM
2. Click **+ Create policy**
3. Name it: `qovery-permissions`
4. Click **Add rule** for each of these permission sets:
**Required Permissions:**
* ✅ **Containers** - Full access (for Kapsule management)
* ✅ **Network Services** - Full access (for VPC, Load Balancers)
* ✅ **Compute** - Full access (for instances)
* ✅ **Storage** - Full access (for persistent volumes)
* ✅ **VPC** - Full access (for networking)
5. Under **Principal**, attach this policy to your application
6. Click **Create policy**
These permissions allow Qovery to fully manage your Kubernetes infrastructure, including creating instances, configuring networking, and managing storage. For a detailed breakdown of every permission and why it's needed, see the [Scaleway IAM Permissions Reference](/docs/getting-started/security-and-compliance/scaleway-iam-permissions).
You'll need these identifiers:
**Organization ID:**
1. Go to **Organization Settings**
2. Copy the **Organization ID** (format: `xxxxxxxx-xxxx-xxxx-xxxx-xxxxxxxxxxxx`)
**Project ID:**
1. Go to your **Project Dashboard**
2. Click **Project settings**
3. Copy the **Project ID** (format: `xxxxxxxx-xxxx-xxxx-xxxx-xxxxxxxxxxxx`)
Keep these IDs handy - you'll need them when configuring Qovery.
### Add Credentials to Qovery
1. Go to [Qovery Console](https://console.qovery.com)
2. Go to your organization overview and click on the **Clusters** tab
3. Click **Create Cluster**
4. Select **Scaleway** as the cloud provider
Provide the information you gathered:
* **Access Key ID**: Your Scaleway access key
* **Secret Access Key**: Your Scaleway secret key
* **Organization ID**: Your Scaleway organization ID
* **Project ID**: Your Scaleway project ID
 Click **Next** to validate the credentials.
Qovery will test the credentials and verify it can access your Scaleway account.
If validation fails, double-check your API key has all required permissions attached via the policy.
**Source**: Content above is maintained in `/snippets/scaleway-credentials.mdx`. Update snippet first, then copy to all usage locations.
## Step 2: Configure Your Cluster
Now configure your Kapsule cluster settings in the Qovery console.
### Basic Configuration
Choose a descriptive name for your cluster:
* `production-kapsule`
* `staging-scaleway`
* `dev-kapsule-paris`
Use naming conventions that indicate environment and region for easier management.
Choose a Scaleway region closest to your users:
**Paris (France) - `fr-par`:**
* Availability Zones: `fr-par-1`, `fr-par-2`, `fr-par-3`
* Main Scaleway hub with most services
* Lowest latency for Western Europe
* Multiple data centers for redundancy
**Amsterdam (Netherlands) - `nl-ams`:**
* Availability Zones: `nl-ams-1`, `nl-ams-2`, `nl-ams-3`
* Optimal for Northern Europe
* Good connectivity to UK and Scandinavia
* Growing availability zone coverage
**Warsaw (Poland) - `pl-waw`:**
* Availability Zones: `pl-waw-1`, `pl-waw-2`, `pl-waw-3`
* Optimal for Eastern Europe
* Central European location
* Good latency to Germany, Austria, Czech Republic
**Choosing a Region:**
* Paris: Most mature, largest service catalog
* Amsterdam: Northern Europe, strong connectivity
* Warsaw: Eastern Europe, competitive pricing
Select the Scaleway credentials you created in Step 1.
If you need to create new credentials, click **Add new credentials** and repeat Step 1.
### Node Pool Configuration
Configure the instance types for your Kapsule node pools:
**Development/Testing:**
* `DEV1-M` (2 vCPU, 3 GB RAM)
* `DEV1-L` (3 vCPU, 4 GB RAM)
* `DEV1-XL` (4 vCPU, 6 GB RAM)
**General Purpose (Balanced workloads):**
* `GP1-XS` (4 vCPU, 16 GB RAM)
* `GP1-S` (8 vCPU, 32 GB RAM)
* `GP1-M` (16 vCPU, 64 GB RAM)
* `GP1-L` (32 vCPU, 128 GB RAM)
**Cost-Optimized (x86):**
* `COPARM1-2C-8G` (2 vCPU, 8 GB RAM) - Budget-friendly
* `COPARM1-4C-16G` (4 vCPU, 16 GB RAM) - Good balance
* `COPARM1-8C-32G` (8 vCPU, 32 GB RAM) - Higher capacity
**Cost-Optimized (ARM - Ampere Altra):**
* `COPARM1-2C-8G` (2 vCPU ARM, 8 GB RAM) - Lower cost
* `COPARM1-4C-16G` (4 vCPU ARM, 16 GB RAM) - Great value
* `COPARM1-8C-32G` (8 vCPU ARM, 32 GB RAM) - Best price/performance
ARM instances offer excellent price-to-performance ratio for compatible workloads (most modern container images support ARM).
**Example Configuration:**
```yaml theme={null}
Node Pool Settings:
- DEV1-M (2 vCPU, 3GB) - Development workloads
- GP1-XS (4 vCPU, 16GB) - General purpose applications
- COPARM1-4C-16G (4 vCPU ARM, 16GB) - Cost-optimized workloads
```
**Multi-architecture Support:** Scaleway Kapsule supports both x86\_64 and ARM instances. You can mix both in the same cluster by using node selectors.
## Step 3: Configure Network
In the `Configure Network` window, configure your cluster networking options:
* **Static IP for egress traffic**: Enable this option if your applications need to connect to external services that require IP allowlisting. When enabled, your cluster will use a fixed public IP address for all outbound traffic.
* **NAT Gateway type**: Select the appropriate gateway size based on your expected outbound traffic requirements:
* **VPC-GW-S** (Up to 100 Mbps): Small development environments, low traffic
* **VPC-GW-M** (Up to 1 Gbps): Standard production workloads
* **VPC-GW-L** (Up to 3 Gbps): High-traffic applications
* **VPC-GW-XL** (Up to 10 Gbps): Very high-traffic, enterprise workloads
The Static IP feature is useful when connecting to external databases, third-party APIs, or enterprise services that require IP allowlisting. See [Scaleway Public Gateway documentation](https://www.scaleway.com/en/docs/network/vpc/concepts/#public-gateways) for more details.
To confirm, click `Next`.
### Control Plane Options
**Mutualized (Free) - Recommended for most users:**
* Shared Kubernetes control plane
* No additional cost
* Suitable for development, staging, and production
* 99.9% SLA
**Dedicated (Paid) - For high-performance needs:**
* Dedicated control plane resources
* Higher API rate limits
* Better performance under heavy load
* 30-day minimum commitment
Start with mutualized (free) control plane. You can upgrade to dedicated later if you need higher performance or rate limits.
## Step 4: Deploy Your Cluster
Review all your cluster settings:
* Cluster name
* Scaleway project
* Region and availability zones
* Instance types
* Control plane tier
* Networking options
Click **Create and Deploy**
You can start configuring applications immediately! The cluster will be available once deployment completes.
Watch the deployment progress in the Qovery console.
**Timeline:**
* **0-5 min**: Creating Private Network and security groups
* **5-10 min**: Provisioning Kapsule control plane
* **10-15 min**: Creating node pool and instances
* **15-20 min**: Installing Qovery components (ingress, monitoring, etc.)
**Status indicators:**
* 🟡 **Creating**: Infrastructure provisioning in progress
* 🟢 **Running**: Cluster is ready to use
* 🔴 **Error**: Check logs for troubleshooting
Once complete, your cluster will appear in the cluster list with status **Running**.
## What Gets Created
Qovery automatically provisions these Scaleway resources:
* **Kapsule Cluster**: Managed Kubernetes cluster
* **Private Network**: Isolated VPC for your cluster
* **Control Plane**: Mutualized or dedicated (your choice)
* **Node Pool**: Auto-scaling group of instances
* **Security Groups**: Firewall rules for traffic control
* **Public Gateway**: NAT for outbound internet access
* **Load Balancer**: Layer 4/7 load balancing for ingress
* **Public IPs**: Flexible IP addresses for services
* **DNS**: Automatic domain management
* **Private IPs**: Internal cluster communication
* **Instances**: DEV1, GP1, or Cost-Optimized instances
* **Block Storage**: SSD volumes for persistent data
* **Auto-scaling**: Cluster autoscaler for node provisioning
* **Multi-AZ**: Nodes spread across availability zones
* **NGINX Ingress Controller**: HTTP/HTTPS routing
* **Cert-Manager**: Automatic SSL/TLS certificates
* **Qovery Agent**: Cluster management and monitoring
* **Metrics Server**: Resource usage metrics
* **DNS Management**: Automatic domain configuration
## Post-Installation Steps
Once your cluster is running:
Follow the [Deploy Your First App](/docs/guides/getting-started/deploy-your-first-application) guide
Set up your own domain instead of the default Qovery domain
Configure [monitoring and observability](/docs/integrations/observability/overview)
Set up backup policies for persistent data using Scaleway snapshots
## Troubleshooting
**Error**: "Invalid credentials" or "Permission denied"
**Solutions:**
* Verify all required permissions are attached to your API key via IAM policy
* Check that the API key is active (not expired or revoked)
* Ensure you copied the full access key and secret key correctly
* Verify the Organization ID and Project ID match your Scaleway account
* Make sure your Scaleway project has billing enabled
**Issue**: Cluster stuck in "Creating" state for over 30 minutes
**Solutions:**
* Check Scaleway quotas for your project (instances, IPs, block volumes)
* Verify the selected region has instance availability
* Check [Scaleway Status Page](https://status.scaleway.com) for outages
* Verify your billing is up to date
* Contact Qovery support if issue persists
**Error**: "Quota exceeded" or "No capacity available"
**Solutions:**
1. Check your quotas in Scaleway Console → Organization Settings → Quotas
2. Request quota increase through Scaleway support
3. Try a different availability zone within the same region
4. Choose smaller or different instance types
5. Clean up unused resources
**Common quota limits:**
* Compute instances per zone
* Total vCPUs per organization
* Flexible IPs per project
* Block Storage volumes
* Load Balancers per region
**Issue**: Applications can't access external services or the internet
**Solutions:**
* Verify Public Gateway is properly configured
* Check Security Group rules allow outbound traffic
* Ensure Private Network routes are configured
* Verify DNS resolution: `kubectl run -it debug --image=nicolaka/netshoot --rm`
* Check load balancer health checks are passing
**Error**: "Instance failed to join cluster" or "Node registration timeout"
**Solutions:**
* Check instance type availability in your region/AZ
* Verify Security Group allows Kapsule control plane communication
* Ensure Private Network is properly configured
* Check instance startup logs in Scaleway console
* Try a different instance type or availability zone
## Advanced Configuration
### Private Network Routes
Connect your Kapsule cluster to existing Scaleway resources:
1. Navigate to Private Networks in Scaleway Console
2. Attach your existing Private Network to the Kapsule cluster
3. Configure routes between networks
4. Update Security Groups to allow traffic
5. Test connectivity from pods
### Using Existing Private Network
Deploy Qovery into your own Private Network:
When using an existing Private Network, ensure it has:
* Sufficient IP address ranges for pods and services
* Public Gateway attached for internet access
* Security Groups configured to allow Kubernetes traffic
* No conflicts with existing resources
### ARM Workloads
Take advantage of ARM instances for better price-to-performance:
1. Use ARM-compatible container images (most official images support both)
2. Add node selector to deployments:
```yaml theme={null}
nodeSelector:
kubernetes.io/arch: arm64
```
3. Test ARM compatibility in staging before production
4. Mix ARM and x86 nodes using node selectors for different workloads
### Multi-Availability Zone
Increase reliability with multi-AZ deployment:
1. Configure node pools across multiple AZs
2. Use pod anti-affinity to spread replicas
3. Configure topology spread constraints
4. Test failover scenarios
5. Monitor cross-AZ traffic costs
## Best Practices
Leverage ARM instances (COPARM1) for better price/performance on compatible workloads
Mutualized control plane is free and suitable for most workloads
Configure cluster autoscaler to optimize costs during low-traffic periods
Deploy across multiple AZs for high availability
Use Scaleway Cockpit to track resource usage and costs
Leverage Scaleway snapshots for persistent volume backups
## Next Steps
Complete step-by-step deployment guide
Set up team access control
Automate deployments with GitHub Actions or GitLab CI
Configure monitoring and alerting
## Additional Resources
* [Scaleway Kapsule Documentation](https://www.scaleway.com/en/docs/kubernetes/)
* [Scaleway Pricing Calculator](https://www.scaleway.com/en/pricing/)
* [Scaleway Status Page](https://status.scaleway.com)
* [Qovery Status Page](https://status.qovery.com)
* [Qovery Kubernetes Changelog](https://www.qovery.com/changelog---kubernetes) - Kubernetes cluster related updates
Click **Next** to validate the credentials.
Qovery will test the credentials and verify it can access your Scaleway account.
If validation fails, double-check your API key has all required permissions attached via the policy.
**Source**: Content above is maintained in `/snippets/scaleway-credentials.mdx`. Update snippet first, then copy to all usage locations.
## Step 2: Configure Your Cluster
Now configure your Kapsule cluster settings in the Qovery console.
### Basic Configuration
Choose a descriptive name for your cluster:
* `production-kapsule`
* `staging-scaleway`
* `dev-kapsule-paris`
Use naming conventions that indicate environment and region for easier management.
Choose a Scaleway region closest to your users:
**Paris (France) - `fr-par`:**
* Availability Zones: `fr-par-1`, `fr-par-2`, `fr-par-3`
* Main Scaleway hub with most services
* Lowest latency for Western Europe
* Multiple data centers for redundancy
**Amsterdam (Netherlands) - `nl-ams`:**
* Availability Zones: `nl-ams-1`, `nl-ams-2`, `nl-ams-3`
* Optimal for Northern Europe
* Good connectivity to UK and Scandinavia
* Growing availability zone coverage
**Warsaw (Poland) - `pl-waw`:**
* Availability Zones: `pl-waw-1`, `pl-waw-2`, `pl-waw-3`
* Optimal for Eastern Europe
* Central European location
* Good latency to Germany, Austria, Czech Republic
**Choosing a Region:**
* Paris: Most mature, largest service catalog
* Amsterdam: Northern Europe, strong connectivity
* Warsaw: Eastern Europe, competitive pricing
Select the Scaleway credentials you created in Step 1.
If you need to create new credentials, click **Add new credentials** and repeat Step 1.
### Node Pool Configuration
Configure the instance types for your Kapsule node pools:
**Development/Testing:**
* `DEV1-M` (2 vCPU, 3 GB RAM)
* `DEV1-L` (3 vCPU, 4 GB RAM)
* `DEV1-XL` (4 vCPU, 6 GB RAM)
**General Purpose (Balanced workloads):**
* `GP1-XS` (4 vCPU, 16 GB RAM)
* `GP1-S` (8 vCPU, 32 GB RAM)
* `GP1-M` (16 vCPU, 64 GB RAM)
* `GP1-L` (32 vCPU, 128 GB RAM)
**Cost-Optimized (x86):**
* `COPARM1-2C-8G` (2 vCPU, 8 GB RAM) - Budget-friendly
* `COPARM1-4C-16G` (4 vCPU, 16 GB RAM) - Good balance
* `COPARM1-8C-32G` (8 vCPU, 32 GB RAM) - Higher capacity
**Cost-Optimized (ARM - Ampere Altra):**
* `COPARM1-2C-8G` (2 vCPU ARM, 8 GB RAM) - Lower cost
* `COPARM1-4C-16G` (4 vCPU ARM, 16 GB RAM) - Great value
* `COPARM1-8C-32G` (8 vCPU ARM, 32 GB RAM) - Best price/performance
ARM instances offer excellent price-to-performance ratio for compatible workloads (most modern container images support ARM).
**Example Configuration:**
```yaml theme={null}
Node Pool Settings:
- DEV1-M (2 vCPU, 3GB) - Development workloads
- GP1-XS (4 vCPU, 16GB) - General purpose applications
- COPARM1-4C-16G (4 vCPU ARM, 16GB) - Cost-optimized workloads
```
**Multi-architecture Support:** Scaleway Kapsule supports both x86\_64 and ARM instances. You can mix both in the same cluster by using node selectors.
## Step 3: Configure Network
In the `Configure Network` window, configure your cluster networking options:
* **Static IP for egress traffic**: Enable this option if your applications need to connect to external services that require IP allowlisting. When enabled, your cluster will use a fixed public IP address for all outbound traffic.
* **NAT Gateway type**: Select the appropriate gateway size based on your expected outbound traffic requirements:
* **VPC-GW-S** (Up to 100 Mbps): Small development environments, low traffic
* **VPC-GW-M** (Up to 1 Gbps): Standard production workloads
* **VPC-GW-L** (Up to 3 Gbps): High-traffic applications
* **VPC-GW-XL** (Up to 10 Gbps): Very high-traffic, enterprise workloads
The Static IP feature is useful when connecting to external databases, third-party APIs, or enterprise services that require IP allowlisting. See [Scaleway Public Gateway documentation](https://www.scaleway.com/en/docs/network/vpc/concepts/#public-gateways) for more details.
To confirm, click `Next`.
### Control Plane Options
**Mutualized (Free) - Recommended for most users:**
* Shared Kubernetes control plane
* No additional cost
* Suitable for development, staging, and production
* 99.9% SLA
**Dedicated (Paid) - For high-performance needs:**
* Dedicated control plane resources
* Higher API rate limits
* Better performance under heavy load
* 30-day minimum commitment
Start with mutualized (free) control plane. You can upgrade to dedicated later if you need higher performance or rate limits.
## Step 4: Deploy Your Cluster
Review all your cluster settings:
* Cluster name
* Scaleway project
* Region and availability zones
* Instance types
* Control plane tier
* Networking options
Click **Create and Deploy**
You can start configuring applications immediately! The cluster will be available once deployment completes.
Watch the deployment progress in the Qovery console.
**Timeline:**
* **0-5 min**: Creating Private Network and security groups
* **5-10 min**: Provisioning Kapsule control plane
* **10-15 min**: Creating node pool and instances
* **15-20 min**: Installing Qovery components (ingress, monitoring, etc.)
**Status indicators:**
* 🟡 **Creating**: Infrastructure provisioning in progress
* 🟢 **Running**: Cluster is ready to use
* 🔴 **Error**: Check logs for troubleshooting
Once complete, your cluster will appear in the cluster list with status **Running**.
## What Gets Created
Qovery automatically provisions these Scaleway resources:
* **Kapsule Cluster**: Managed Kubernetes cluster
* **Private Network**: Isolated VPC for your cluster
* **Control Plane**: Mutualized or dedicated (your choice)
* **Node Pool**: Auto-scaling group of instances
* **Security Groups**: Firewall rules for traffic control
* **Public Gateway**: NAT for outbound internet access
* **Load Balancer**: Layer 4/7 load balancing for ingress
* **Public IPs**: Flexible IP addresses for services
* **DNS**: Automatic domain management
* **Private IPs**: Internal cluster communication
* **Instances**: DEV1, GP1, or Cost-Optimized instances
* **Block Storage**: SSD volumes for persistent data
* **Auto-scaling**: Cluster autoscaler for node provisioning
* **Multi-AZ**: Nodes spread across availability zones
* **NGINX Ingress Controller**: HTTP/HTTPS routing
* **Cert-Manager**: Automatic SSL/TLS certificates
* **Qovery Agent**: Cluster management and monitoring
* **Metrics Server**: Resource usage metrics
* **DNS Management**: Automatic domain configuration
## Post-Installation Steps
Once your cluster is running:
Follow the [Deploy Your First App](/docs/guides/getting-started/deploy-your-first-application) guide
Set up your own domain instead of the default Qovery domain
Configure [monitoring and observability](/docs/integrations/observability/overview)
Set up backup policies for persistent data using Scaleway snapshots
## Troubleshooting
**Error**: "Invalid credentials" or "Permission denied"
**Solutions:**
* Verify all required permissions are attached to your API key via IAM policy
* Check that the API key is active (not expired or revoked)
* Ensure you copied the full access key and secret key correctly
* Verify the Organization ID and Project ID match your Scaleway account
* Make sure your Scaleway project has billing enabled
**Issue**: Cluster stuck in "Creating" state for over 30 minutes
**Solutions:**
* Check Scaleway quotas for your project (instances, IPs, block volumes)
* Verify the selected region has instance availability
* Check [Scaleway Status Page](https://status.scaleway.com) for outages
* Verify your billing is up to date
* Contact Qovery support if issue persists
**Error**: "Quota exceeded" or "No capacity available"
**Solutions:**
1. Check your quotas in Scaleway Console → Organization Settings → Quotas
2. Request quota increase through Scaleway support
3. Try a different availability zone within the same region
4. Choose smaller or different instance types
5. Clean up unused resources
**Common quota limits:**
* Compute instances per zone
* Total vCPUs per organization
* Flexible IPs per project
* Block Storage volumes
* Load Balancers per region
**Issue**: Applications can't access external services or the internet
**Solutions:**
* Verify Public Gateway is properly configured
* Check Security Group rules allow outbound traffic
* Ensure Private Network routes are configured
* Verify DNS resolution: `kubectl run -it debug --image=nicolaka/netshoot --rm`
* Check load balancer health checks are passing
**Error**: "Instance failed to join cluster" or "Node registration timeout"
**Solutions:**
* Check instance type availability in your region/AZ
* Verify Security Group allows Kapsule control plane communication
* Ensure Private Network is properly configured
* Check instance startup logs in Scaleway console
* Try a different instance type or availability zone
## Advanced Configuration
### Private Network Routes
Connect your Kapsule cluster to existing Scaleway resources:
1. Navigate to Private Networks in Scaleway Console
2. Attach your existing Private Network to the Kapsule cluster
3. Configure routes between networks
4. Update Security Groups to allow traffic
5. Test connectivity from pods
### Using Existing Private Network
Deploy Qovery into your own Private Network:
When using an existing Private Network, ensure it has:
* Sufficient IP address ranges for pods and services
* Public Gateway attached for internet access
* Security Groups configured to allow Kubernetes traffic
* No conflicts with existing resources
### ARM Workloads
Take advantage of ARM instances for better price-to-performance:
1. Use ARM-compatible container images (most official images support both)
2. Add node selector to deployments:
```yaml theme={null}
nodeSelector:
kubernetes.io/arch: arm64
```
3. Test ARM compatibility in staging before production
4. Mix ARM and x86 nodes using node selectors for different workloads
### Multi-Availability Zone
Increase reliability with multi-AZ deployment:
1. Configure node pools across multiple AZs
2. Use pod anti-affinity to spread replicas
3. Configure topology spread constraints
4. Test failover scenarios
5. Monitor cross-AZ traffic costs
## Best Practices
Leverage ARM instances (COPARM1) for better price/performance on compatible workloads
Mutualized control plane is free and suitable for most workloads
Configure cluster autoscaler to optimize costs during low-traffic periods
Deploy across multiple AZs for high availability
Use Scaleway Cockpit to track resource usage and costs
Leverage Scaleway snapshots for persistent volume backups
## Next Steps
Complete step-by-step deployment guide
Set up team access control
Automate deployments with GitHub Actions or GitLab CI
Configure monitoring and alerting
## Additional Resources
* [Scaleway Kapsule Documentation](https://www.scaleway.com/en/docs/kubernetes/)
* [Scaleway Pricing Calculator](https://www.scaleway.com/en/pricing/)
* [Scaleway Status Page](https://status.scaleway.com)
* [Qovery Status Page](https://status.qovery.com)
* [Qovery Kubernetes Changelog](https://www.qovery.com/changelog---kubernetes) - Kubernetes cluster related updates