> ## Documentation Index
> Fetch the complete documentation index at: https://www.qovery.com/docs/llms.txt
> Use this file to discover all available pages before exploring further.
# Database Seeding with Lifecycle Jobs
> How to seed your PostgreSQL database with SQL scripts using Qovery Lifecycle Jobs
## Overview
This guide shows you how to use Qovery Lifecycle Jobs to seed your PostgreSQL database with SQL scripts. This approach is ideal for initializing databases with sample data, setting up database schemas, or restoring database backups during deployment.
**What are Lifecycle Jobs?** Lifecycle Jobs are special jobs in Qovery that run at specific events during your application lifecycle, such as START, STOP, or DELETE. They're perfect for database initialization, migrations, and cleanup tasks.
## Prerequisites
* A Qovery account with an environment set up
* A PostgreSQL database deployed in your Qovery environment
* A SQL script file for seeding your database
* Basic knowledge of Docker and shell scripting
## Goal
Set up an automated database seeding process that runs when your environment starts, using a secure approach that downloads SQL scripts from external storage (like S3) and executes them against your PostgreSQL database.
**Security Best Practice**: Never store sensitive data or production database dumps in public repositories. Always download SQL scripts from secure locations like AWS S3, Azure Blob Storage, or private repositories.
## Architecture Overview
The solution consists of three main components:
1. **Dockerfile**: Builds a container with PostgreSQL client and curl
2. **Seed Script**: Shell script that downloads and executes SQL files
3. **Lifecycle Job**: Qovery job configured to run at environment start
## Step 1: Prepare Your SQL Script
First, prepare your SQL script and store it in a secure location.
Create a SQL file containing your database schema and seed data:
```sql seed.sql theme={null}
-- Create tables
CREATE TABLE IF NOT EXISTS users (
id SERIAL PRIMARY KEY,
username VARCHAR(50) UNIQUE NOT NULL,
email VARCHAR(100) UNIQUE NOT NULL,
created_at TIMESTAMP DEFAULT CURRENT_TIMESTAMP
);
CREATE TABLE IF NOT EXISTS posts (
id SERIAL PRIMARY KEY,
user_id INTEGER REFERENCES users(id),
title VARCHAR(200) NOT NULL,
content TEXT,
created_at TIMESTAMP DEFAULT CURRENT_TIMESTAMP
);
-- Insert sample data
INSERT INTO users (username, email) VALUES
('john_doe', 'john@example.com'),
('jane_smith', 'jane@example.com')
ON CONFLICT (username) DO NOTHING;
INSERT INTO posts (user_id, title, content) VALUES
(1, 'First Post', 'This is my first post!'),
(1, 'Second Post', 'Another great post'),
(2, 'Hello World', 'My introduction post')
ON CONFLICT DO NOTHING;
```
Upload your SQL script to a secure location:
**AWS S3 Example:**
```bash theme={null}
aws s3 cp seed.sql s3://your-bucket/database-seeds/seed.sql
```
**Generate a presigned URL (valid for limited time):**
```bash theme={null}
aws s3 presign s3://your-bucket/database-seeds/seed.sql --expires-in 604800
```
You can also use Azure Blob Storage, Google Cloud Storage, or any HTTP-accessible location with authentication.
## Step 2: Create the Seeding Script
Create a shell script that will download and execute your SQL file.
Create a file named `seed.sh` with the following content:
```bash seed.sh theme={null}
#!/bin/env bash
set -e
set -u
set -o pipefail
# Check if psql is installed
if ! command -v psql &> /dev/null; then
echo "psql could not be found. Please install it and try again."
exit 1
fi
# Check if curl is installed
if ! command -v curl &> /dev/null; then
echo "curl could not be found. Please install it and try again."
exit 1
fi
# Download the SQL dump
echo "Downloading SQL seed file from: ${SEED_URL}"
curl "${SEED_URL}" -o seed.sql
# Check if seed.sql exists in the current directory
if [[ ! -f "seed.sql" ]]; then
echo "The seed.sql file could not be found in the current directory."
exit 1
fi
echo "Database seeding started."
# Seed the database
if [[ "${RESTORE_METHOD}" == "pg_restore" ]]; then
pg_restore -d "$DATABASE_URL" seed.sql
elif [[ "${RESTORE_METHOD}" == "psql" ]]; then
psql "$DATABASE_URL" < seed.sql
else
echo "Invalid restore method. Please set the RESTORE_METHOD environment variable to either 'pg_restore' or 'psql'."
exit 1
fi
echo "Database seeding completed successfully."
```
* **psql**: Used for plain SQL files (.sql)
* **pg\_restore**: Used for custom PostgreSQL dump formats (.dump, .backup)
If you're testing locally, make the script executable:
```bash theme={null}
chmod +x seed.sh
```
## Step 3: Create the Dockerfile
Create a Dockerfile that packages the seeding script with required dependencies.
Create a file named `Dockerfile`:
```dockerfile Dockerfile theme={null}
FROM debian:11-slim
# Install PostgreSQL client and curl
RUN apt update && apt install postgresql-client curl -y
# Set working directory
WORKDIR /app
# Copy the seed script
COPY seed.sh .
# Make the script executable
RUN chmod +x seed.sh
# Set bash as entrypoint
ENTRYPOINT [ "/bin/bash" ]
```
Your repository should have this structure:
```
database-seed/
├── Dockerfile
└── seed.sh
```
Push your code to a Git repository (GitHub, GitLab, or Bitbucket):
```bash theme={null}
git init
git add Dockerfile seed.sh
git commit -m "Add database seeding lifecycle job"
git remote add origin
git push -u origin main
```
## Step 4: Create Lifecycle Job in Qovery
Now create the Lifecycle Job in the Qovery Console.
Navigate to [Qovery Console](https://console.qovery.com) and select your environment.
Click **New service** → **Create lifecycle job**
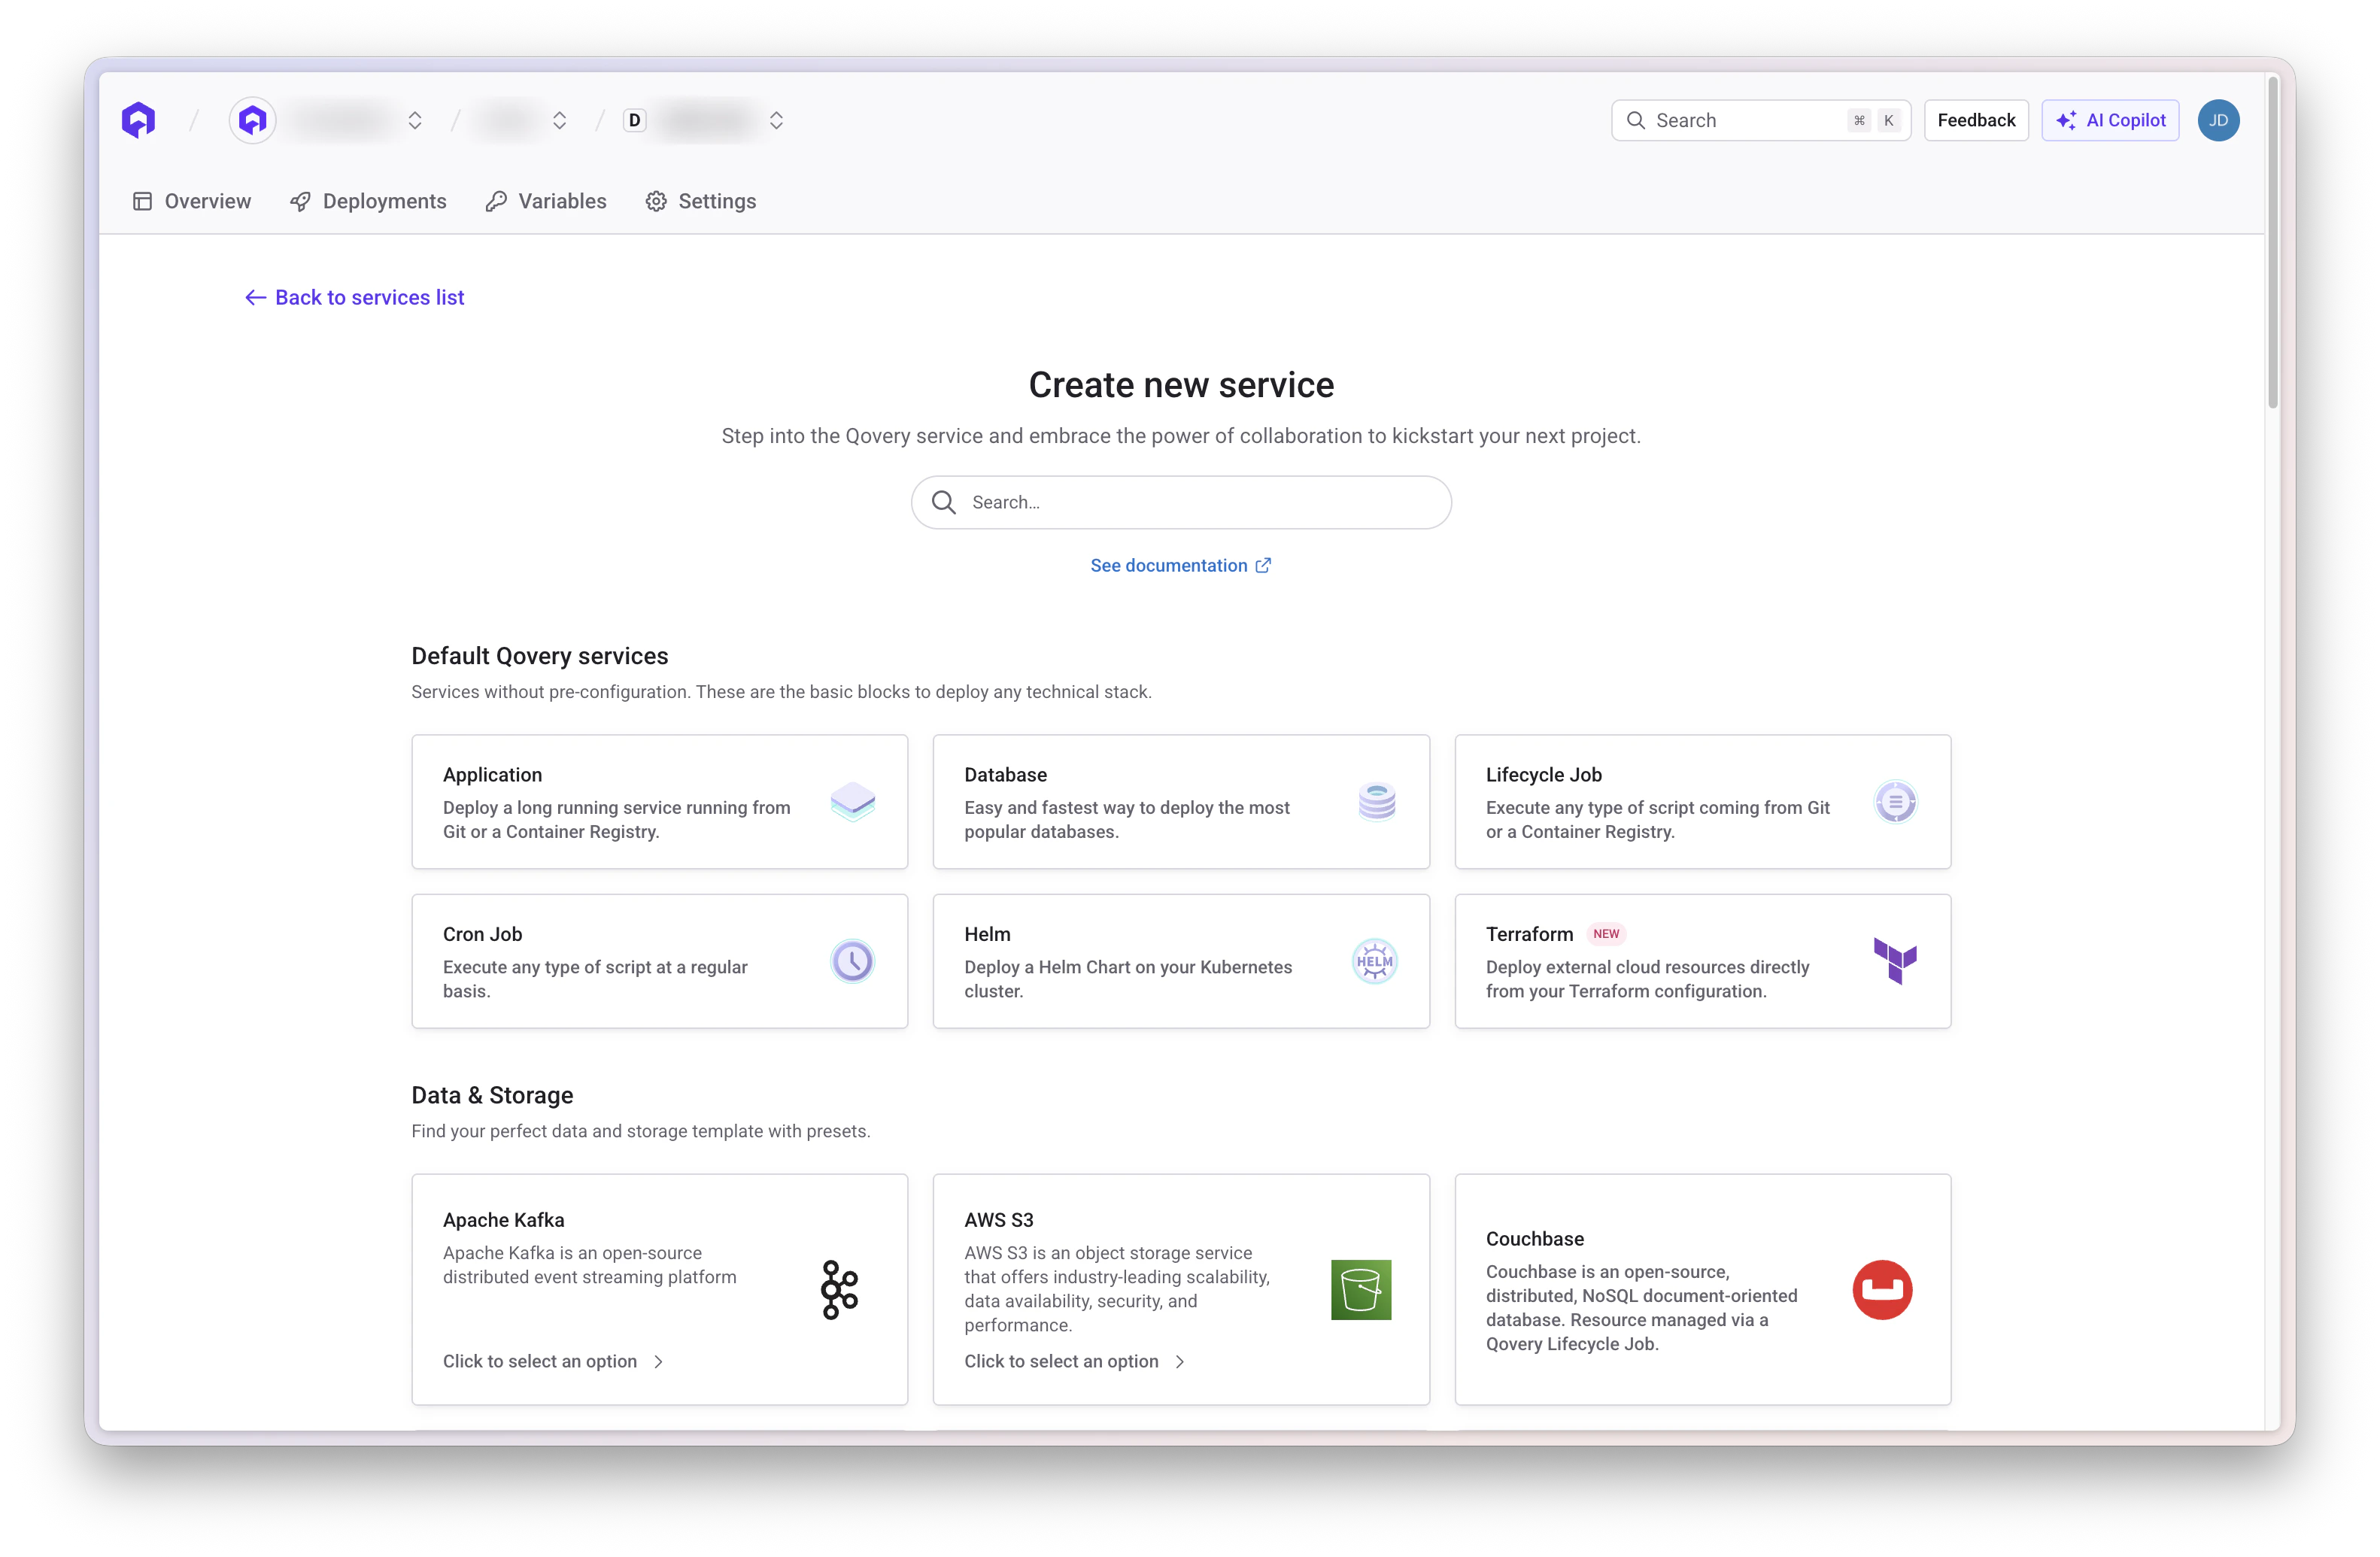 Configure the service:
* **Name**: `database-seed`
* **Source**: Select your Git provider and repository
* **Branch**: `main` (or your default branch)
* **Root application path**: Leave empty if Dockerfile is at root, or specify path if in subdirectory
* **Build mode**: Docker
* **Dockerfile path**: `Dockerfile`
* **Event**: Select **START**
This ensures the database seeding runs when your environment starts.
You can also select multiple events if needed:
* **START**: Run when environment starts
* **STOP**: Run when environment stops
* **DELETE**: Run when environment is deleted
* **Number of restarts**: 0 (job should run once and complete)
* **Max duration**: 300 seconds (adjust based on your database size)
* **Port**: Leave empty (not needed for this job)
* **CMD Arguments**: `["seed.sh"]`
Don't forget to add the CMD Arguments `["seed.sh"]` - this tells the container to execute your seeding script.
Set appropriate resources:
* **CPU**: 0.5 vCPU (adjust based on database size)
* **Memory**: 512 MB (adjust based on SQL file size)
Configure the service:
* **Name**: `database-seed`
* **Source**: Select your Git provider and repository
* **Branch**: `main` (or your default branch)
* **Root application path**: Leave empty if Dockerfile is at root, or specify path if in subdirectory
* **Build mode**: Docker
* **Dockerfile path**: `Dockerfile`
* **Event**: Select **START**
This ensures the database seeding runs when your environment starts.
You can also select multiple events if needed:
* **START**: Run when environment starts
* **STOP**: Run when environment stops
* **DELETE**: Run when environment is deleted
* **Number of restarts**: 0 (job should run once and complete)
* **Max duration**: 300 seconds (adjust based on your database size)
* **Port**: Leave empty (not needed for this job)
* **CMD Arguments**: `["seed.sh"]`
Don't forget to add the CMD Arguments `["seed.sh"]` - this tells the container to execute your seeding script.
Set appropriate resources:
* **CPU**: 0.5 vCPU (adjust based on database size)
* **Memory**: 512 MB (adjust based on SQL file size)
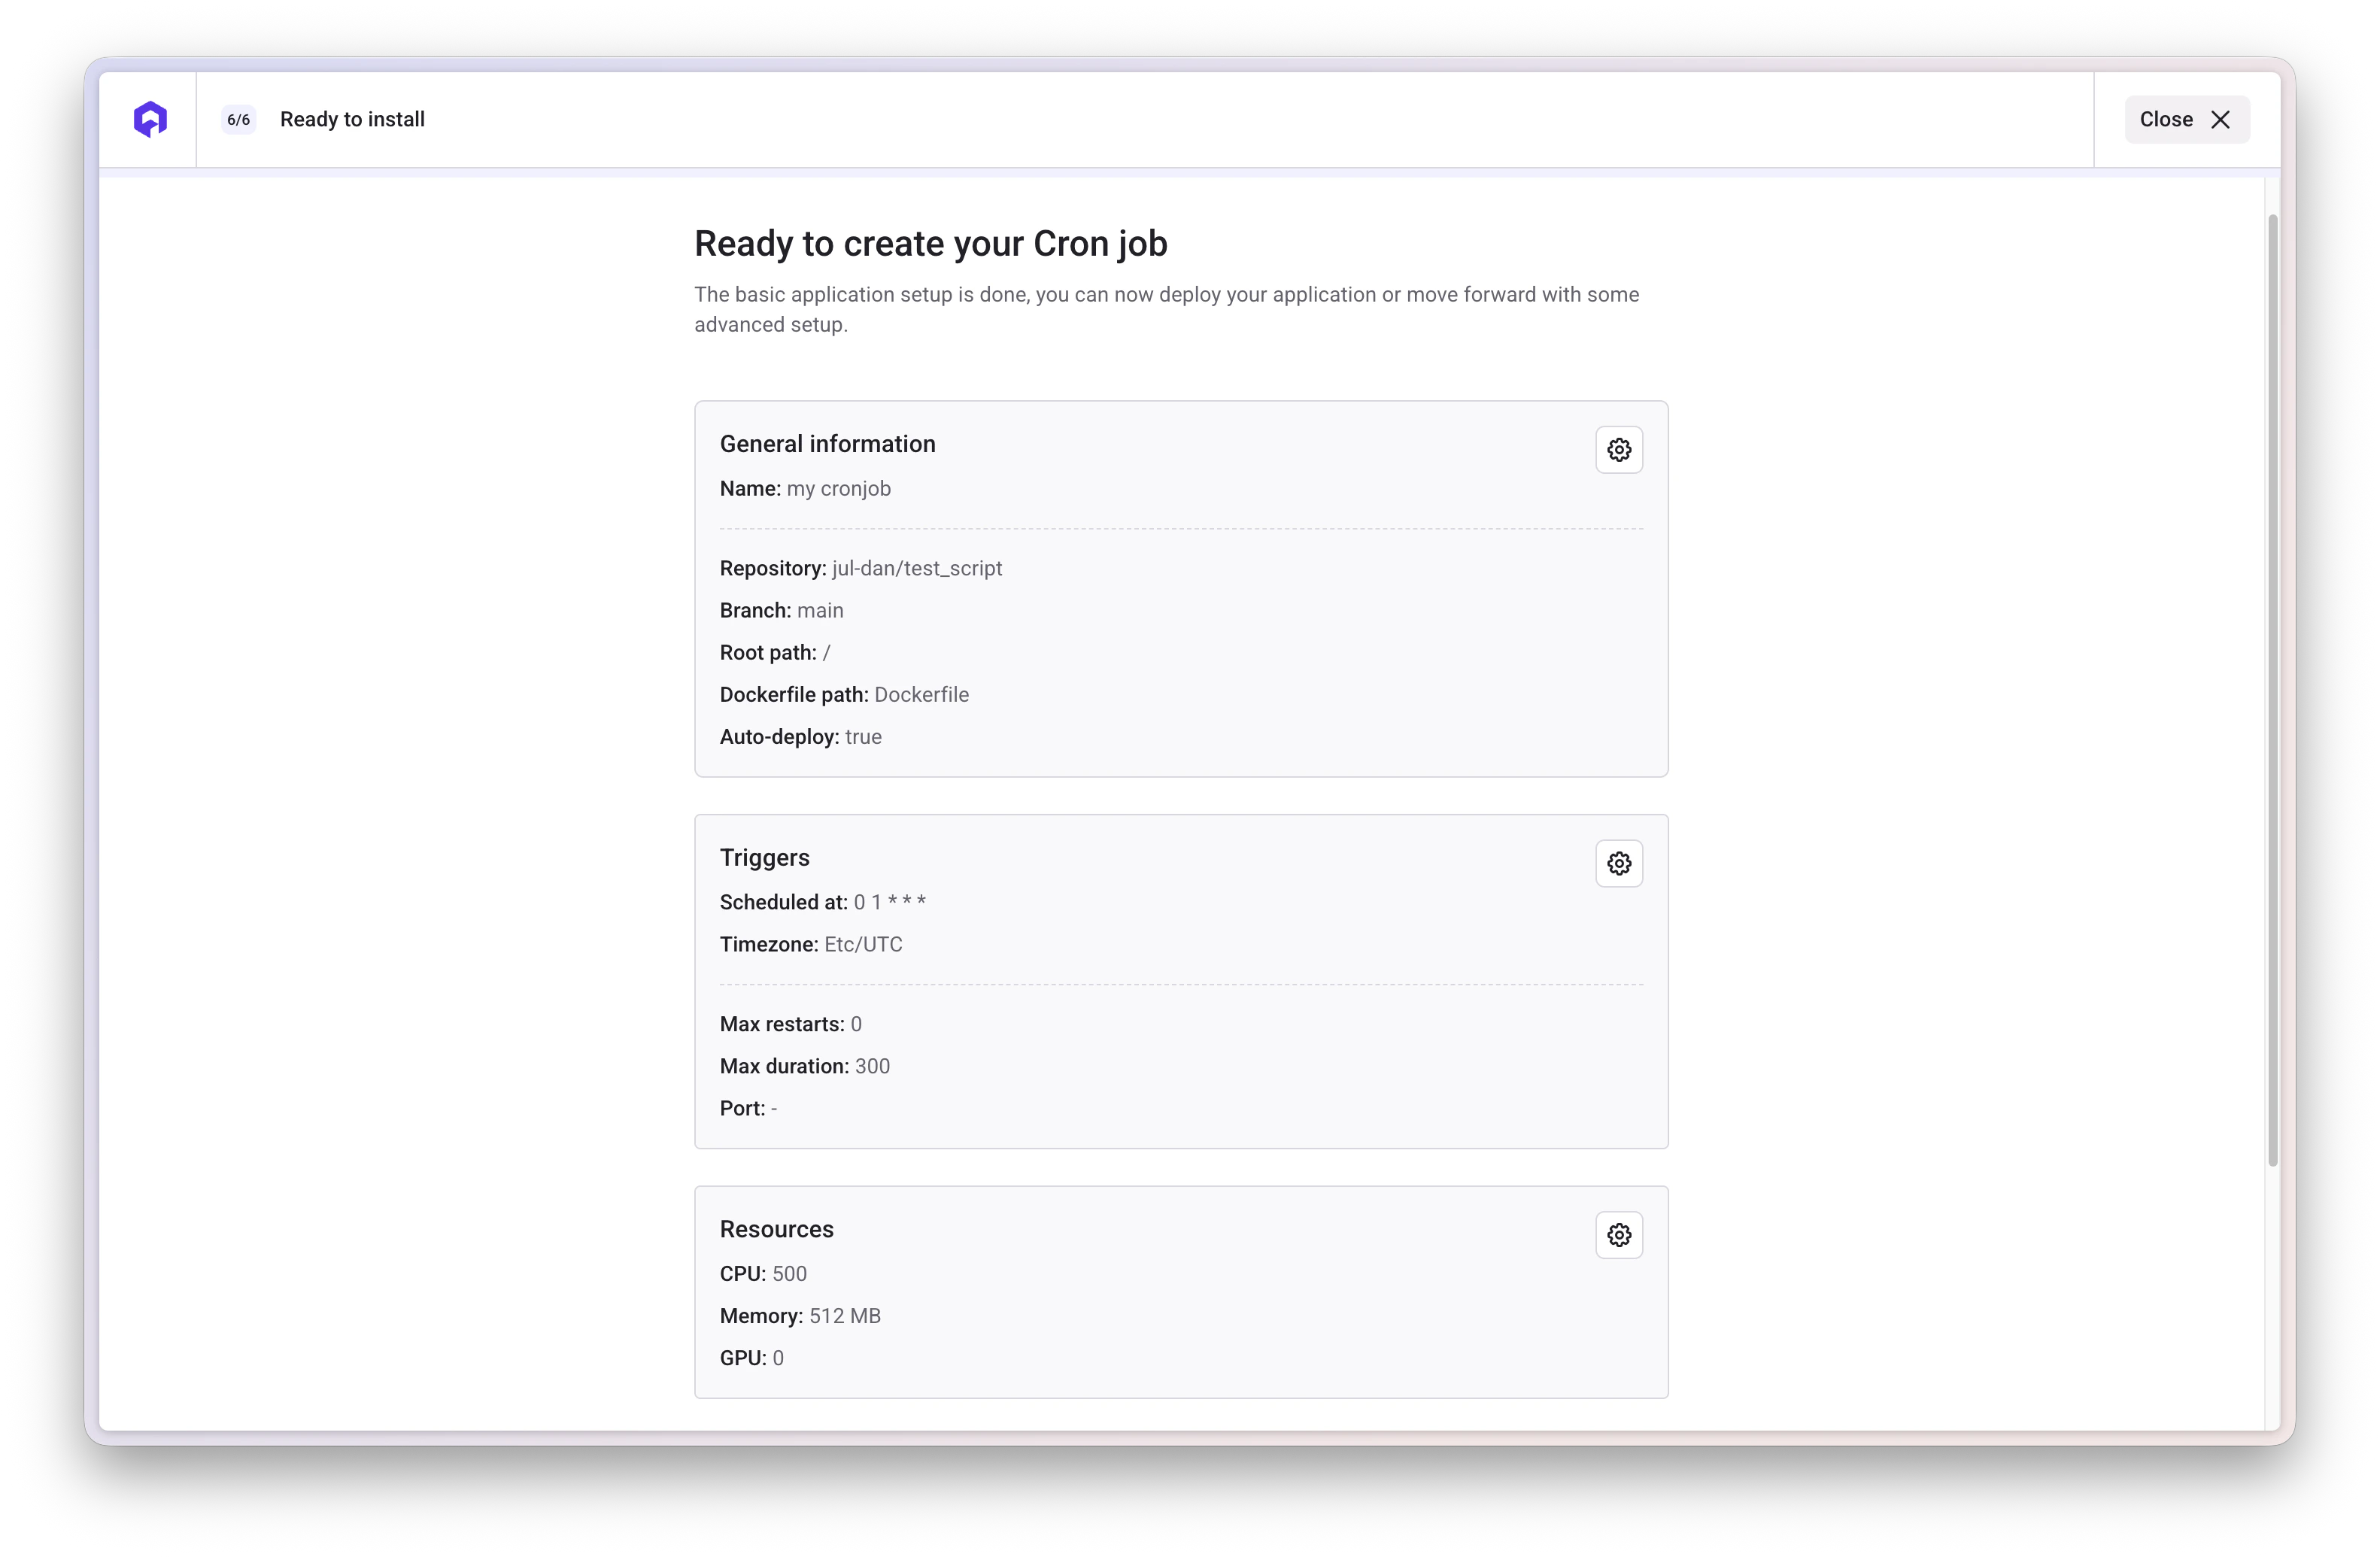 Click **Create** (not **Create and deploy**)
We need to set up environment variables before deploying.
## Step 5: Configure Environment Variables
Configure the environment variables required by your seeding script.
In your Lifecycle Job, navigate to the **Variables** section.
Click **Create** (not **Create and deploy**)
We need to set up environment variables before deploying.
## Step 5: Configure Environment Variables
Configure the environment variables required by your seeding script.
In your Lifecycle Job, navigate to the **Variables** section.
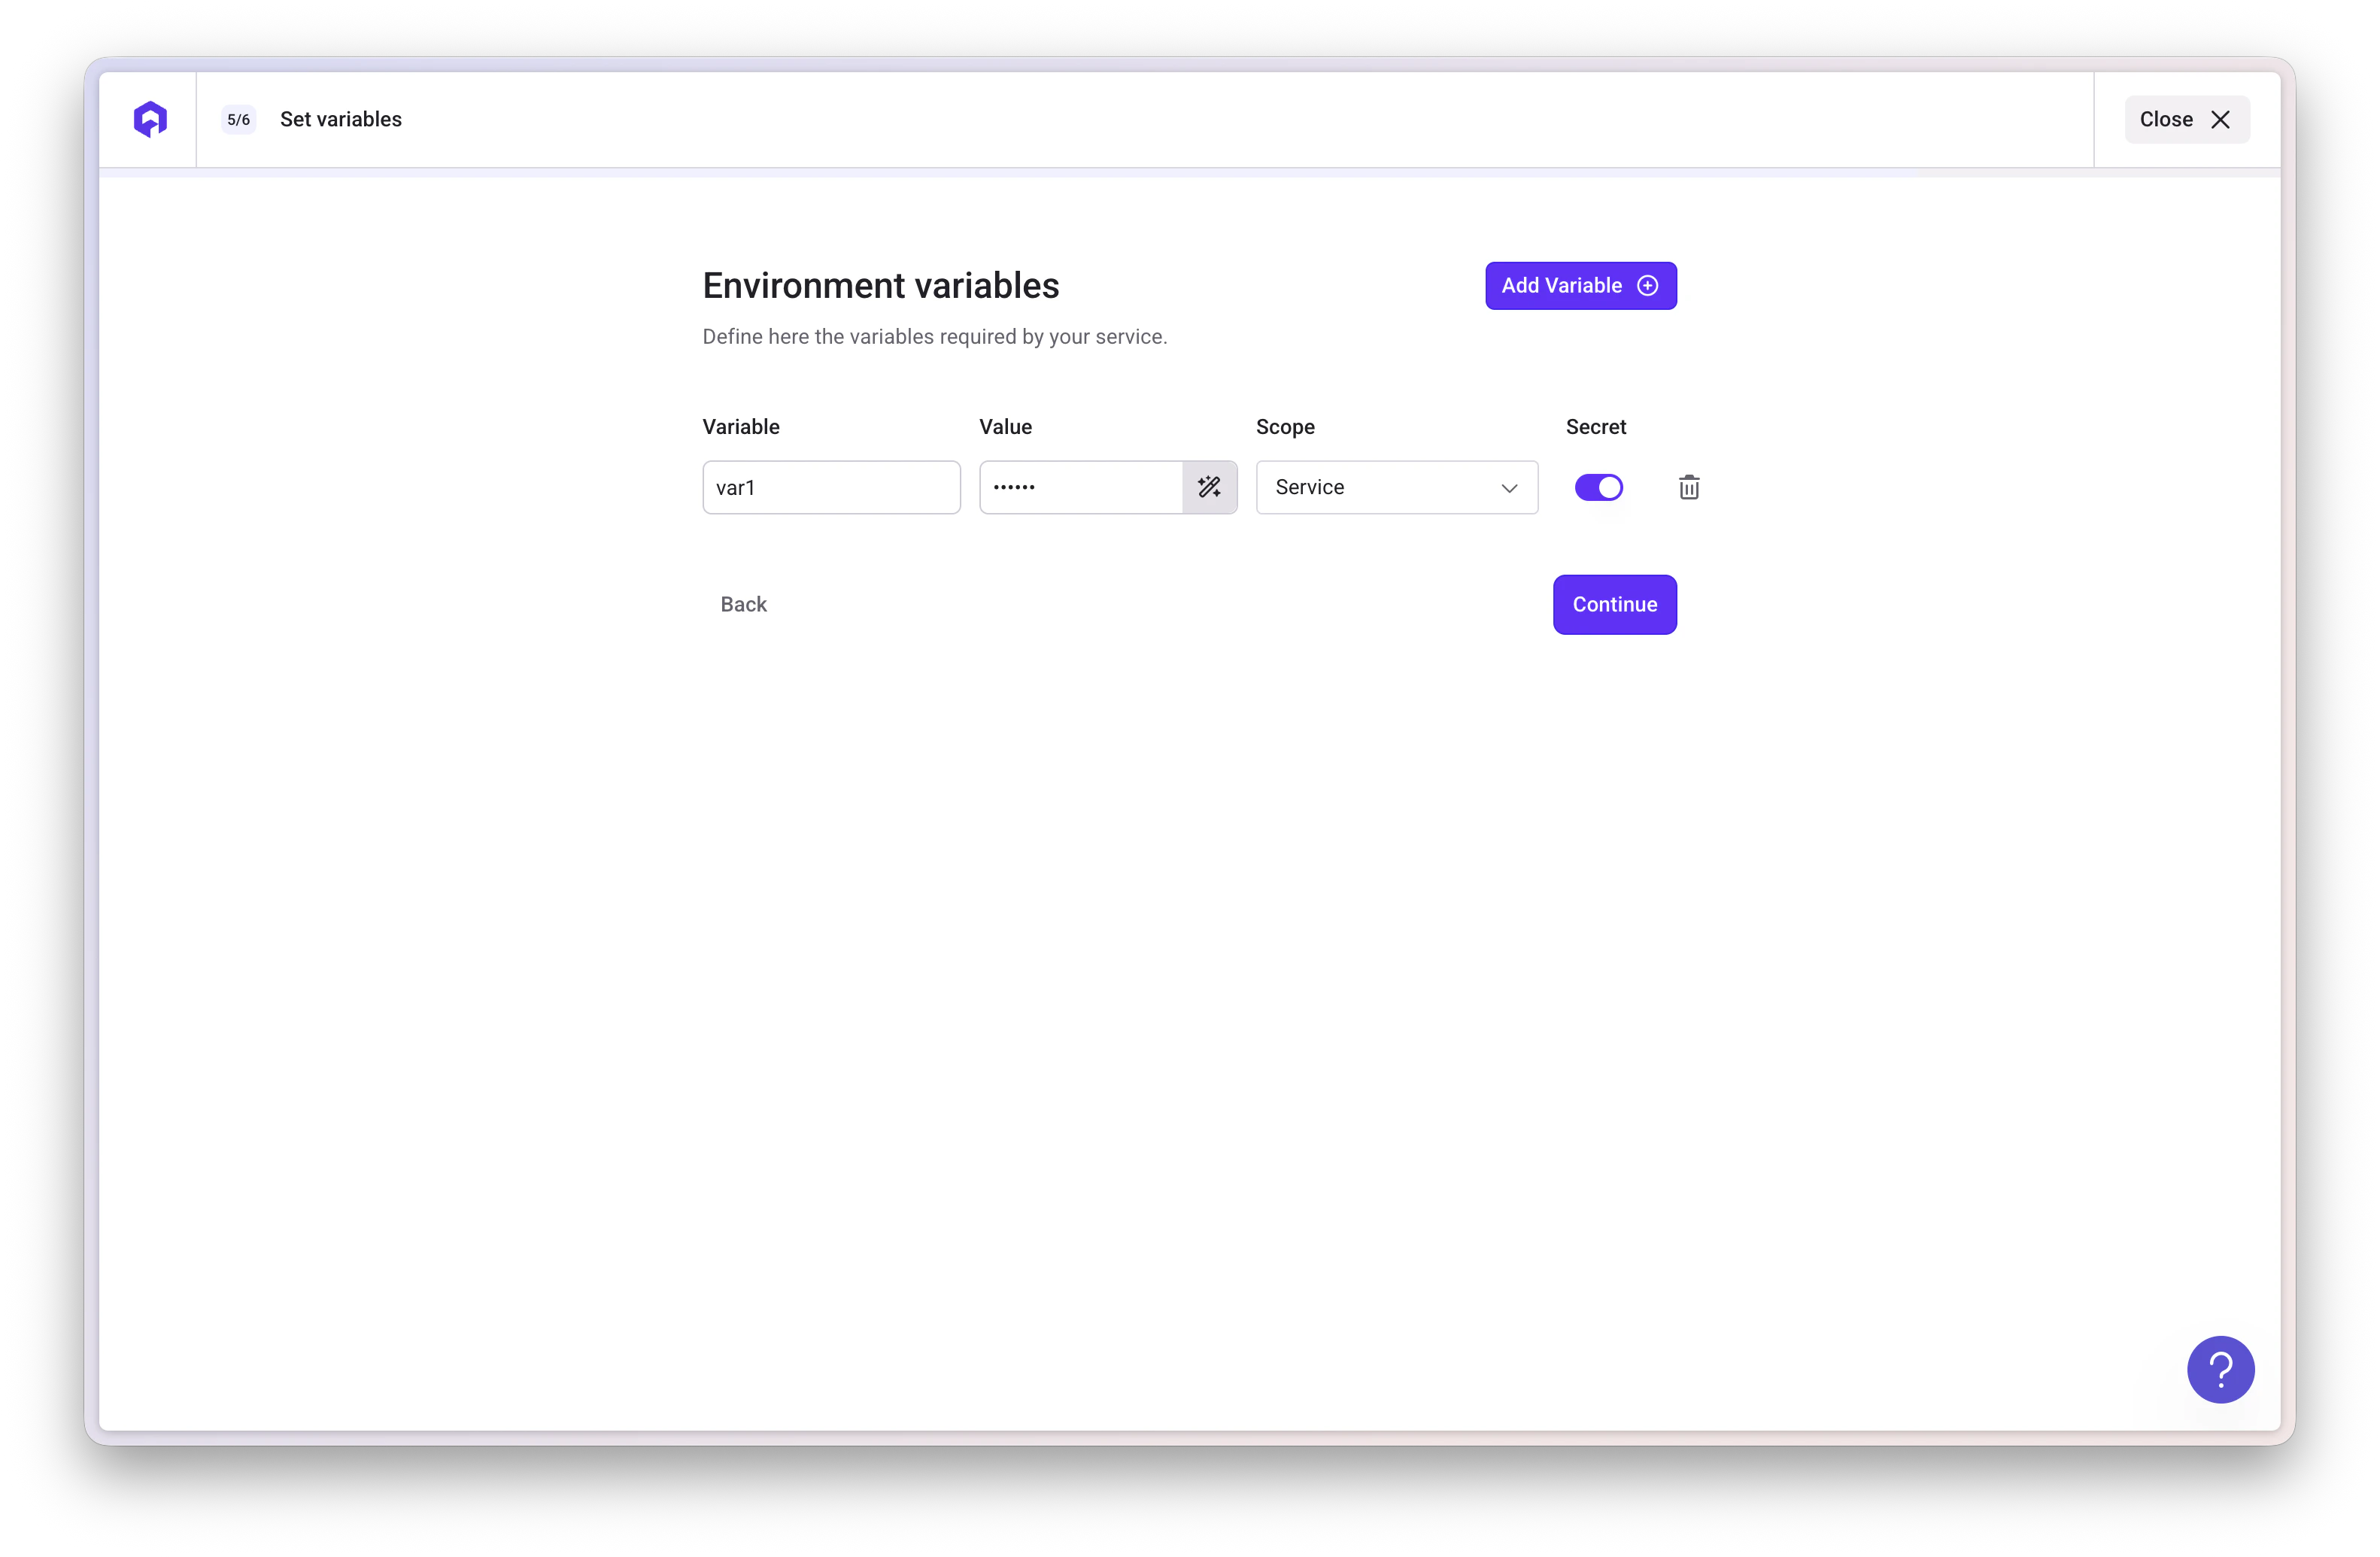 Add the database connection string:
* **Variable**: `DATABASE_URL`
* **Value**: Use the built-in alias from your PostgreSQL service
* **Type**: Alias
**Example value format:**
```
postgresql://username:password@hostname:5432/database_name
```
**Using Qovery Database Aliases**: If your PostgreSQL database is deployed in Qovery, you can reference it using built-in aliases like `$QOVERY_DATABASE_YOUR_DB_NAME_CONNECTION_URI`. This automatically provides the connection string.
Add the URL to your SQL script:
* **Variable**: `SEED_URL`
* **Value**: The URL to your SQL script (e.g., S3 presigned URL)
* **Type**: Secret (if URL contains sensitive information)
**Example:**
```
https://your-bucket.s3.amazonaws.com/database-seeds/seed.sql?AWSAccessKeyId=...
```
Specify the restore method:
* **Variable**: `RESTORE_METHOD`
* **Value**: `psql` (for plain SQL files) or `pg_restore` (for PostgreSQL dumps)
* **Type**: Value
- Use `psql` for `.sql` files created with `pg_dump --format=plain`
- Use `pg_restore` for `.dump` or `.backup` files created with `pg_dump --format=custom`
## Step 6: Deploy and Test
Deploy your Lifecycle Job and verify it works correctly.
Click **Deploy** to start the deployment.
The job will build the Docker image and wait for the next lifecycle event.
Watch the deployment logs to ensure the container builds successfully.
The seeding job will automatically run when:
* You deploy or redeploy your environment
* You start a stopped environment
* The START event is triggered
To test immediately, you can redeploy your environment.
View the Lifecycle Job logs to verify successful execution:
Add the database connection string:
* **Variable**: `DATABASE_URL`
* **Value**: Use the built-in alias from your PostgreSQL service
* **Type**: Alias
**Example value format:**
```
postgresql://username:password@hostname:5432/database_name
```
**Using Qovery Database Aliases**: If your PostgreSQL database is deployed in Qovery, you can reference it using built-in aliases like `$QOVERY_DATABASE_YOUR_DB_NAME_CONNECTION_URI`. This automatically provides the connection string.
Add the URL to your SQL script:
* **Variable**: `SEED_URL`
* **Value**: The URL to your SQL script (e.g., S3 presigned URL)
* **Type**: Secret (if URL contains sensitive information)
**Example:**
```
https://your-bucket.s3.amazonaws.com/database-seeds/seed.sql?AWSAccessKeyId=...
```
Specify the restore method:
* **Variable**: `RESTORE_METHOD`
* **Value**: `psql` (for plain SQL files) or `pg_restore` (for PostgreSQL dumps)
* **Type**: Value
- Use `psql` for `.sql` files created with `pg_dump --format=plain`
- Use `pg_restore` for `.dump` or `.backup` files created with `pg_dump --format=custom`
## Step 6: Deploy and Test
Deploy your Lifecycle Job and verify it works correctly.
Click **Deploy** to start the deployment.
The job will build the Docker image and wait for the next lifecycle event.
Watch the deployment logs to ensure the container builds successfully.
The seeding job will automatically run when:
* You deploy or redeploy your environment
* You start a stopped environment
* The START event is triggered
To test immediately, you can redeploy your environment.
View the Lifecycle Job logs to verify successful execution:
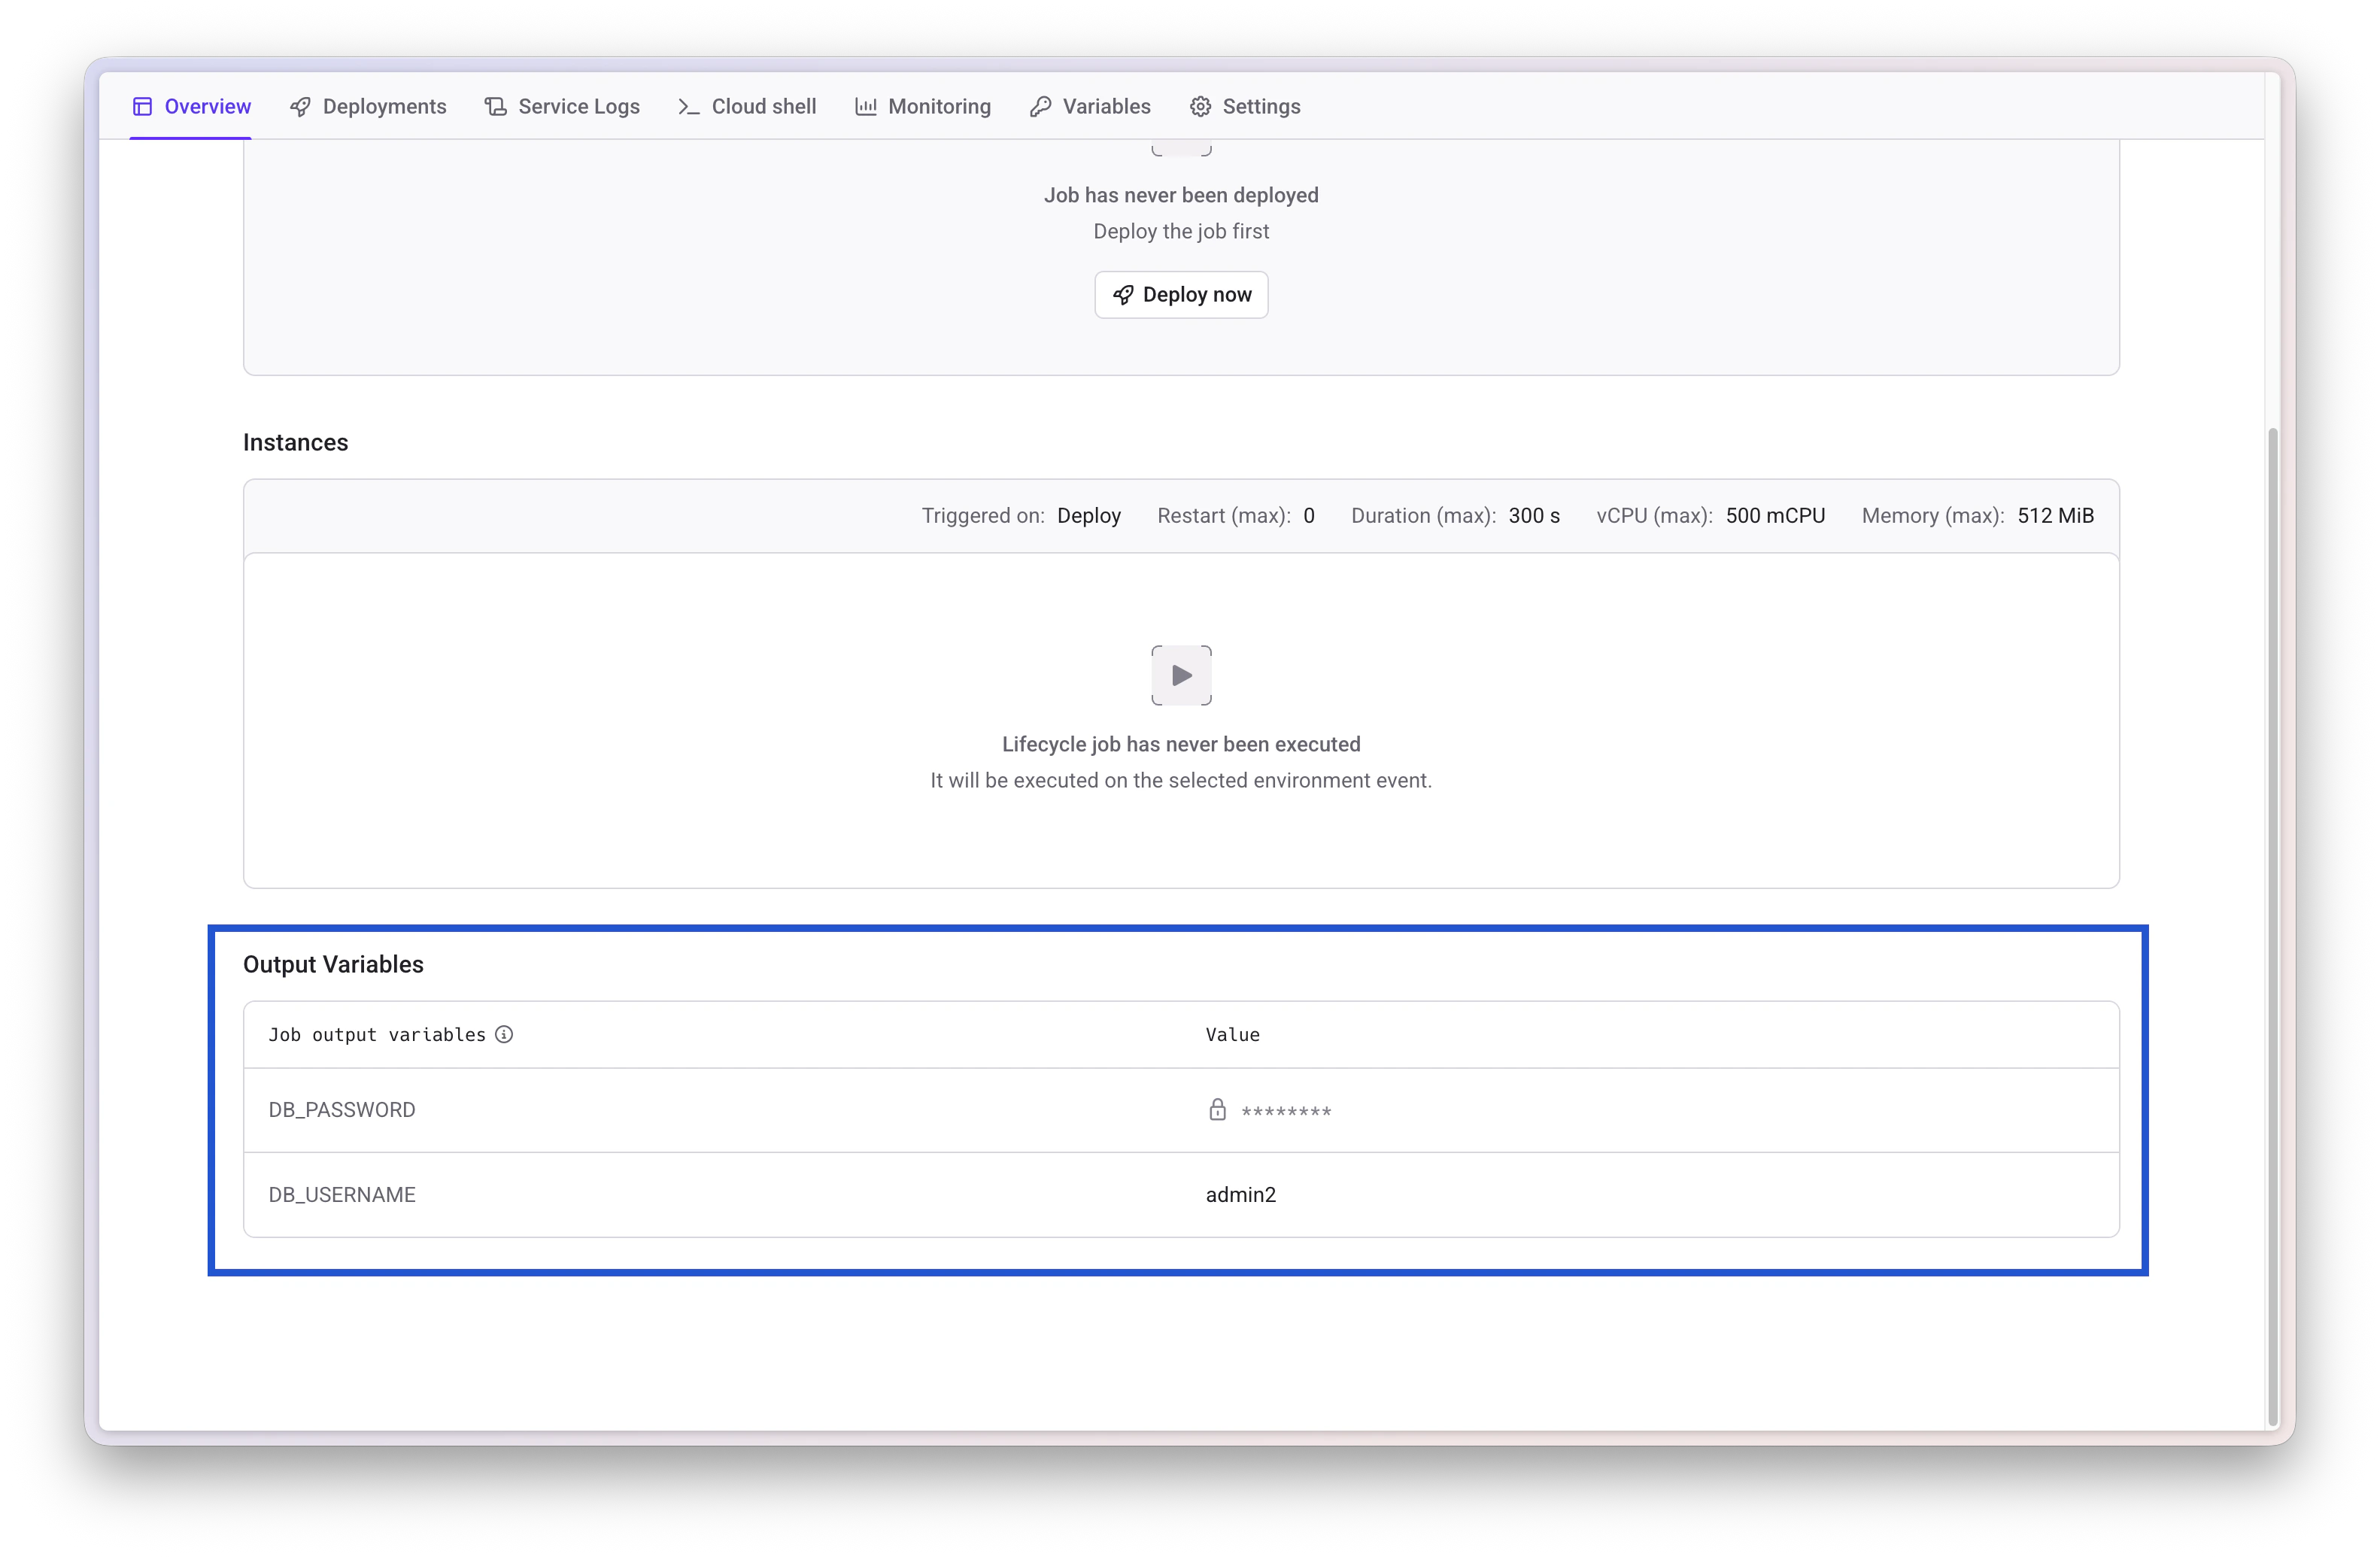 You should see output like:
```
Downloading SQL seed file from: https://...
Database seeding started.
INSERT 0 2
INSERT 0 3
Database seeding completed successfully.
```
Connect to your database and verify the data was seeded:
```sql theme={null}
SELECT * FROM users;
SELECT * FROM posts;
```
## Advanced Scenarios
### Idempotent Seeding
To make your seeding script safe to run multiple times, use idempotent SQL commands:
```sql theme={null}
-- Use IF NOT EXISTS for table creation
CREATE TABLE IF NOT EXISTS users (
id SERIAL PRIMARY KEY,
username VARCHAR(50) UNIQUE NOT NULL
);
-- Use ON CONFLICT for inserts
INSERT INTO users (username, email) VALUES
('john_doe', 'john@example.com')
ON CONFLICT (username) DO NOTHING;
-- Use ON CONFLICT DO UPDATE to update existing records
INSERT INTO users (username, email) VALUES
('john_doe', 'john@example.com')
ON CONFLICT (username)
DO UPDATE SET email = EXCLUDED.email;
```
### Using Multiple SQL Files
Modify your seed script to handle multiple SQL files:
```bash theme={null}
#!/bin/env bash
set -e
# Array of SQL files to execute in order
SQL_FILES=(
"01-schema.sql"
"02-seed-users.sql"
"03-seed-posts.sql"
)
for sql_file in "${SQL_FILES[@]}"; do
echo "Downloading ${sql_file}..."
curl "${SEED_BASE_URL}/${sql_file}" -o "${sql_file}"
echo "Executing ${sql_file}..."
psql "$DATABASE_URL" < "${sql_file}"
done
echo "All database seeding completed successfully."
```
### Conditional Seeding
Only seed if database is empty:
```bash theme={null}
#!/bin/env bash
set -e
# Check if database is empty
TABLE_COUNT=$(psql "$DATABASE_URL" -t -c "SELECT COUNT(*) FROM information_schema.tables WHERE table_schema = 'public';")
if [ "$TABLE_COUNT" -eq 0 ]; then
echo "Database is empty. Proceeding with seeding..."
curl "${SEED_URL}" -o seed.sql
psql "$DATABASE_URL" < seed.sql
echo "Database seeding completed."
else
echo "Database already contains tables. Skipping seeding."
fi
```
### Environment-Specific Seeds
Use different seed files for different environments:
```bash theme={null}
#!/bin/env bash
set -e
# Determine seed file based on environment
if [[ "${QOVERY_ENVIRONMENT_TYPE}" == "PRODUCTION" ]]; then
SEED_FILE="production-seed.sql"
elif [[ "${QOVERY_ENVIRONMENT_TYPE}" == "STAGING" ]]; then
SEED_FILE="staging-seed.sql"
else
SEED_FILE="development-seed.sql"
fi
echo "Using seed file: ${SEED_FILE}"
curl "${SEED_BASE_URL}/${SEED_FILE}" -o seed.sql
psql "$DATABASE_URL" < seed.sql
```
## Troubleshooting
### Job Fails with "psql: command not found"
**Issue**: PostgreSQL client not installed in container
**Solution**: Verify your Dockerfile installs `postgresql-client`:
```dockerfile theme={null}
RUN apt update && apt install postgresql-client -y
```
### Connection Timeout to Database
**Issue**: Cannot connect to database from Lifecycle Job
**Checklist**:
* ✅ Database is deployed and running
* ✅ `DATABASE_URL` environment variable is correctly set
* ✅ Database and Lifecycle Job are in the same environment
* ✅ Network connectivity between services is enabled
### SQL File Download Fails
**Issue**: Cannot download SQL file from storage
**Solution**:
* Verify the `SEED_URL` is correct and accessible
* Check if presigned URLs have expired (regenerate if needed)
* Ensure the container has network access to external URLs
* Test the URL manually with curl
### Duplicate Key Errors
**Issue**: Seeding fails with duplicate key violations
**Solution**: Use idempotent SQL commands:
```sql theme={null}
-- Instead of INSERT, use:
INSERT INTO users (username, email) VALUES ('john', 'john@example.com')
ON CONFLICT (username) DO NOTHING;
```
### Job Runs Too Long and Times Out
**Issue**: Seeding job exceeds max duration
**Solution**:
* Increase the **Max duration** in job settings
* Optimize your SQL script (use COPY instead of INSERT for large datasets)
* Split large seeds into multiple smaller files
* Consider using `pg_restore` with parallel jobs flag for large dumps
## Best Practices
Never commit sensitive data to your Git repository:
* Use presigned URLs with expiration for S3
* Store SQL files in private buckets with IAM authentication
* Use Qovery Secrets for sensitive environment variables
* Rotate presigned URLs regularly
Design your SQL scripts to be safely re-runnable:
* Use `CREATE TABLE IF NOT EXISTS`
* Use `INSERT ... ON CONFLICT DO NOTHING`
* Check for existing data before inserting
* Use transactions to ensure all-or-nothing execution
Use different seed data for different environments:
* Minimal data for development
* Realistic test data for staging
* Migration scripts only for production
* Use environment variables to select appropriate seeds
Always check job logs after deployment:
* Verify successful completion in Qovery logs
* Check database contents after seeding
* Set up alerts for job failures
* Review execution time to optimize performance
Track changes to your seed data:
* Keep seed SQL files in version control
* Use semantic versioning for seed files
* Document changes in commit messages
* Tag releases that include seed changes
Always test database seeding in non-production environments:
* Test with preview environments
* Verify on staging before production
* Test rollback procedures
* Document the seeding process
## Alternative Approaches
### Using Database Migrations
For schema changes and ongoing database updates, consider using migration tools instead:
* **Flyway**: Version-controlled database migrations
* **Liquibase**: Database-independent migration management
* **Alembic**: Python-based migration tool for SQLAlchemy
* **TypeORM/Sequelize**: Built-in migration support for Node.js
### Using Qovery Clone Environment
For duplicating existing data:
1. Create a database backup in your source environment
2. Use Qovery's Clone Environment feature
3. The cloned environment includes database snapshots
### Using Init Containers (Helm)
If deploying with Helm charts, use init containers:
```yaml theme={null}
initContainers:
- name: db-seed
image: your-seed-image
command: ["/bin/bash", "seed.sh"]
env:
- name: DATABASE_URL
value: "postgresql://..."
```
## Additional Resources
Complete guide to Qovery Lifecycle Jobs
Managing environment variables and secrets
Deploying and managing PostgreSQL databases
Complete working example on GitHub
## Next Steps
Now that you've set up database seeding, you can:
* Create environment-specific seed files for development, staging, and production
* Implement database migrations for schema changes
* Set up automated testing with seeded test data
* Use Preview Environments with fresh seed data for each PR
* Explore other Lifecycle Job use cases (backups, cleanup, monitoring)
You should see output like:
```
Downloading SQL seed file from: https://...
Database seeding started.
INSERT 0 2
INSERT 0 3
Database seeding completed successfully.
```
Connect to your database and verify the data was seeded:
```sql theme={null}
SELECT * FROM users;
SELECT * FROM posts;
```
## Advanced Scenarios
### Idempotent Seeding
To make your seeding script safe to run multiple times, use idempotent SQL commands:
```sql theme={null}
-- Use IF NOT EXISTS for table creation
CREATE TABLE IF NOT EXISTS users (
id SERIAL PRIMARY KEY,
username VARCHAR(50) UNIQUE NOT NULL
);
-- Use ON CONFLICT for inserts
INSERT INTO users (username, email) VALUES
('john_doe', 'john@example.com')
ON CONFLICT (username) DO NOTHING;
-- Use ON CONFLICT DO UPDATE to update existing records
INSERT INTO users (username, email) VALUES
('john_doe', 'john@example.com')
ON CONFLICT (username)
DO UPDATE SET email = EXCLUDED.email;
```
### Using Multiple SQL Files
Modify your seed script to handle multiple SQL files:
```bash theme={null}
#!/bin/env bash
set -e
# Array of SQL files to execute in order
SQL_FILES=(
"01-schema.sql"
"02-seed-users.sql"
"03-seed-posts.sql"
)
for sql_file in "${SQL_FILES[@]}"; do
echo "Downloading ${sql_file}..."
curl "${SEED_BASE_URL}/${sql_file}" -o "${sql_file}"
echo "Executing ${sql_file}..."
psql "$DATABASE_URL" < "${sql_file}"
done
echo "All database seeding completed successfully."
```
### Conditional Seeding
Only seed if database is empty:
```bash theme={null}
#!/bin/env bash
set -e
# Check if database is empty
TABLE_COUNT=$(psql "$DATABASE_URL" -t -c "SELECT COUNT(*) FROM information_schema.tables WHERE table_schema = 'public';")
if [ "$TABLE_COUNT" -eq 0 ]; then
echo "Database is empty. Proceeding with seeding..."
curl "${SEED_URL}" -o seed.sql
psql "$DATABASE_URL" < seed.sql
echo "Database seeding completed."
else
echo "Database already contains tables. Skipping seeding."
fi
```
### Environment-Specific Seeds
Use different seed files for different environments:
```bash theme={null}
#!/bin/env bash
set -e
# Determine seed file based on environment
if [[ "${QOVERY_ENVIRONMENT_TYPE}" == "PRODUCTION" ]]; then
SEED_FILE="production-seed.sql"
elif [[ "${QOVERY_ENVIRONMENT_TYPE}" == "STAGING" ]]; then
SEED_FILE="staging-seed.sql"
else
SEED_FILE="development-seed.sql"
fi
echo "Using seed file: ${SEED_FILE}"
curl "${SEED_BASE_URL}/${SEED_FILE}" -o seed.sql
psql "$DATABASE_URL" < seed.sql
```
## Troubleshooting
### Job Fails with "psql: command not found"
**Issue**: PostgreSQL client not installed in container
**Solution**: Verify your Dockerfile installs `postgresql-client`:
```dockerfile theme={null}
RUN apt update && apt install postgresql-client -y
```
### Connection Timeout to Database
**Issue**: Cannot connect to database from Lifecycle Job
**Checklist**:
* ✅ Database is deployed and running
* ✅ `DATABASE_URL` environment variable is correctly set
* ✅ Database and Lifecycle Job are in the same environment
* ✅ Network connectivity between services is enabled
### SQL File Download Fails
**Issue**: Cannot download SQL file from storage
**Solution**:
* Verify the `SEED_URL` is correct and accessible
* Check if presigned URLs have expired (regenerate if needed)
* Ensure the container has network access to external URLs
* Test the URL manually with curl
### Duplicate Key Errors
**Issue**: Seeding fails with duplicate key violations
**Solution**: Use idempotent SQL commands:
```sql theme={null}
-- Instead of INSERT, use:
INSERT INTO users (username, email) VALUES ('john', 'john@example.com')
ON CONFLICT (username) DO NOTHING;
```
### Job Runs Too Long and Times Out
**Issue**: Seeding job exceeds max duration
**Solution**:
* Increase the **Max duration** in job settings
* Optimize your SQL script (use COPY instead of INSERT for large datasets)
* Split large seeds into multiple smaller files
* Consider using `pg_restore` with parallel jobs flag for large dumps
## Best Practices
Never commit sensitive data to your Git repository:
* Use presigned URLs with expiration for S3
* Store SQL files in private buckets with IAM authentication
* Use Qovery Secrets for sensitive environment variables
* Rotate presigned URLs regularly
Design your SQL scripts to be safely re-runnable:
* Use `CREATE TABLE IF NOT EXISTS`
* Use `INSERT ... ON CONFLICT DO NOTHING`
* Check for existing data before inserting
* Use transactions to ensure all-or-nothing execution
Use different seed data for different environments:
* Minimal data for development
* Realistic test data for staging
* Migration scripts only for production
* Use environment variables to select appropriate seeds
Always check job logs after deployment:
* Verify successful completion in Qovery logs
* Check database contents after seeding
* Set up alerts for job failures
* Review execution time to optimize performance
Track changes to your seed data:
* Keep seed SQL files in version control
* Use semantic versioning for seed files
* Document changes in commit messages
* Tag releases that include seed changes
Always test database seeding in non-production environments:
* Test with preview environments
* Verify on staging before production
* Test rollback procedures
* Document the seeding process
## Alternative Approaches
### Using Database Migrations
For schema changes and ongoing database updates, consider using migration tools instead:
* **Flyway**: Version-controlled database migrations
* **Liquibase**: Database-independent migration management
* **Alembic**: Python-based migration tool for SQLAlchemy
* **TypeORM/Sequelize**: Built-in migration support for Node.js
### Using Qovery Clone Environment
For duplicating existing data:
1. Create a database backup in your source environment
2. Use Qovery's Clone Environment feature
3. The cloned environment includes database snapshots
### Using Init Containers (Helm)
If deploying with Helm charts, use init containers:
```yaml theme={null}
initContainers:
- name: db-seed
image: your-seed-image
command: ["/bin/bash", "seed.sh"]
env:
- name: DATABASE_URL
value: "postgresql://..."
```
## Additional Resources
Complete guide to Qovery Lifecycle Jobs
Managing environment variables and secrets
Deploying and managing PostgreSQL databases
Complete working example on GitHub
## Next Steps
Now that you've set up database seeding, you can:
* Create environment-specific seed files for development, staging, and production
* Implement database migrations for schema changes
* Set up automated testing with seeded test data
* Use Preview Environments with fresh seed data for each PR
* Explore other Lifecycle Job use cases (backups, cleanup, monitoring)