> ## Documentation Index
> Fetch the complete documentation index at: https://www.qovery.com/docs/llms.txt
> Use this file to discover all available pages before exploring further.
# Deploy JupyterHub using Helm
> Deploy JupyterHub on Qovery using the official Helm chart
JupyterHub is an easy way to interact with a computing environment through a webpage. This tutorial guides you through deploying JupyterHub on Qovery using the official Helm chart.
## Prerequisites
* Existing Qovery cluster
* Dedicated project and environment ready
***
## Installation
1. Navigate to your environment in Qovery Console
2. Add a new Helm repository:
* **Repository name**: `JupyterHub`
* **Kind**: `HTTPS`
* **URL**: `https://hub.jupyter.org/helm-chart/`
Create a new Helm service with the following configuration:
**Basic Settings:**
* **Application name**: `JupyterHub`
* **Chart name**: `jupyterhub`
* **Version**: `3.3.7`
* **Allow cluster-wide resources**: Enabled
**YAML Override:**
```yaml theme={null}
proxy:
service:
type: ClusterIP
```
The `type: ClusterIP` configuration is necessary for JupyterHub to work properly within the Qovery cluster.
Configure the service port:
* **Service name**: `jupyterhub-proxy-public`
* **Service port**: `80` (HTTP)
* **External port**: `443`
* **Port name**: `jupyterhub-proxy-public-p80`
This configuration exposes JupyterHub's proxy service externally through HTTPS.
Click the **Play button** to deploy JupyterHub:
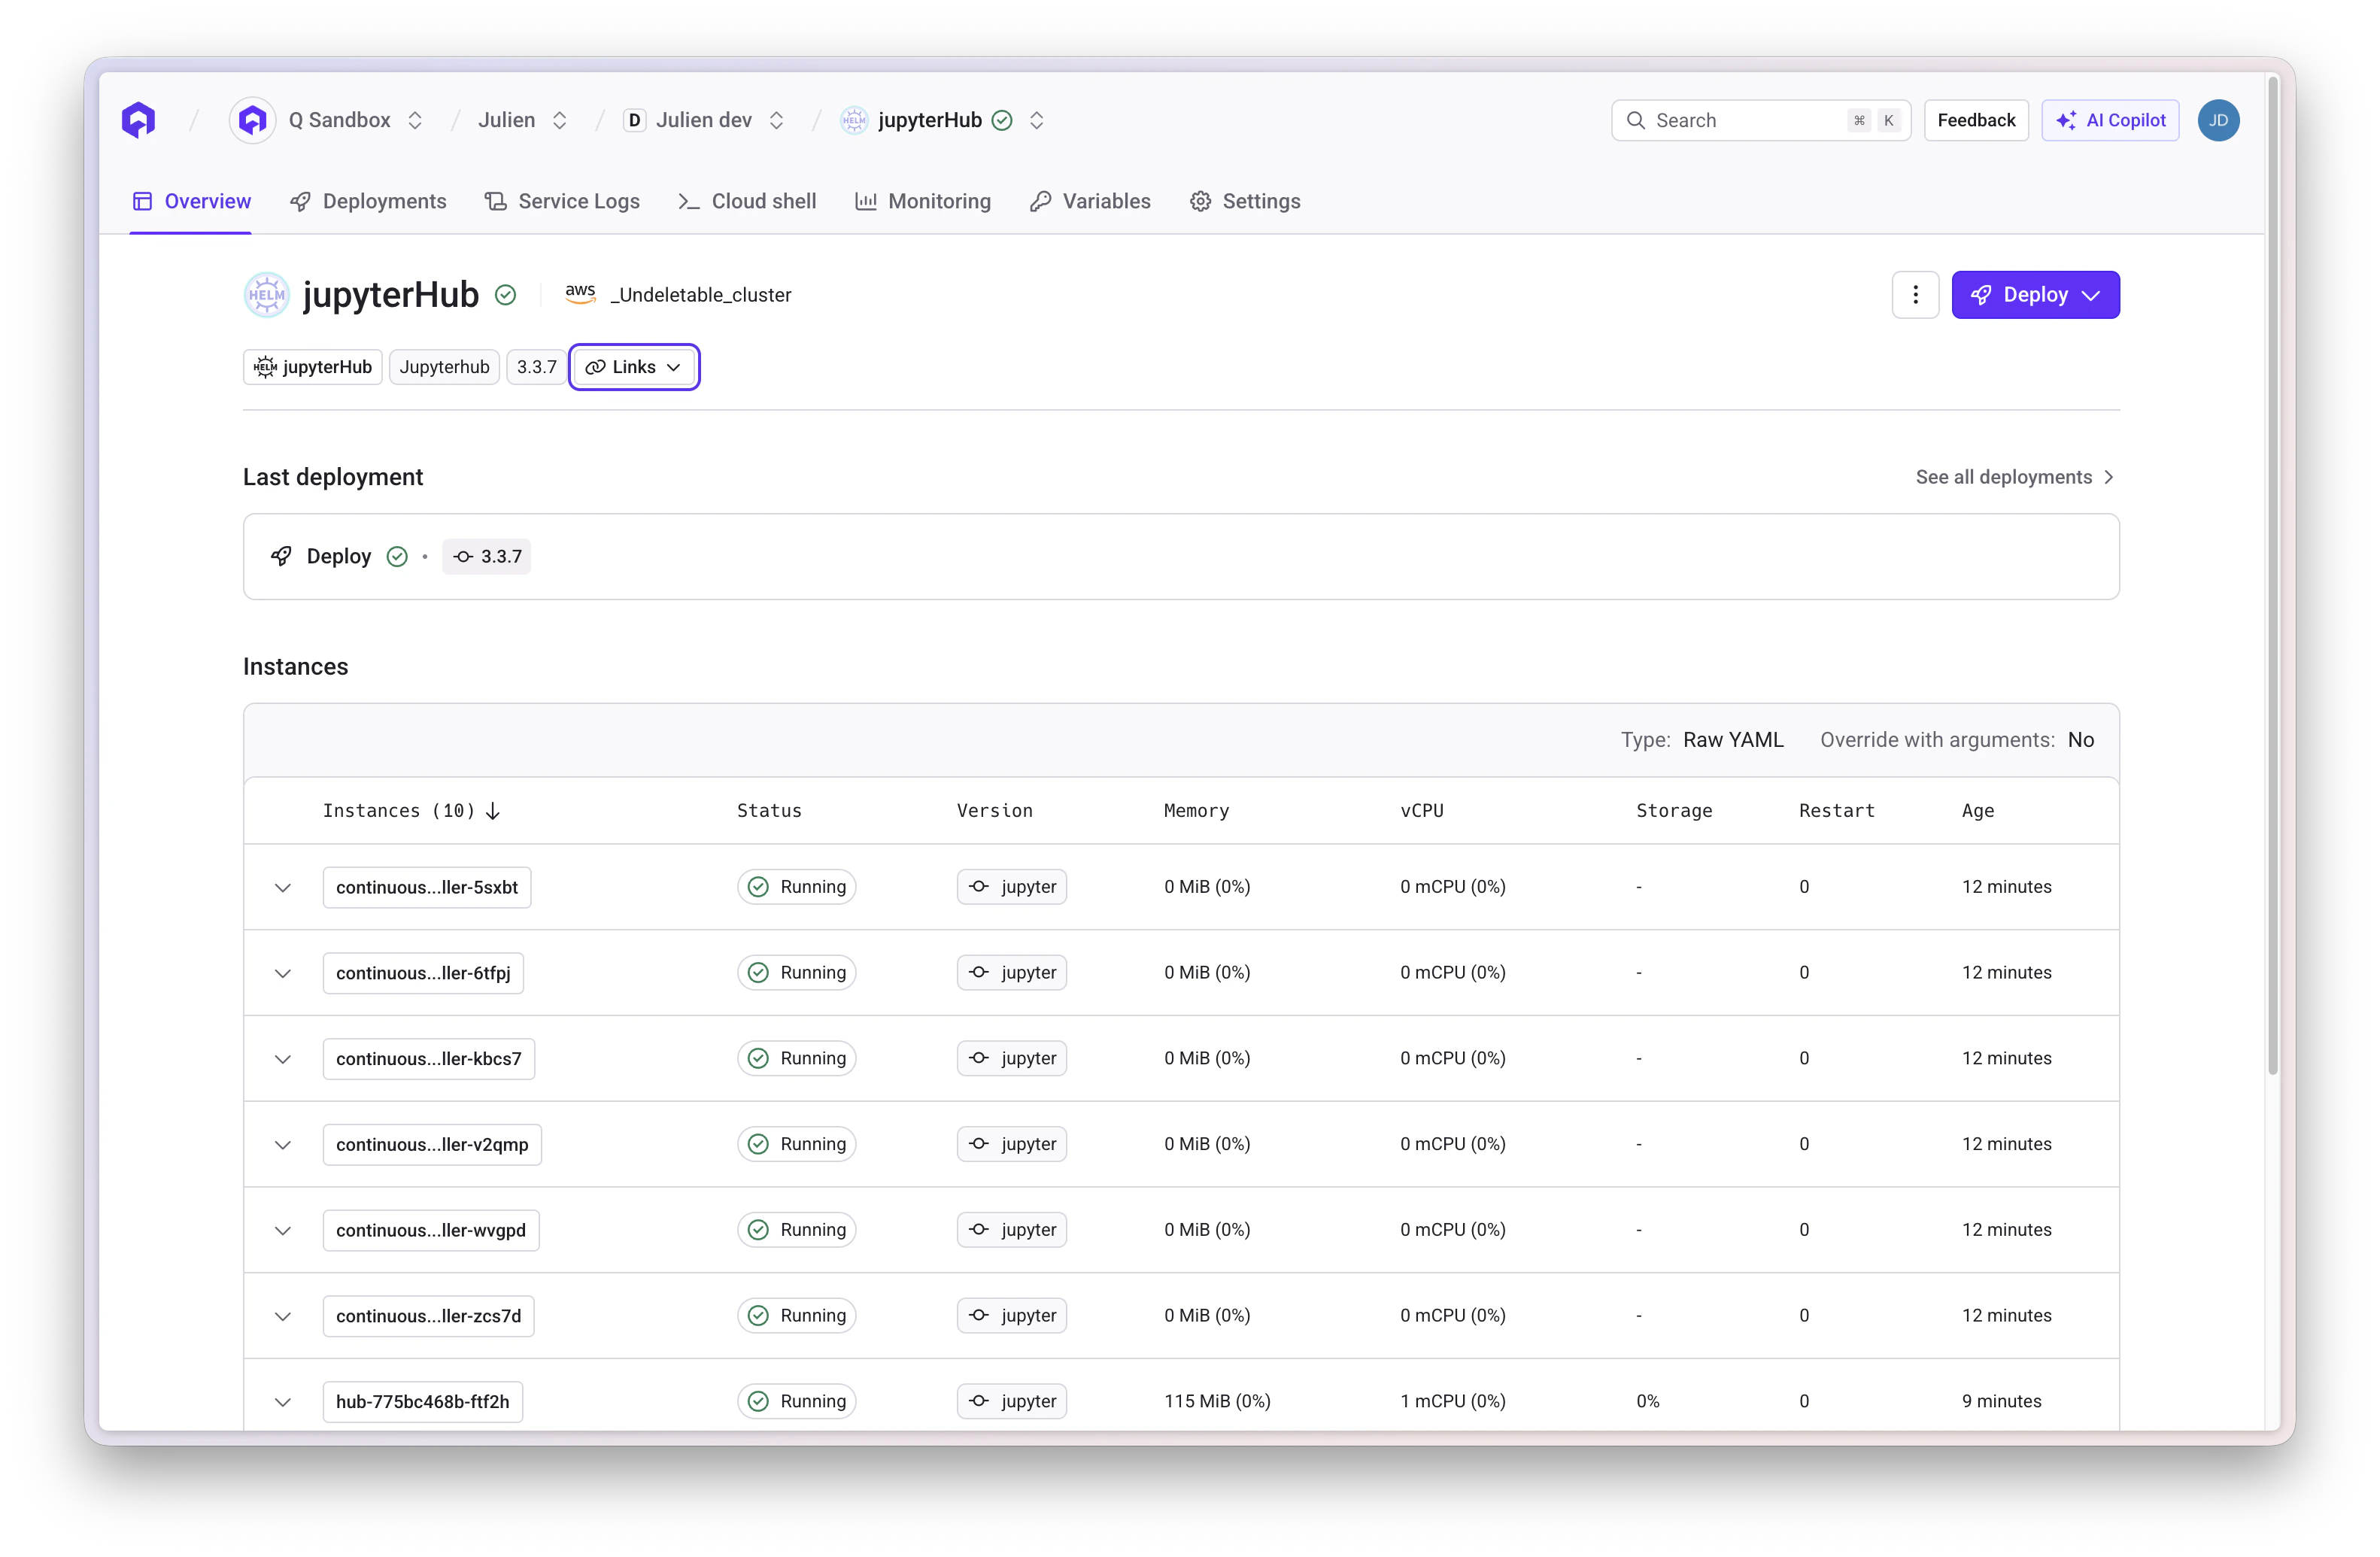 Wait for the deployment to complete. This may take several minutes as JupyterHub pulls images and initializes.
Once deployed, access JupyterHub via the **Link button** in the Qovery interface:
Wait for the deployment to complete. This may take several minutes as JupyterHub pulls images and initializes.
Once deployed, access JupyterHub via the **Link button** in the Qovery interface:
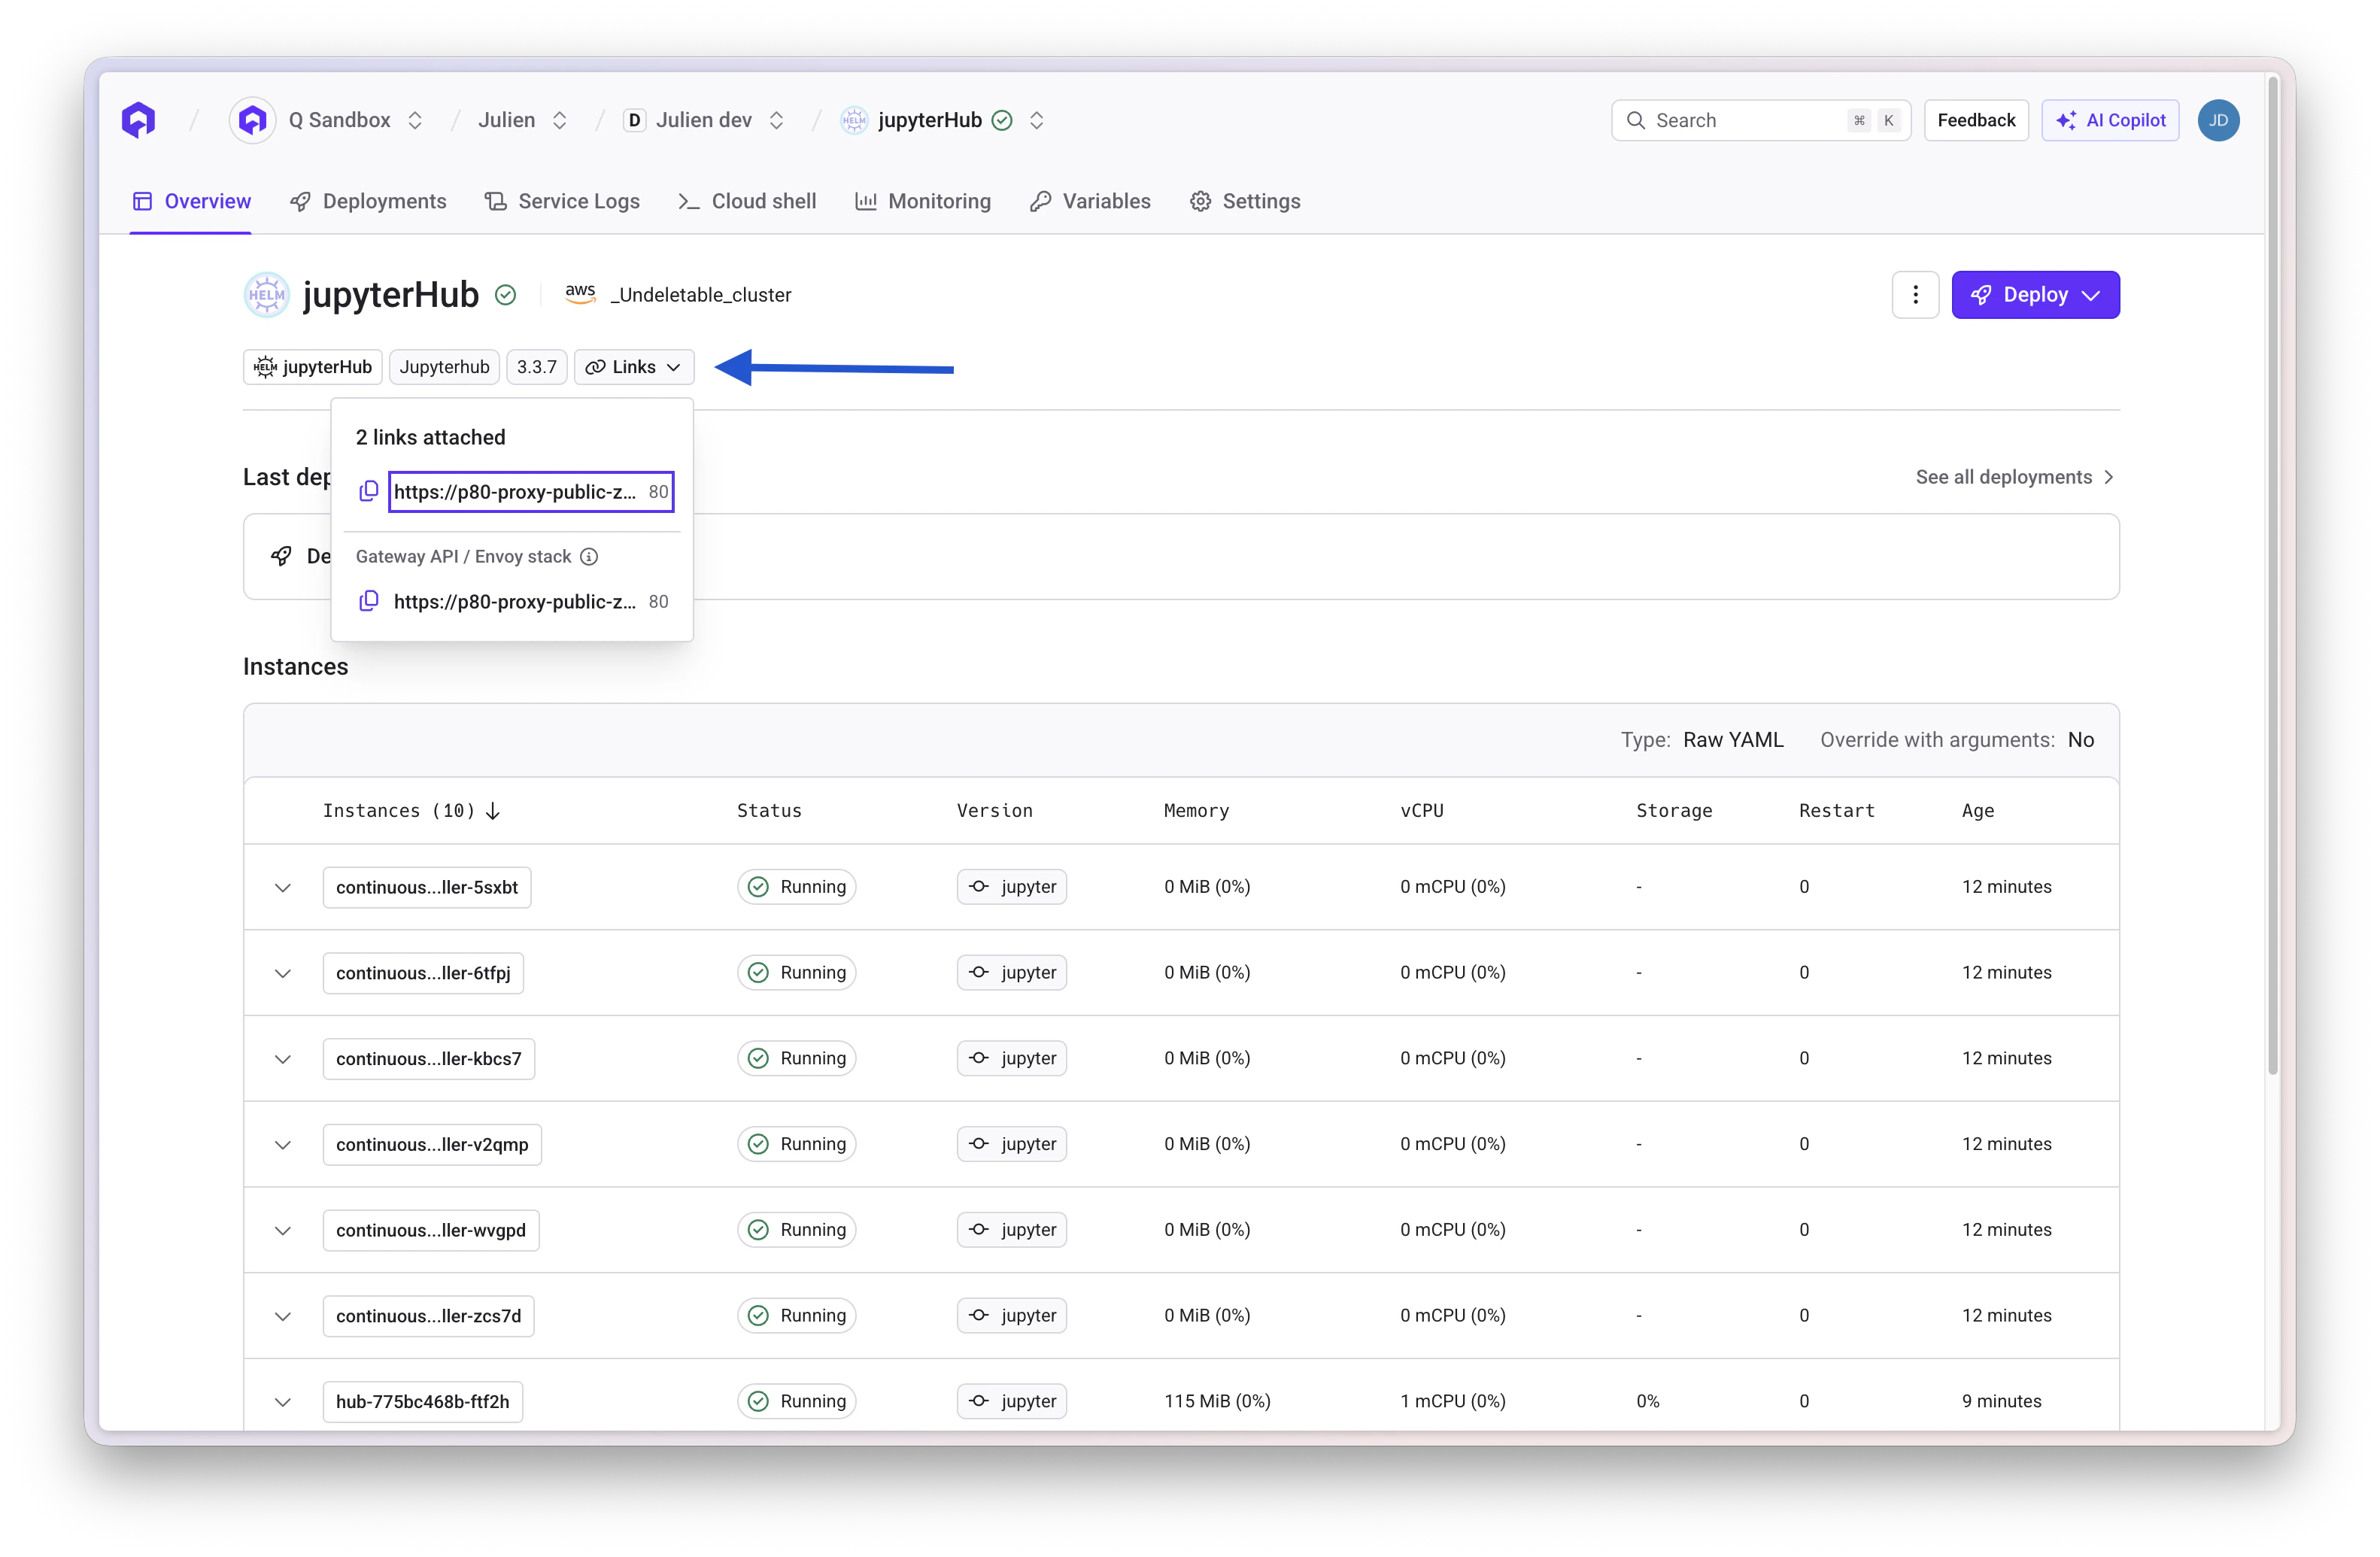 You'll be directed to the JupyterHub login page.
***
## Basic Configuration
### Default Authentication
By default, JupyterHub uses a dummy authenticator that accepts any username/password. For production use, configure proper authentication.
### Customize Your Deployment
This is a basic setup. For advanced configurations, consult:
* [JupyterHub Customization Guide](https://z2jh.jupyter.org/en/stable/jupyterhub/customization.html)
* [JupyterHub Administrator Guide](https://z2jh.jupyter.org/en/stable/administrator/index.html)
***
## Common Customizations
Use GitHub OAuth for authentication:
```yaml theme={null}
hub:
config:
JupyterHub:
authenticator_class: github
GitHubOAuthenticator:
client_id: YOUR_CLIENT_ID
client_secret: YOUR_CLIENT_SECRET
oauth_callback_url: https://your-jupyterhub-url/hub/oauth_callback
```
Add `YOUR_CLIENT_SECRET` as a secret variable in Qovery.
Set resource limits for user notebooks:
```yaml theme={null}
singleuser:
cpu:
limit: 2
guarantee: 0.5
memory:
limit: 2G
guarantee: 1G
```
HTTPS is automatically handled by Qovery. Just ensure your port configuration is correct.
Use a custom notebook image:
```yaml theme={null}
singleuser:
image:
name: jupyter/datascience-notebook
tag: latest
```
Enable persistent storage for user notebooks:
```yaml theme={null}
singleuser:
storage:
type: dynamic
capacity: 10Gi
dynamic:
storageClass: gp2 # AWS EBS
```
***
## Accessing User Notebooks
### Default Spawner
Users can spawn notebooks with different configurations:
* Minimal environment
* Data science stack (pandas, numpy, scipy)
* TensorFlow/PyTorch for machine learning
### Custom Profiles
Define multiple profiles for users:
```yaml theme={null}
singleuser:
profileList:
- display_name: "Minimal environment"
description: "Basic Python environment"
default: true
- display_name: "Data Science"
description: "Includes pandas, numpy, scipy"
kubespawner_override:
image: jupyter/datascience-notebook:latest
- display_name: "Machine Learning"
description: "TensorFlow and PyTorch"
kubespawner_override:
image: jupyter/tensorflow-notebook:latest
cpu_limit: 4
mem_limit: "8G"
```
***
## Troubleshooting
* Check pod logs in Qovery Console
* Verify cluster has sufficient resources
* Ensure cluster-wide resources are enabled
* Check for image pull errors
* Verify the service port configuration
* Check that the port name matches
* Ensure HTTPS is properly configured
* Check ingress logs for errors
* Check resource quotas on the cluster
* Verify storage provisioner is working
* Review user pod logs
* Check for image pull errors
* Ensure persistent storage is configured
* Verify PVC (PersistentVolumeClaim) is created
* Check storage class is available
* Review volume mount configuration
***
## Scaling JupyterHub
### Horizontal Scaling
Scale the hub component:
```yaml theme={null}
hub:
replicas: 2
```
### Resource Allocation
Adjust hub resources:
```yaml theme={null}
hub:
resources:
requests:
cpu: 500m
memory: 1Gi
limits:
cpu: 2
memory: 2Gi
```
***
## Related Documentation
Learn about deploying with Helm
Configure service advanced settings
Manage secrets and variables
Configure persistent storage
You'll be directed to the JupyterHub login page.
***
## Basic Configuration
### Default Authentication
By default, JupyterHub uses a dummy authenticator that accepts any username/password. For production use, configure proper authentication.
### Customize Your Deployment
This is a basic setup. For advanced configurations, consult:
* [JupyterHub Customization Guide](https://z2jh.jupyter.org/en/stable/jupyterhub/customization.html)
* [JupyterHub Administrator Guide](https://z2jh.jupyter.org/en/stable/administrator/index.html)
***
## Common Customizations
Use GitHub OAuth for authentication:
```yaml theme={null}
hub:
config:
JupyterHub:
authenticator_class: github
GitHubOAuthenticator:
client_id: YOUR_CLIENT_ID
client_secret: YOUR_CLIENT_SECRET
oauth_callback_url: https://your-jupyterhub-url/hub/oauth_callback
```
Add `YOUR_CLIENT_SECRET` as a secret variable in Qovery.
Set resource limits for user notebooks:
```yaml theme={null}
singleuser:
cpu:
limit: 2
guarantee: 0.5
memory:
limit: 2G
guarantee: 1G
```
HTTPS is automatically handled by Qovery. Just ensure your port configuration is correct.
Use a custom notebook image:
```yaml theme={null}
singleuser:
image:
name: jupyter/datascience-notebook
tag: latest
```
Enable persistent storage for user notebooks:
```yaml theme={null}
singleuser:
storage:
type: dynamic
capacity: 10Gi
dynamic:
storageClass: gp2 # AWS EBS
```
***
## Accessing User Notebooks
### Default Spawner
Users can spawn notebooks with different configurations:
* Minimal environment
* Data science stack (pandas, numpy, scipy)
* TensorFlow/PyTorch for machine learning
### Custom Profiles
Define multiple profiles for users:
```yaml theme={null}
singleuser:
profileList:
- display_name: "Minimal environment"
description: "Basic Python environment"
default: true
- display_name: "Data Science"
description: "Includes pandas, numpy, scipy"
kubespawner_override:
image: jupyter/datascience-notebook:latest
- display_name: "Machine Learning"
description: "TensorFlow and PyTorch"
kubespawner_override:
image: jupyter/tensorflow-notebook:latest
cpu_limit: 4
mem_limit: "8G"
```
***
## Troubleshooting
* Check pod logs in Qovery Console
* Verify cluster has sufficient resources
* Ensure cluster-wide resources are enabled
* Check for image pull errors
* Verify the service port configuration
* Check that the port name matches
* Ensure HTTPS is properly configured
* Check ingress logs for errors
* Check resource quotas on the cluster
* Verify storage provisioner is working
* Review user pod logs
* Check for image pull errors
* Ensure persistent storage is configured
* Verify PVC (PersistentVolumeClaim) is created
* Check storage class is available
* Review volume mount configuration
***
## Scaling JupyterHub
### Horizontal Scaling
Scale the hub component:
```yaml theme={null}
hub:
replicas: 2
```
### Resource Allocation
Adjust hub resources:
```yaml theme={null}
hub:
resources:
requests:
cpu: 500m
memory: 1Gi
limits:
cpu: 2
memory: 2Gi
```
***
## Related Documentation
Learn about deploying with Helm
Configure service advanced settings
Manage secrets and variables
Configure persistent storage