> ## Documentation Index
> Fetch the complete documentation index at: https://www.qovery.com/docs/llms.txt
> Use this file to discover all available pages before exploring further.
# Jira Coding Agent
> Ready-made Agent Task that picks up a Jira issue and proposes the corresponding code change
**Early Preview.** Agent Tasks is available in early preview to a limited set of organizations. Capabilities and setup will change before general availability.
## Overview
Picks up a Jira issue and proposes the corresponding code change as a pull request against the repository (or repositories) you connect.
## Setting It Up
From the **Agent use cases** section when creating a new service, pick **Jira Coding Agent** (see [Creating an Agent](/docs/configuration/agent-tasks/overview#creating-an-agent)).
The template ships with three environment variables for connecting to Jira: a base URL (for example `https://company.atlassian.net`), an email, and an API token. Add `company.atlassian.net` to the domain allowlist so the agent can reach the Jira API. If you don't need Jira access for your workflow, remove these and adapt the instructions accordingly.
To create the API token:
1. Click your profile in the top right of Jira, then **Account Settings**
2. Go to **Security**
3. Under **Create and manage API tokens**, click **Create API token**
Add the Git repository, or repositories, this agent should code against as its Context. You can also add a Qovery service as Context, alongside its repository.
Enter your Anthropic API key, the only provider supported today.
Not required for this use case by default, add any if your workflow needs them. See [Creating an Agent](/docs/configuration/agent-tasks/overview#creating-an-agent).
Select **From a webhook**, and copy the generated webhook URL from the agent task's overview page, you'll need it next.
In Jira, go to your project's **Settings > Automation**, then **Create flow > Create from scratch**. For example, to call the agent whenever a label is added: choose the **Field value changed** trigger, select **Labels** as the field, and leave the change type as **Any changes to the field value**. Add a JQL condition to scope it (for example `labels = "go-agent"`), then add a **Send web request** action with the URL from the previous step, method `POST`, and body **Issue data (Automation format)**.
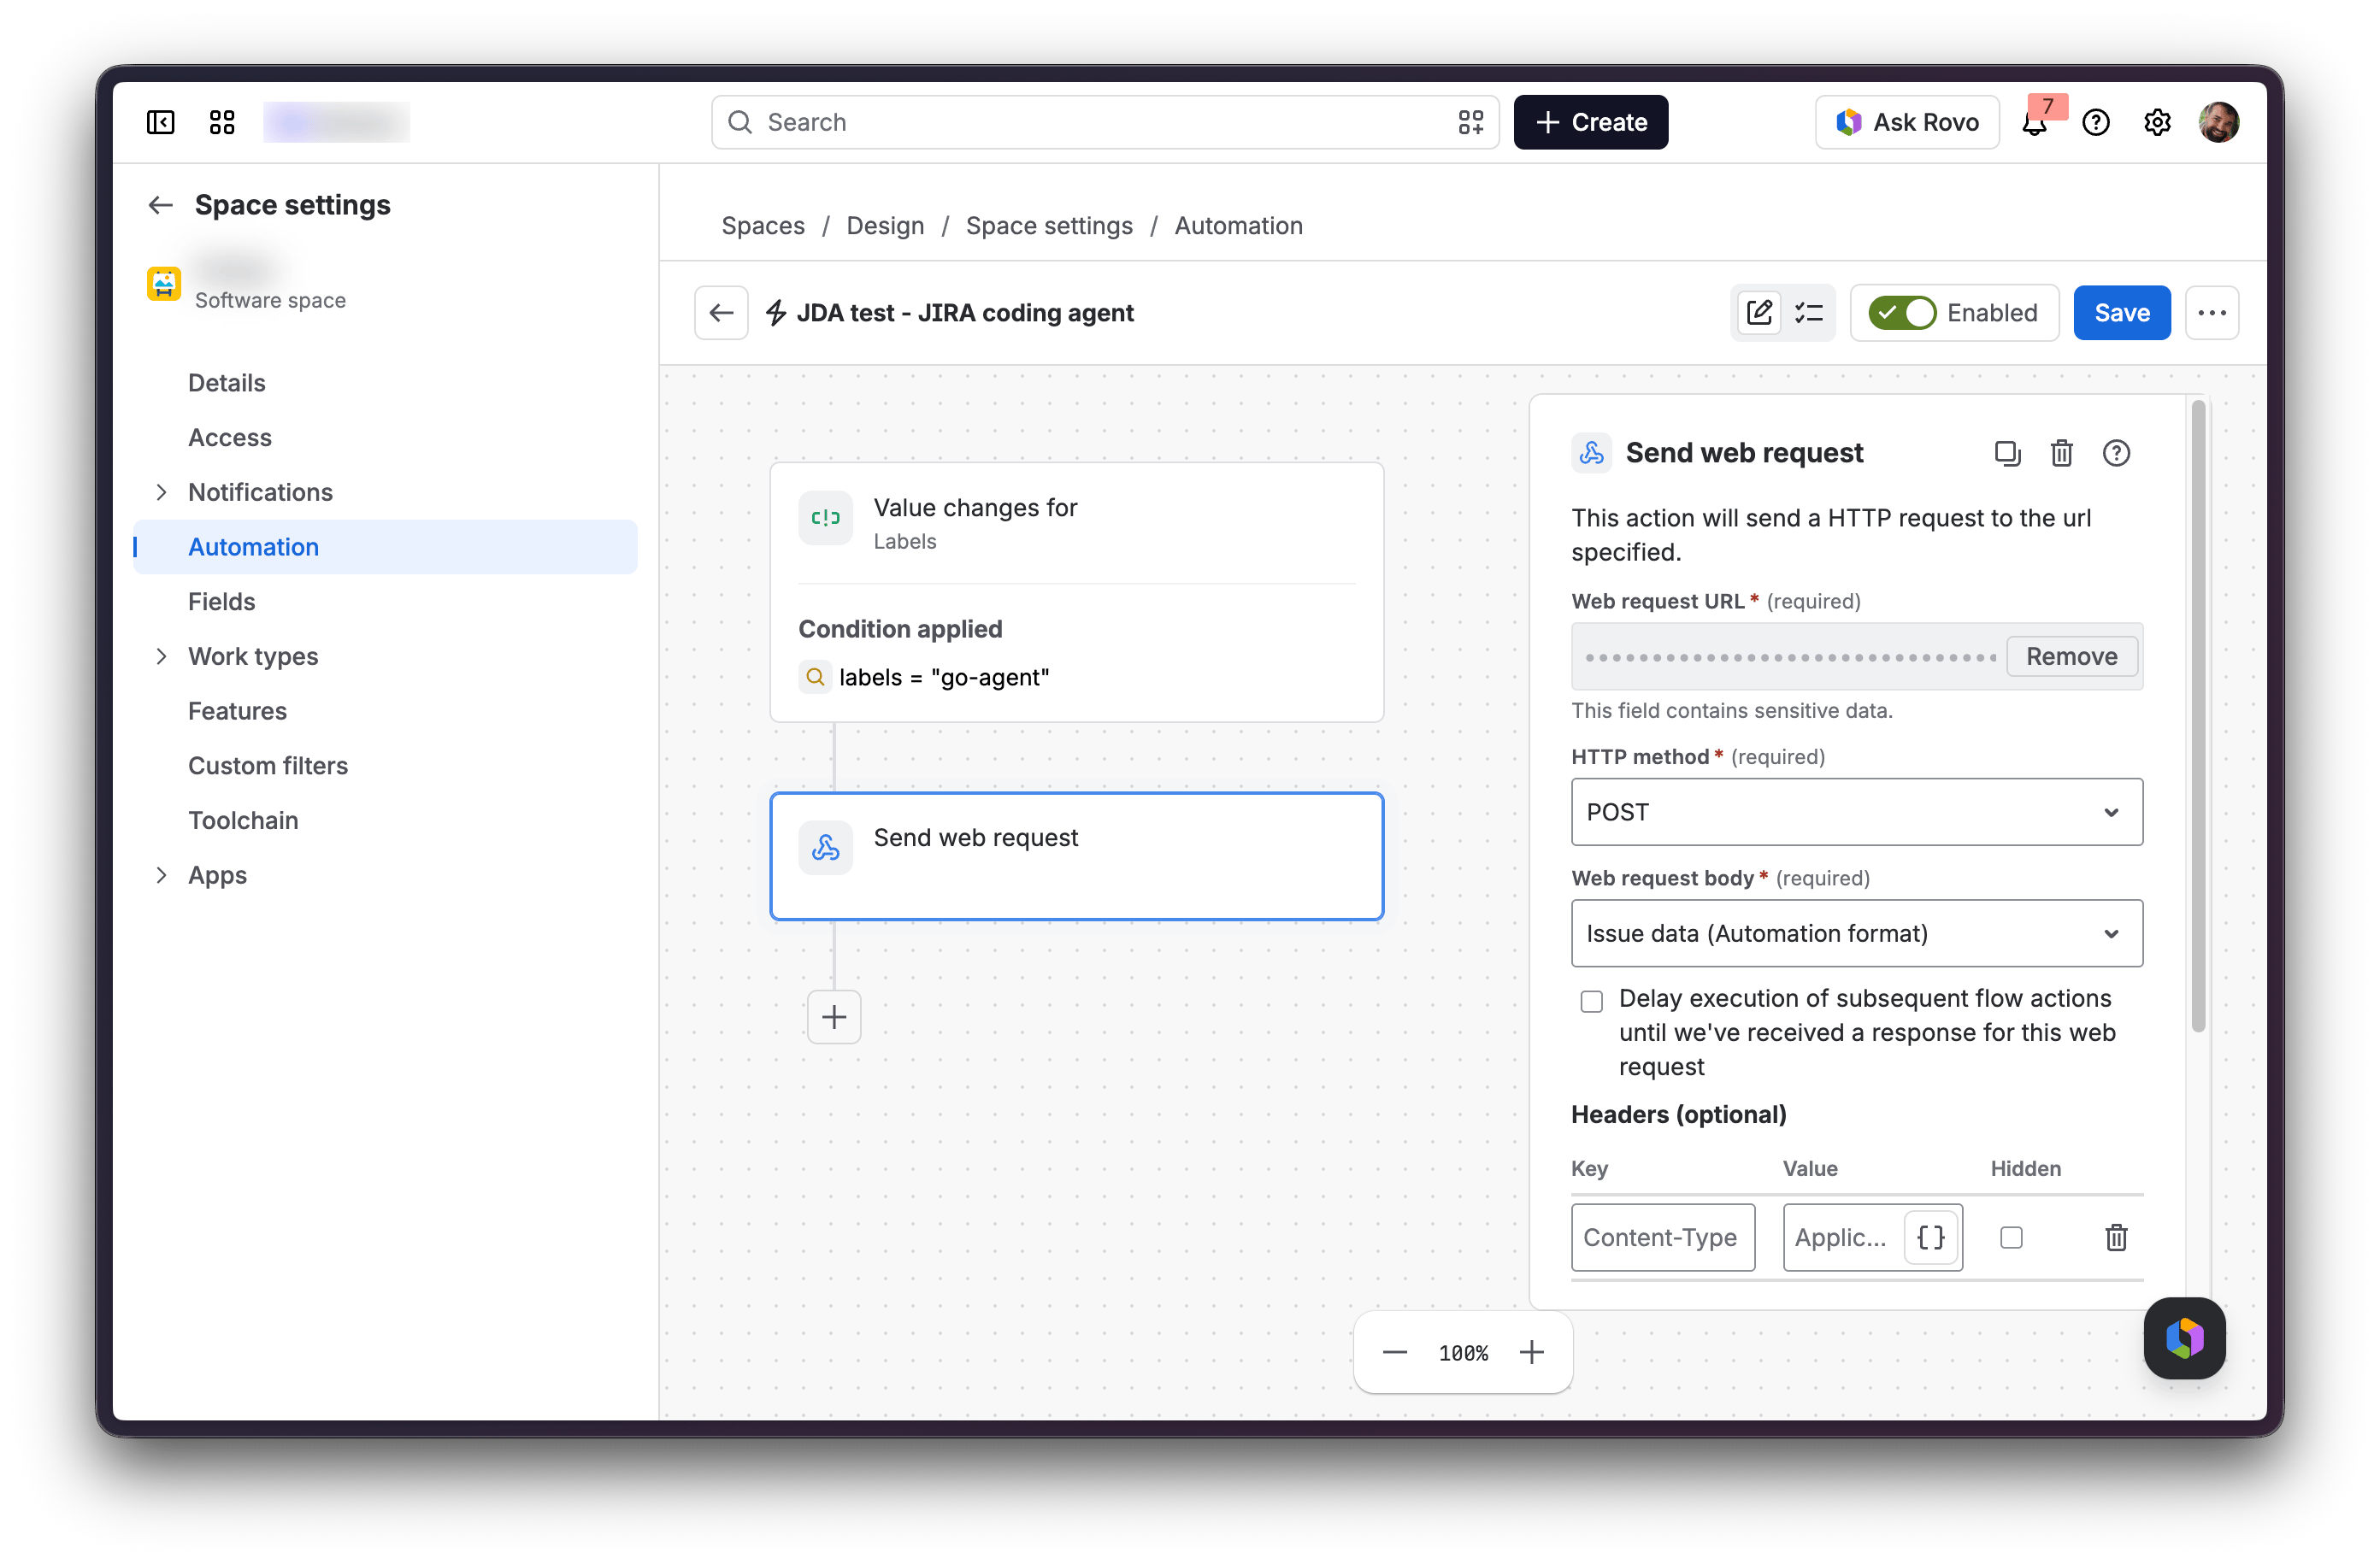 Save the flow, then add the label (for example `go-agent`) to a Jira issue to test it: your environment will be cloned to work on the ticket's request.
To have the agent post to Slack when it's done, add a webhook output pointing to a [Slack Incoming Webhook](https://api.slack.com/messaging/webhooks) URL. See [Outputs](/docs/configuration/agent-tasks/overview#outputs) for the setup steps.
See [Configuration](/docs/configuration/agent-tasks/overview#configuration) for resources, governance, and environment variables shared by every agent task, and [Execution Mode](/docs/configuration/agent-tasks/overview#execution-mode) for choosing how it runs.
Save the flow, then add the label (for example `go-agent`) to a Jira issue to test it: your environment will be cloned to work on the ticket's request.
To have the agent post to Slack when it's done, add a webhook output pointing to a [Slack Incoming Webhook](https://api.slack.com/messaging/webhooks) URL. See [Outputs](/docs/configuration/agent-tasks/overview#outputs) for the setup steps.
See [Configuration](/docs/configuration/agent-tasks/overview#configuration) for resources, governance, and environment variables shared by every agent task, and [Execution Mode](/docs/configuration/agent-tasks/overview#execution-mode) for choosing how it runs.